WARNING
To prevent serious injury:
• Never use the mitre gauge when ripping.
• Never use more than one rip fence during a single cut.
• Do not allow familiarity or frequent use of your table saw to cause careless mistakes.
Remember that even a fraction of a second of carelessness is enough to cause a severe
injury.
• Keep both hands away from the blade and the path of the blade.
• When ripping, the workpiece must have a straight edge against the fence, and must not be
warped, twisted, or bowed.
1. Remove the mitre gauge, and secure the rip
fence to table.
2. Adjust the blade so that it is approximately
1/8” (3.2 mm) higher than the workpiece.
3. Hold the workpiece flat on the table and
against the fence. Keep the workpiece
approximately 1” (2.5 cm) away from the
blade.
4. Turn the saw ON, and allow the blade to
come up to full speed.
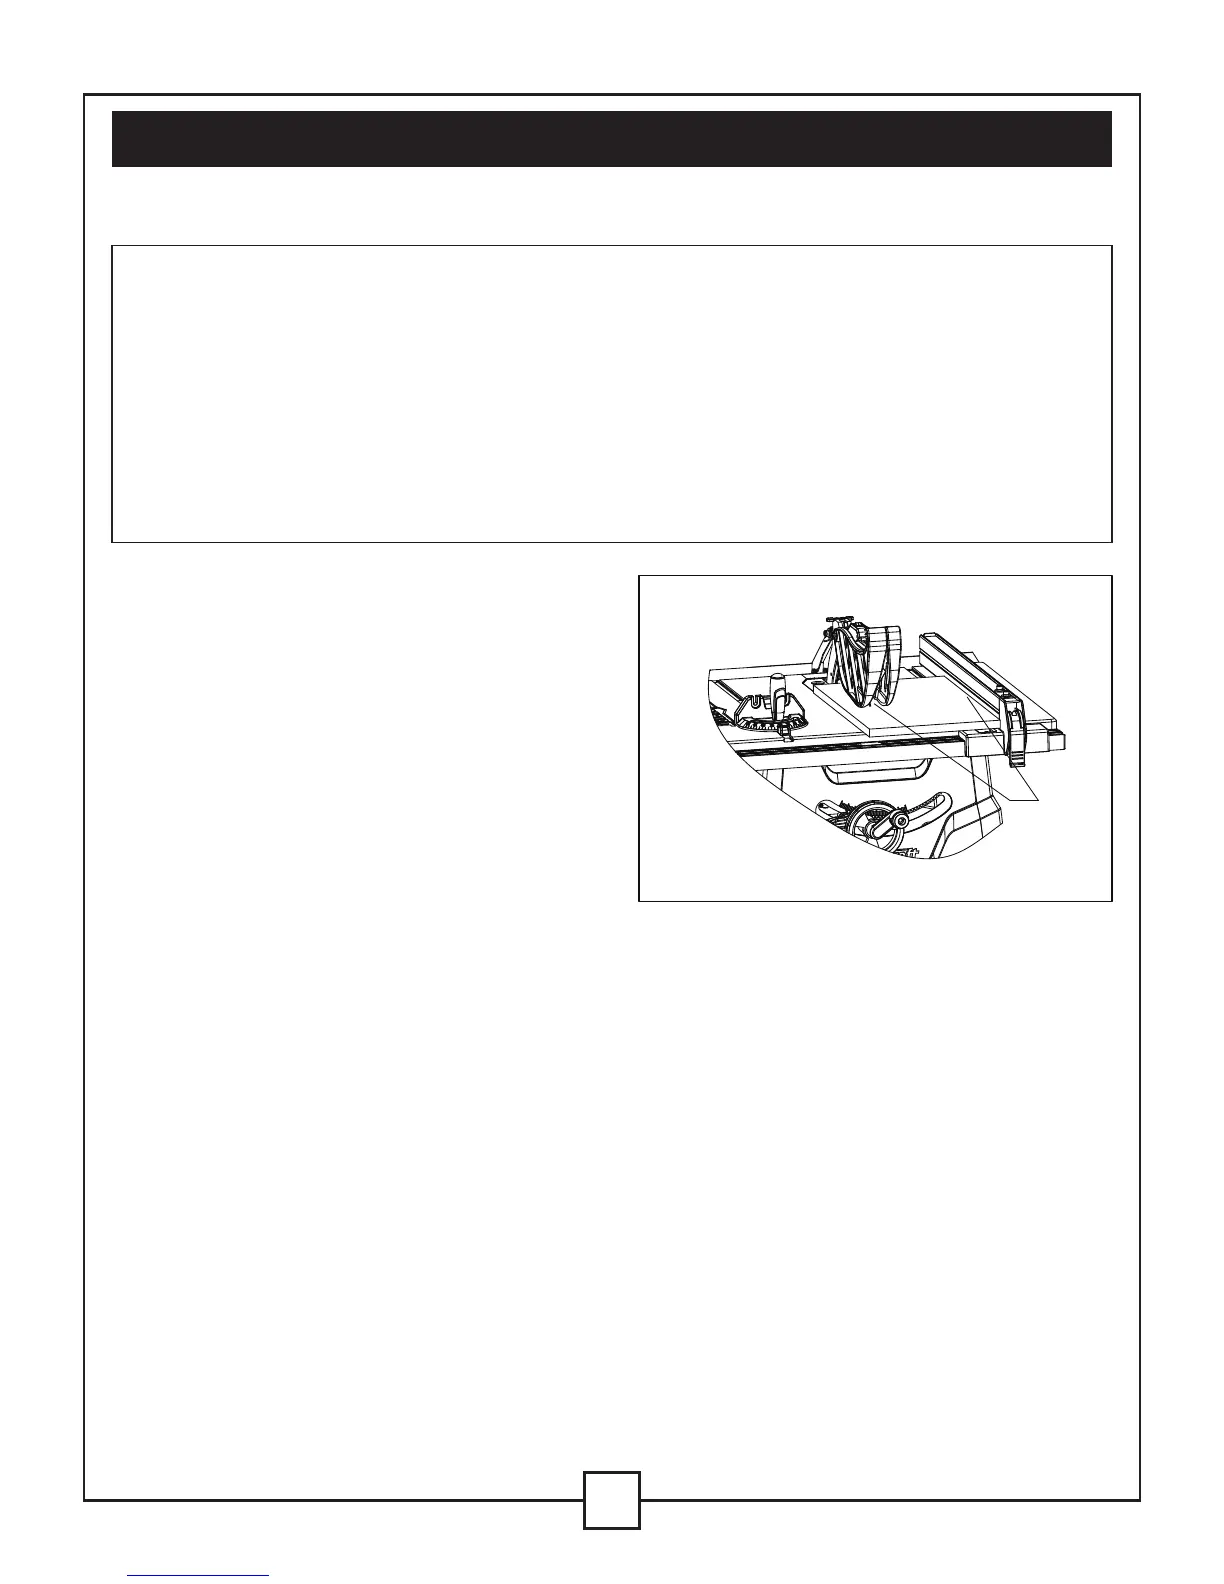
5. Slowly feed the workpiece into the blade
by pushing forward only on the section of
the workpiece (1) that will pass between the blade and the fence (see Fig. 24).
6. Keep your thumbs off the table top. When both of your thumbs touch the front edge of the
table (2), complete the cut using a push stick (3). See Fig. 25).
7. The push stick should always be used when the ripped workpiece (1) is 2” (5 cm) wide or
narrower.
8. Continue to push the workpiece with the push stick until it passes the blade guard and clears
the rear of the table.
9. Never pull the workpiece back while the blade is turning. Turn the switch OFF. When the
blade comes to a complete stop, raise the anti-kickback pawls on either side of the splitter, if
necessary, and then slide the workpiece out.
23
RIPPING (FIG. 24 & 25)
Fig. 24
VI. Operating instructions(continued)
1

 Loading...