13
Never stand directly in line with the b
lade or allow hands to come within 3”
(7.6 cm) of the blade. Do not reach over or across the blade. Failure to heed
this warning can result in serious personal injury.
WARNING: To avoid serious personal inju
ry, always make sure the table
saw is securely mounted to a workbench or an approved leg stand. NEVER
operate the saw on the floor.
MOUNTING HOLES
The table saw must be mounted to a firm supporting surface, such as a
workbench or leg stand. Four bolt holes have been provided in the saw’s base
for this purpose. Each of the four mounting holes should be bolted securely
using 3/8” (9.5 mm) carriage bolts, washers, locking washers, and wing nuts.
Bolts should be of sufficient length to accommodate the saw base, washers,
locking washers, wing nuts, and the thickness of the workbench. Tighten all
four bolts securely.
WARNING: Carefully check the workbench after mounting to m
ake sure that
no movement can occur during use. If any tipping, sliding, or walking is noted,
secure the workbench to the floor before operating.
STORING ACCESSORIES
The table saw has two convenient storage areas specifically designed for
accessories (one on either side of the saw cabinet): Mitre gauge, Wrench,
blade and and Push stick
Store accessories securely when they
are not in use.
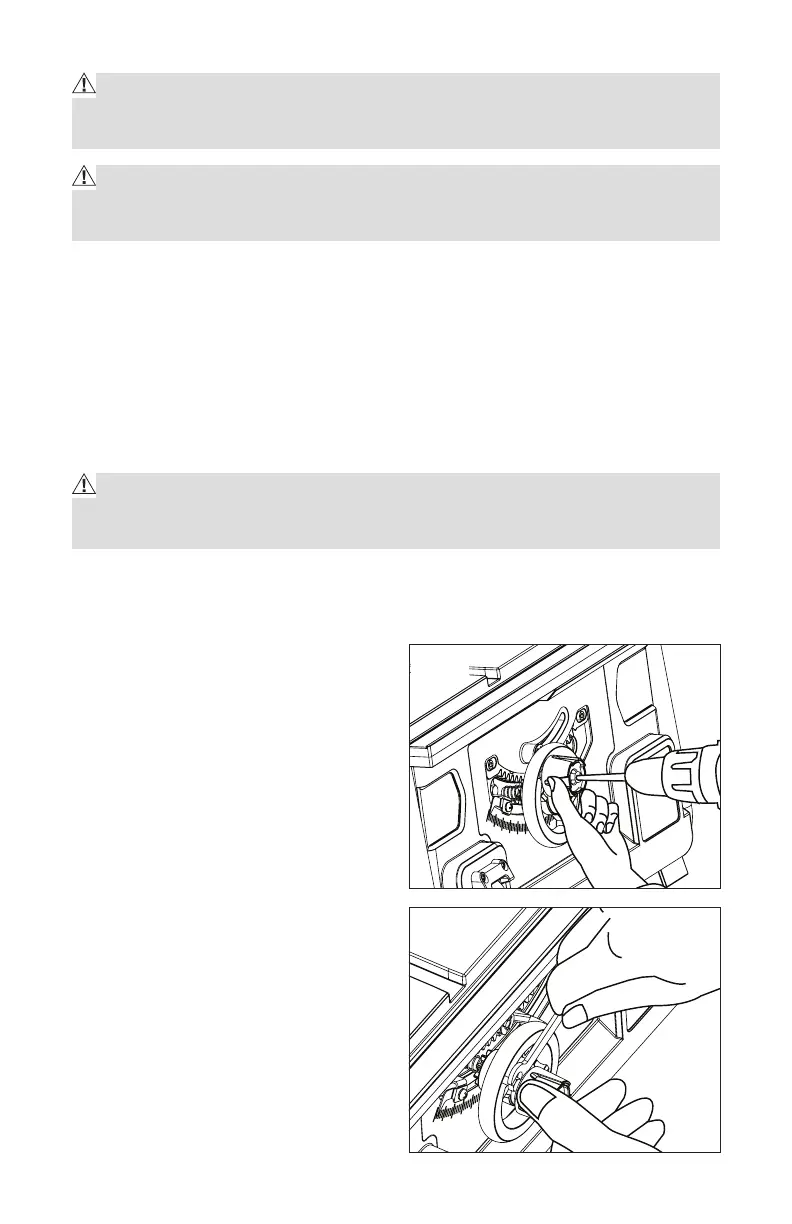
INSTALLING THE HANDLE ASSEMBLY
(See Fig. 2, 3)
1. Unplug the saw.
2. Use a flat blade screwdriver to
remove the end cap from the handle
assembly.
3. Slide the handle into the hole on the
Height/bevel-adjusting hand wheel,
and turn the screw clockwise.
4. Tighten the nut to the Height/bevel-
adjusting hand wheel using the
wrench.
5. Push the end cap into place on the
Fig. 2
Fig. 3
 Loading...