• AC cable to connect the AC input to an AC power source. See section 4.5.2 for specifications.
• Batteries. See section 4.3 for specifications.
• Appropriate and reliable cable terminals, cable lugs, battery terminals and cord end terminals.
We recommend as a minimum tool kit:
• Socket wrench to fix the main DC cables (½" / 13mm)
• Socket wrench to fix the Safety ground connection (
3
/
8
" / 10mm).
• Flat blade screw driver to fix the screw terminals of the AC wiring.
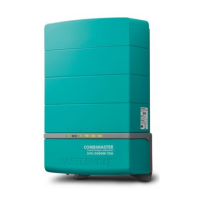
• Tools to fix the screws / bolts (Ø ¼" / 6mm) with plugs to mount the CombiMaster Inverter/Charger to
a surface.
• Philips screw driver to open the connection compartment.
4.7 Installation step-by-step
Step 1. Turn off the electrical power.
Step 2. On a solid surface, mark the holes for the mounting bracket and secure the mounting bracket
to the surface.
Step 3. Place the CombiMaster Inverter/Charger over the mounting bracket and then downwards
until it snaps into place.
Step 4. Fix the CombiMaster Inverter/Charger to the surface by fastening two screws at the lower
side of the case as well.

 Loading...
