OM-248 440 Page 5
SECTION 3 − OPERATING INSTRUCTIONS
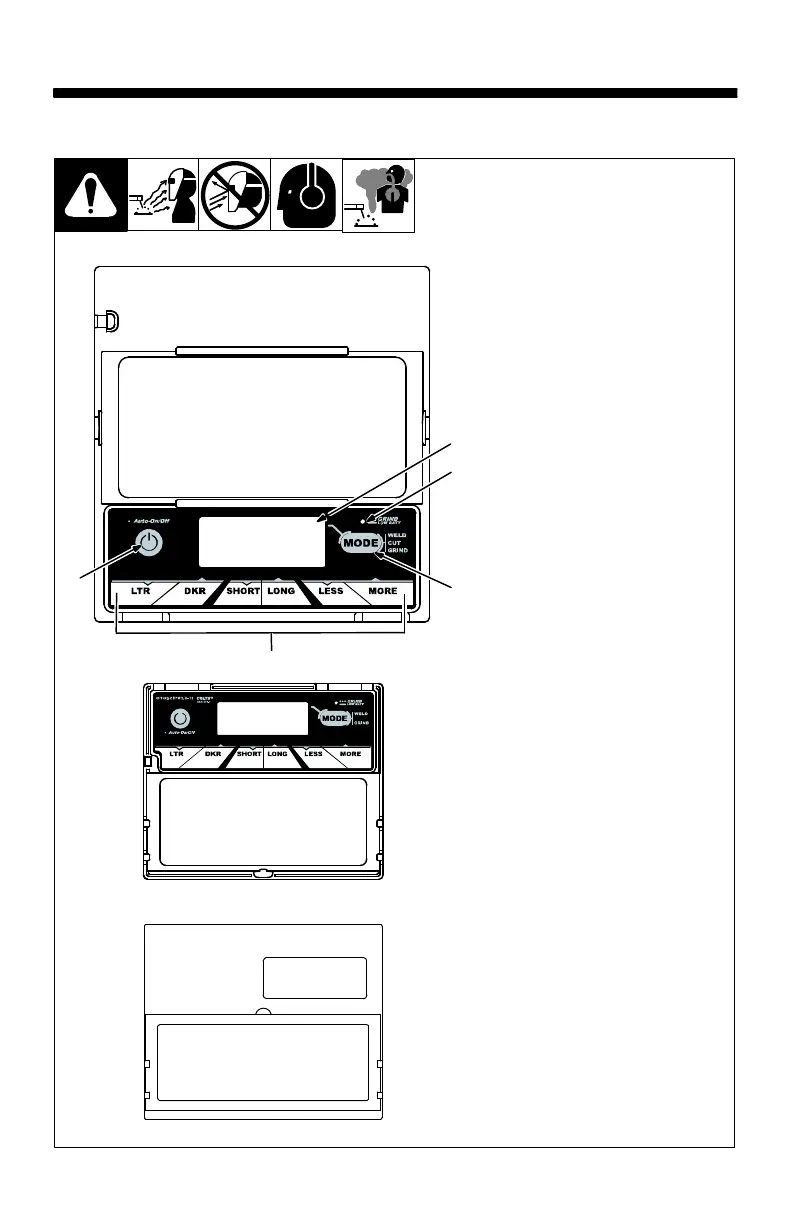
3-1. Helmet Controls
Three different lens assem-
blies are shown. Refer to the il-
lustration that matches the
lens on your helmet.
Variable Shade Model s
1 Auto On/Off Button (See
Section 3-2)
2 Grind Mode / Low Battery
Light (Section 3-2)
3 Mode Control Button
(See Section 3-3)
4 Display Screen
5 Lens Adjustment Buttons
(Sections 3-3 Thru 3-6)
Use adjustment buttons to
change shade, delay, and
sensitivity settings.
The lens assembly saves the
shade, sensitivity, and delay
settings.
Fixed Shade No. 10 Model
The fixed shade model has no but-
tons or controls. The lens turns on
(darkens) automatically when
welding begins and turns off when
welding stops.
Always make sure the lens is
fully charged before welding.
Place helmet in direct sunlight
for 20 minutes to charge the
lens assembly solar cell.
804 792
(73V) Variable Shade Lens Assembly
(52F) Fixed Shade No. 10 Lens Assembly
1
2
3
5
4
(62V) Variable Shade Lens Assembly