Matrix SATATYA NVR Quick Start 37
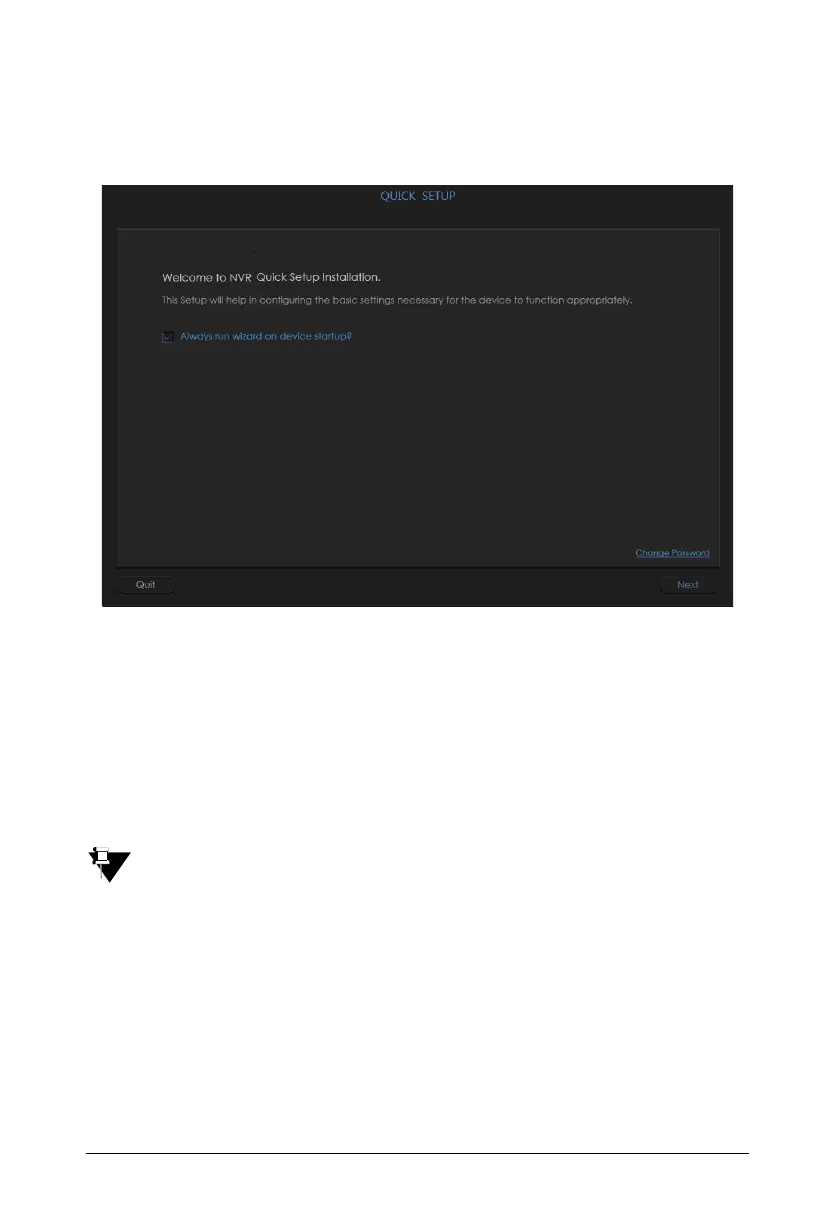
Once logged in, the Quick Setup Wizard pop-up appears. It allows you to configure the basic
parameters of NVR like Time and Language, Network, Storage, Camera Configuration and Search
Camera.
If you wish to change the Password, you can do so by clicking the Change Password link on the
Welcome page.
To navigate though the Wizard click Next. For configuration details of the Quick Setup Wizard,
refer to “Quick Setup Wizard”.
To change the LAN IP Address as per your installation scenario, refer to “Network” in “Quick
Setup Wizard”. For example, the LAN1 IP is set as 192.168.111.165.
The IP Address of the NVR you set must not conflict with that of any other device on the
LAN and it should be in the same Subnet as the network PC you are trying to access. If
you need to change the IP Address, Subnet Mask and Gateway Address of your NVR, do it
first from the Local Client and then connect the NVR to the LAN switch.
You can cancel the Quick Setup process by clicking Quit. However, these parameters can also be
configured later from the detailed configuration links. For details refer to the Matrix SATATYA
System Manual.
After you have configured the LAN 1 IP Address of NVR as per your network installation scenario
you can now access the Device Client, refer to “Accessing the Device Client”.