PB 13MAXDATA PLATINUM 100 I M9Hardware Installations and Upgrades
3 Hardware Installations and Upgrades
Before You Begin
Before working with your server product, pay close attention to the “Safety Information” at the
beginning of this manual.
Tools and Supplies Needed
• Phillips (cross head) screwdriver (#1 bit and #2 bit)
• Needle nosed pliers
• Antistatic wrist strap and conductive foam pad (recommended)
Installing or Replacing a Processor
/ NOTE
Use the instructions provided below to install or replace a processor instead of using the instructions
that came with the processor.
When installing a second processor, verify that the processors are identical and of the same voltage
and speed. Do not mix processors of different types or frequencies.
CAUTIONS
Processor must be appropriate: You may damage the server board if you install a processor that
is inappropriate for your server.
ESD and handling processors: Reduce the risk of electrostatic discharge (ESD) damage to the
processor by doing the following: (1) Touch the metal chassis before touching the processor or server
board. Keep part of your body in contact with the metal chassis to dissipate the static charge while
handling the processor. (2) Avoid moving around unnecessarily.
Installing a Processor
1. Observe the safety and ESD precautions above and at the beginning of this book.
2. Turn off all peripheral devices connected to the server. Turn off the server.
3. Disconnect the AC power cord from the server.
4. Remove the server‘s cover.
5. Locate the processor socket (see Figure 3 on page 10).
6. Disconnect and remove any components necessary to access the processor socket.
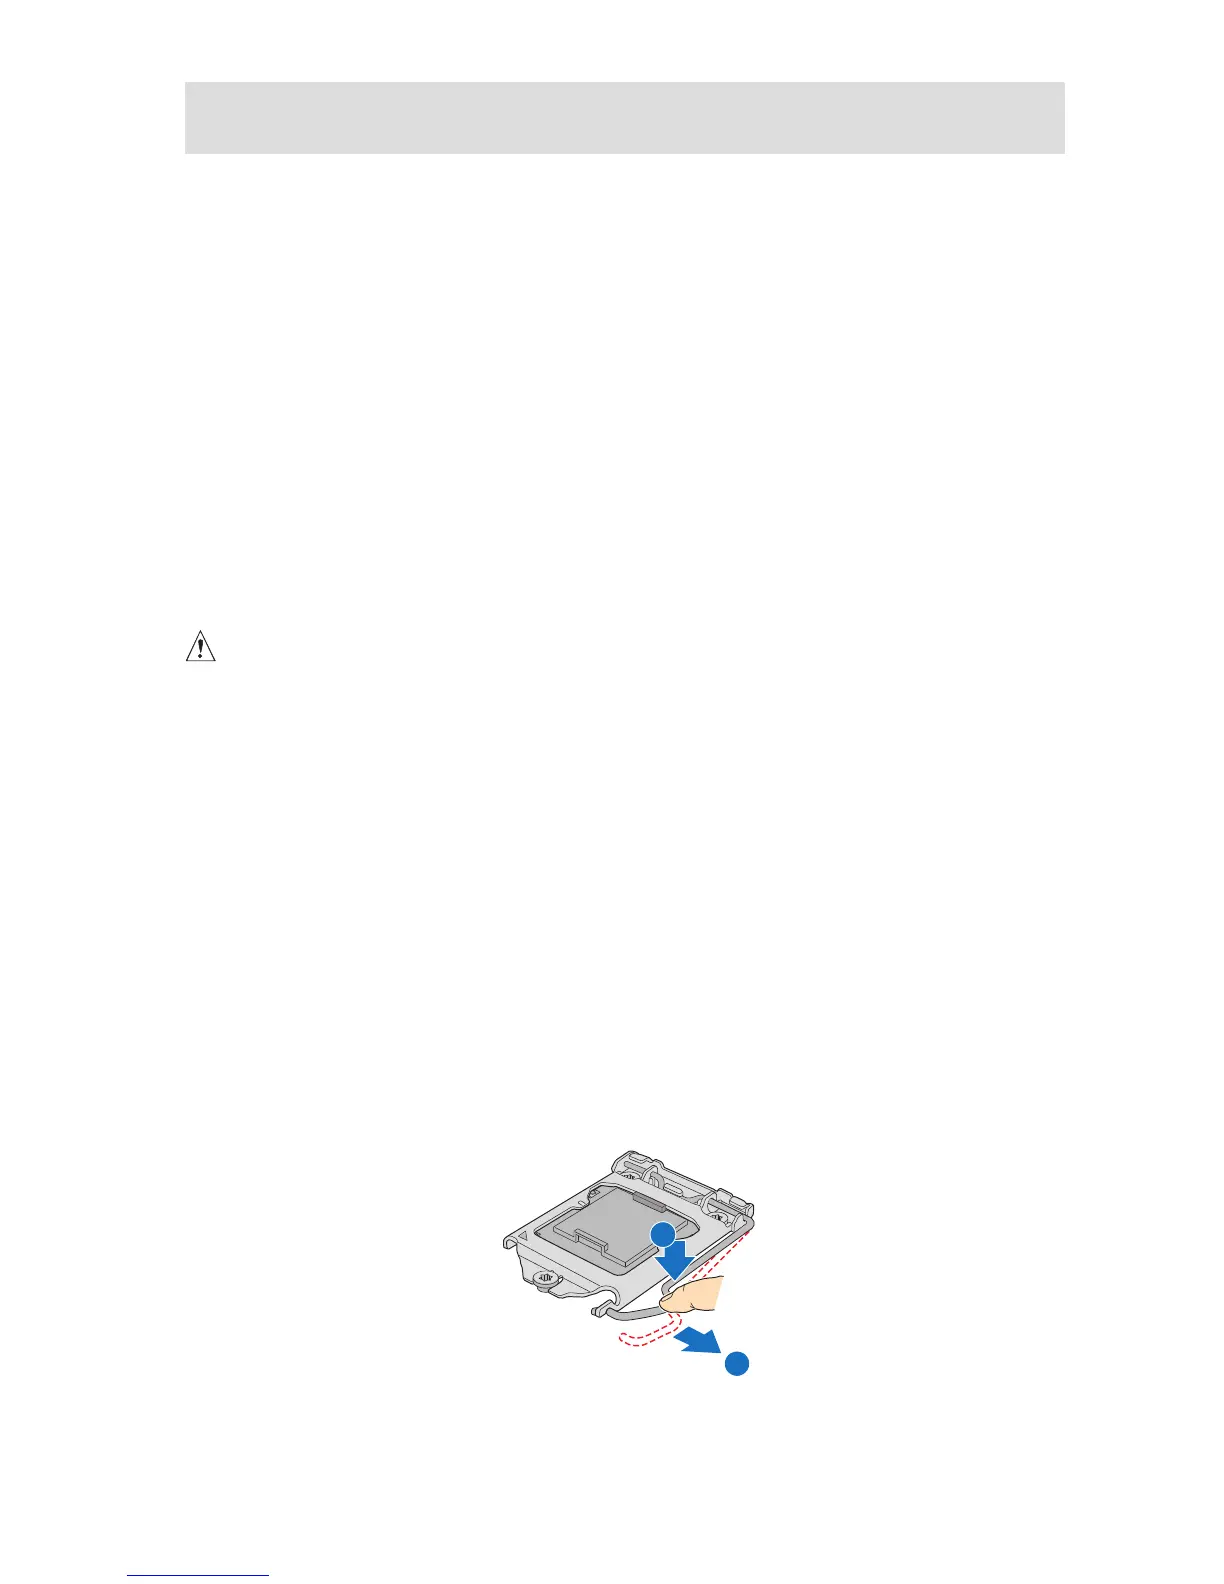
7. Push down the lever on the processor socket. While pushing downward, push it away from
the socket to release it from the hook. Open the socket lever completely. See figure 6.
Figure 6. Opening the Processor Socket Lever