16 16026549 ©2005 Maytag Services
Disassembly Procedures
To avoid risk of electrical shock, personal injury or
death; disconnect power and gas before servicing,
unless testing requires power and/or gas.
Replacing Oven Sensor
1. Turn off gas and remove power from unit (at the
circuit breaker).
2. Remove screws securing sensor to oven cavity back
wall.
3. Gently pull the wire toward the front of the oven until
the connector is within reach.
4. Disconnect sensor and remove from oven cavity.
5. Reverse procedures to reassemble.
NOTE: When re-installing sensor, fasten connector
then feed wires into sensor installation hole until
pressure is felt (wires pressing against main
back wall). This reduces the risk of damage to
the connector when the oven is in use.
Replacing Oven Flue Box Assembly
1. Remove oven from installation position, see
"Replacing Oven" procedure.
2. Remove screws securing top and back outer
wrapping to unit.
3. Remove screws securing flue box assembly to oven
chassis.
4. Slide flue box up and out to remove.
5. Reverse procedures to reassemble.
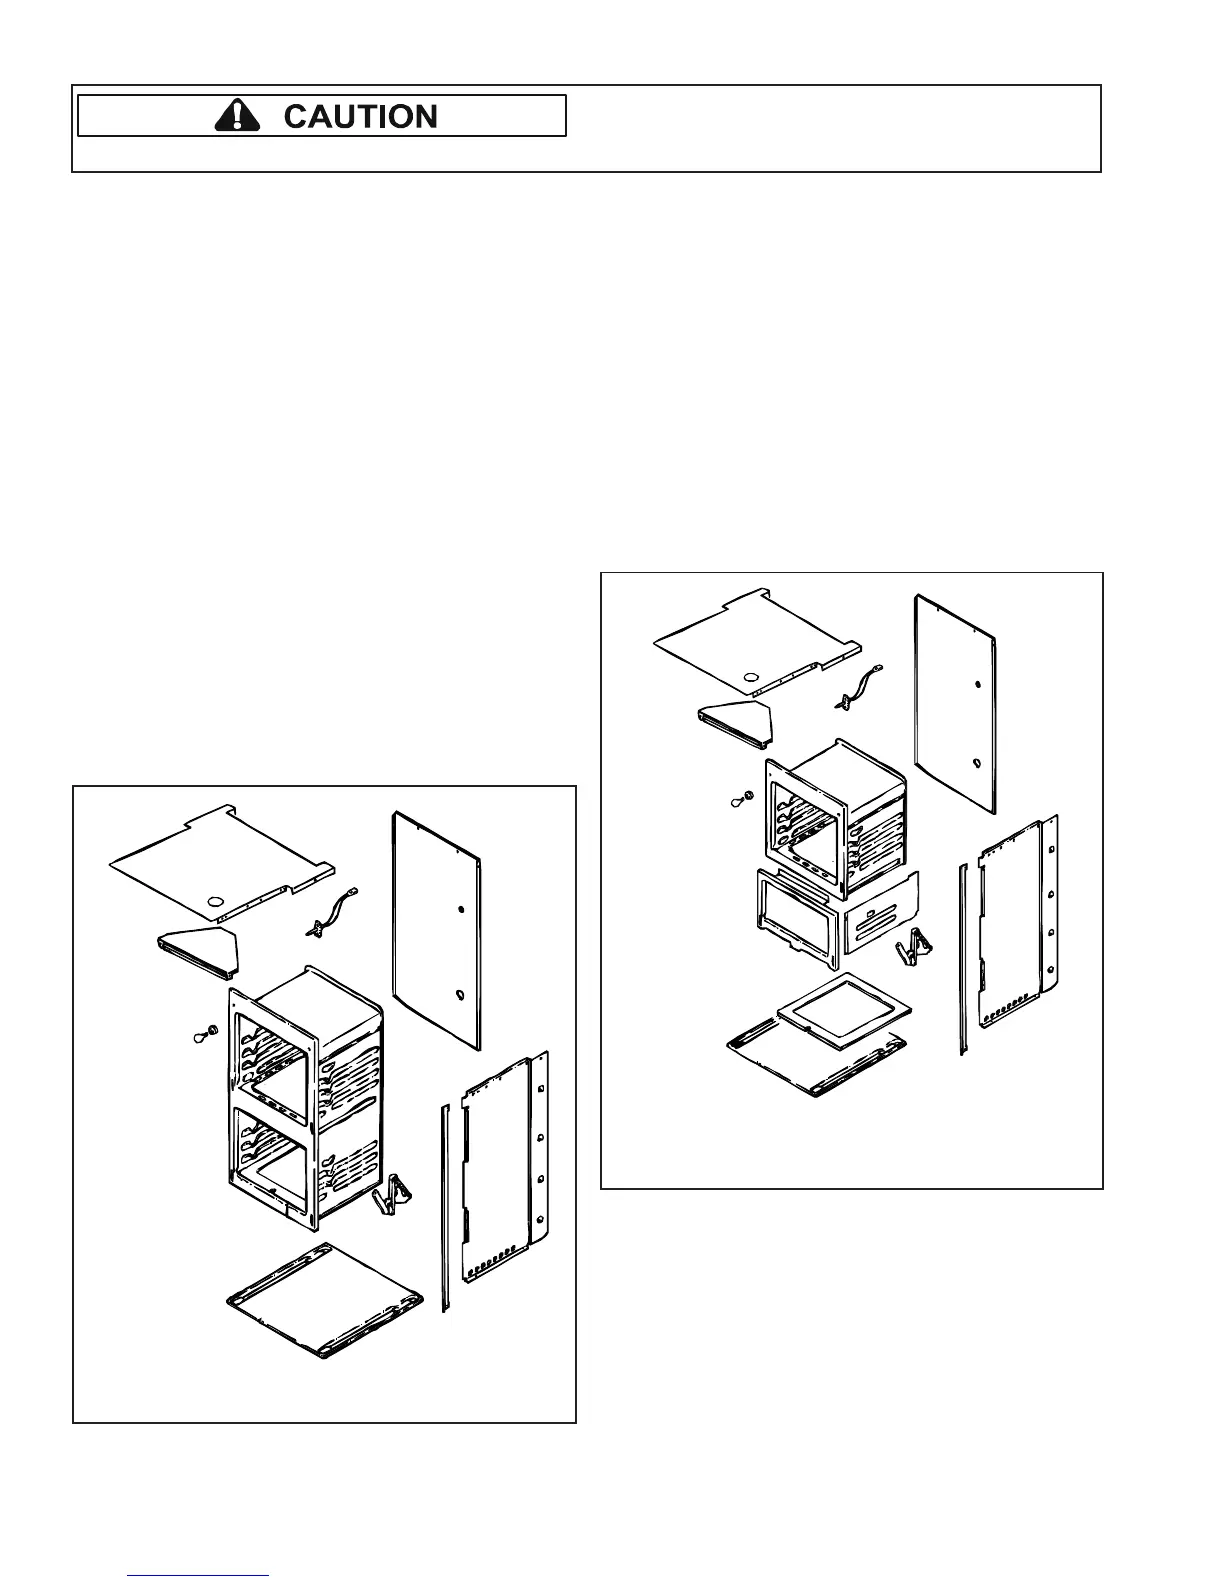
Flue Box
Top C ov er
Main Back
Side
Panel
Door
Hinge
Light Bulb
& Receptacle
Main Base
Sensor
Side
Trim
Oven Frame
Oven Cavity and Frame, Model CWG3600AA*
Replacing Top Cover
1. Remove unit from installation position, see “Replacing
Oven” procedure.
2. Remove main back, see “Replacing Main Back”
procedure.
3. Remove screws securing top cover to chassis.
4. Slide top cover up to remove.
5. Reverse procedures to reassemble.
Replacing Main Back
1. Remove unit from installation position, see “Replacing
Oven” procedure.
2. Remove screws securing main back to chassis.
3. Slide main back up and toward the rear to remove.
4. Reverse procedures to reassemble.
Flue Box
Top Cov er
Main Back
Side
Panel
Door
Hinge
Light Bulb
& Receptacle
Main Base
Sensor
Side
Trim
Oven Frame
Oven Cavity and Frame, Model CWG3100AA*
Replacing Side Trim / Side Panel
1. Remove unit from installation position, see "Replacing
Oven" procedure.
2. Remove screws securing side trim / side panel to
chassis.
3. Slide side trim / side panel up and toward the front to
remove.
4. Reverse procedures to reassemble.
 Loading...