PAGE 18
FOR SERVICE TECHNICIAN’S USE ONLY
DO NOT REMOVE OR DESTROY
TEST #5: Temperature Thermistor
This test checks valves, main control,
temperature thermistor, and wiring.
1. Check the cold valve by performing
the Cold Valve test under Service Test Mode
in Service Diagnostic Mode on page 4.
If cold water is being dispensed, proceed
to step 2.
If hot water is being dispensed, verify
proper hose connection.
2. Check the hot valve by performing
the Hot Valve test under Service Test Mode
in Service Diagnostic Mode on page 4.
If hot water is being dispensed, proceed
to step 3.
If cold water is being dispensed, ensure
that household hot water is present.
3. Unplug washer or disconnect power.
4. Remove console to access main control.
5. Remove connector J2 from the main
control. With an ohmmeter, measure the
resistance of the temperature thermistor
between pins J2-1 and J2-2. Verify that the
approximate resistance, shown in the table
below, is within ambient temperature range.
If the resistance is within the range shown
in the table, go to step 6.
If the resistance is infinite or close to zero,
replace the valve assembly.
NOTE: Most thermistor errors are a result
of the resistance being out of range. If the
temperature thermistor malfunctions, the
washer will default to pre-programmed
wash settings.
6. If the thermistor is good, replace main
control and perform Service Diagnostics
(see page 5) to verify repair.
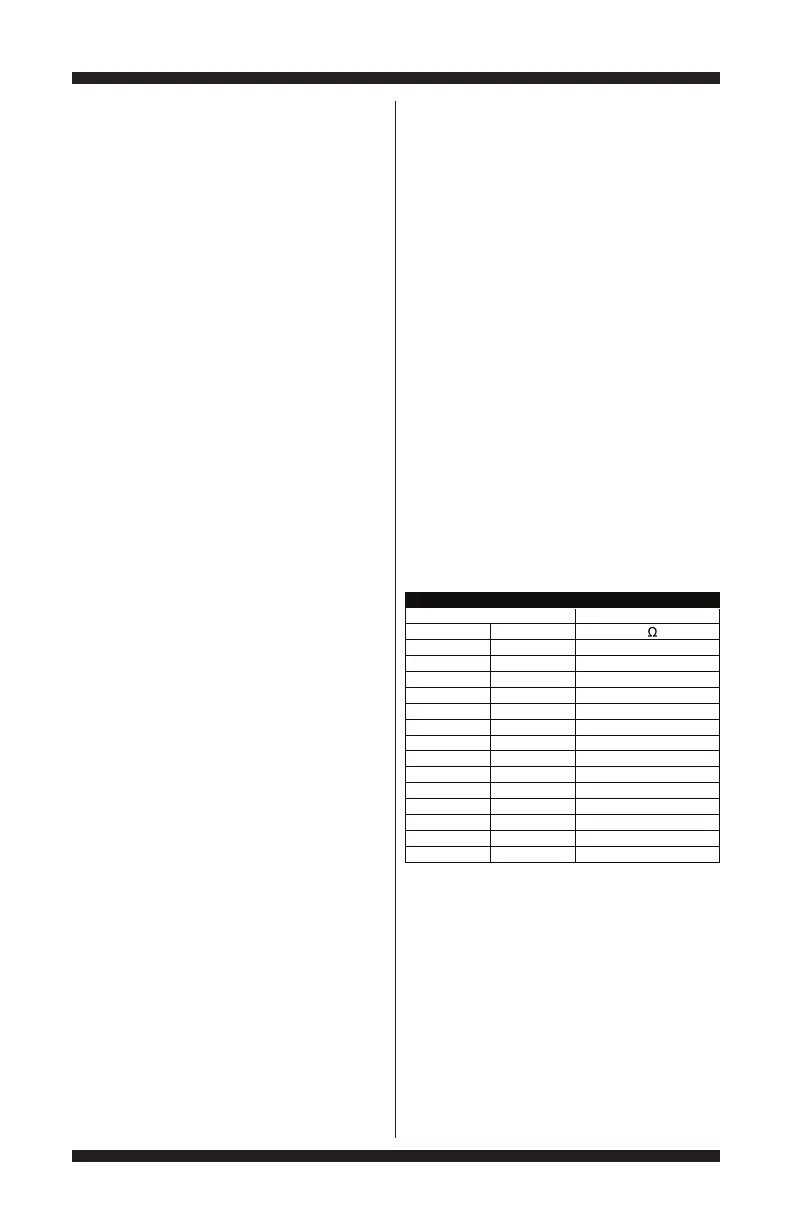
Approx. Resistance
F° C° (K
)
32 0 163
41 5 127
50 10 100
59 15 79
68 20 62
77 25 50
86 30 40
95 35 33
104 40 27
1134
2
122 50 18
131 55 15
140 60 12
A
rox. Tem
erature
If continuity fails, replace the UI harness
and go to step 5.
If continuity passes, replace the user
interface and go to step 5.
5. Reassemble all parts and panels.
6. Plug in washer or reconnect power.
7. To verify repair, activate the Service
Diagnostic Mode, and then perform Key
Activation & Encoder Test on page 3.
Some buttons do not toggle indicators:
1. Unplug washer or disconnect power.
2. Replace the UI assembly.
3. Reassemble all parts and panels.
4. Plug in washer or reconnect power.
5. To verify repair, activate the Service
Diagnostic Mode, and then perform Key
Activation & Encoder Test on page 3.
No audio feedback is heard:
1. Enter the Service Diagnostic Mode, and then
perform Key Activation & Encoder Test on page 3.
If audio feedback is heard with each button
press while in Key Activation & Encoder
Test mode, continue to step 2.
If no audio feedback is heard with each
button press while in Key Activation &
Encoder Test mode, continue to step 4.
2. Exit Key Activation & Encoder Test by
pressing POWER.
3. Turn on the washer and enable audio
feedback in normal mode:
On Whirlpool models, press and hold “End
Beep” for 3 seconds to change the button
sounds level (Off, Low, Med, High). Each
press and hold increments the sound
one level.
On Maytag models, press “Audio Level”
to change the audio level (Off, Low, High).
On Kenmore models, press and hold
“Cycle Signal” for 3 seconds to change
the button sounds level (Off, Low, ...High).
Each press and hold increments the
sound one level.
4. Unplug washer or disconnect power.
5. Access the console electronics and, if
needed, remove the user interface from the
console shell and visually check that the
speaker connects to J6 on the UI.
6. If visual check passes, replace the user
interface assembly.
7. Reassemble all parts and panels.
8. Plug in washer or reconnect power. Perform
Service Diagnostics on page 5. To verify repair,
activate the Service Diagnostic Mode, and then
perform Key Activation & Encoder Test on page 3.



 To Next Page