3-4
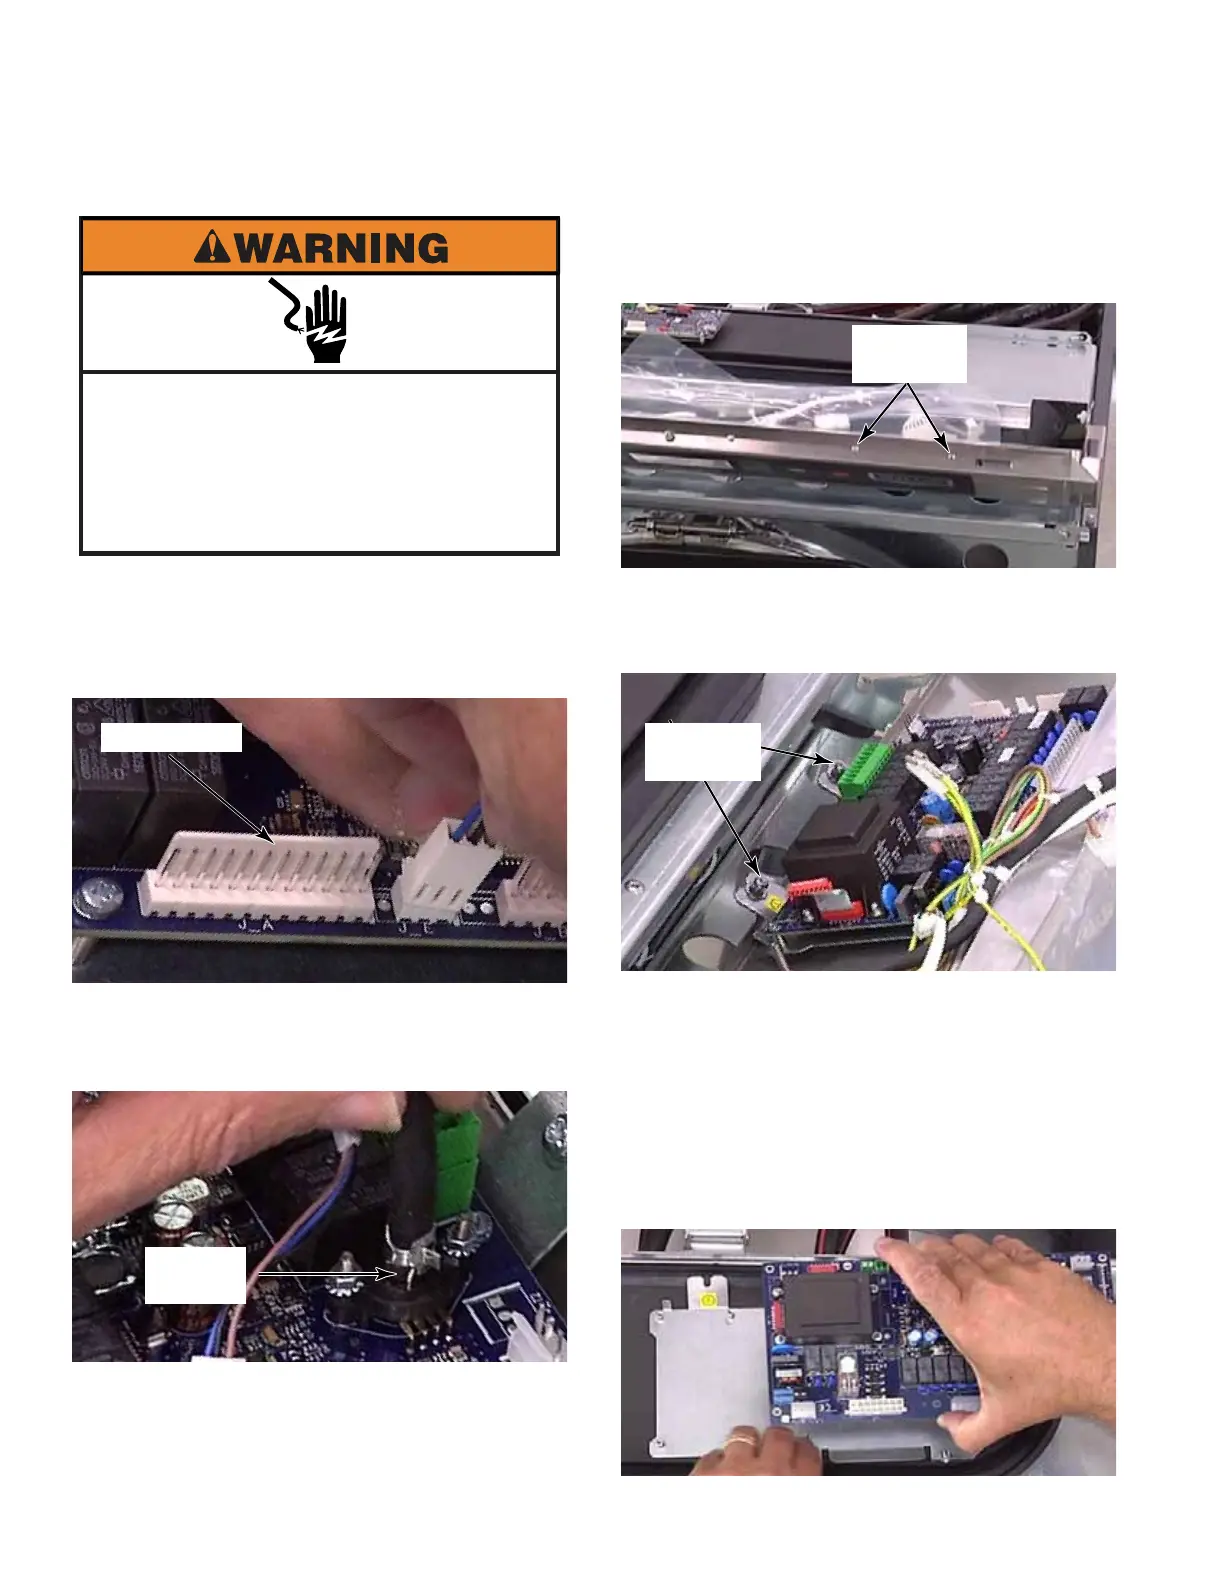
1. Open the control panel. (See page 3-2)
2. Release the locking tab and pull each
connector off the control board.
3. Remove pressure switch air tube by
squeezing ears of clamp and sliding it off
nipple of pressure switch on control board.
4. Disconnect the ground wires from the
control board and mounting bracket.
5. Remove two T-20 screws, with star
washers, from the top edge of control panel
that secure control board mounting bracket.
6. Loosen two T-20 screws in tabs, at the back
edge of control board, inside control panel.
These screws have a star and a flat washer.
7. Slide the mounting bracket and board down,
and lift it out of the control panel.
8. To remove control board from mounting
bracket, remove eight #1 Phillips screws
and star washers.
9. Lift the control board by the edges only and
remove it from the bracket.
Electrical Shock Hazard
Disconnect power before servicing.
Failure to do so can result in death or
electrical shock.
Replace all parts and panels before
operating.
MAIN CONTROL BOARD
Locking Tab
Air Tube
Clamp
Two T-20
Screws
Two T-20
Screws