3-27
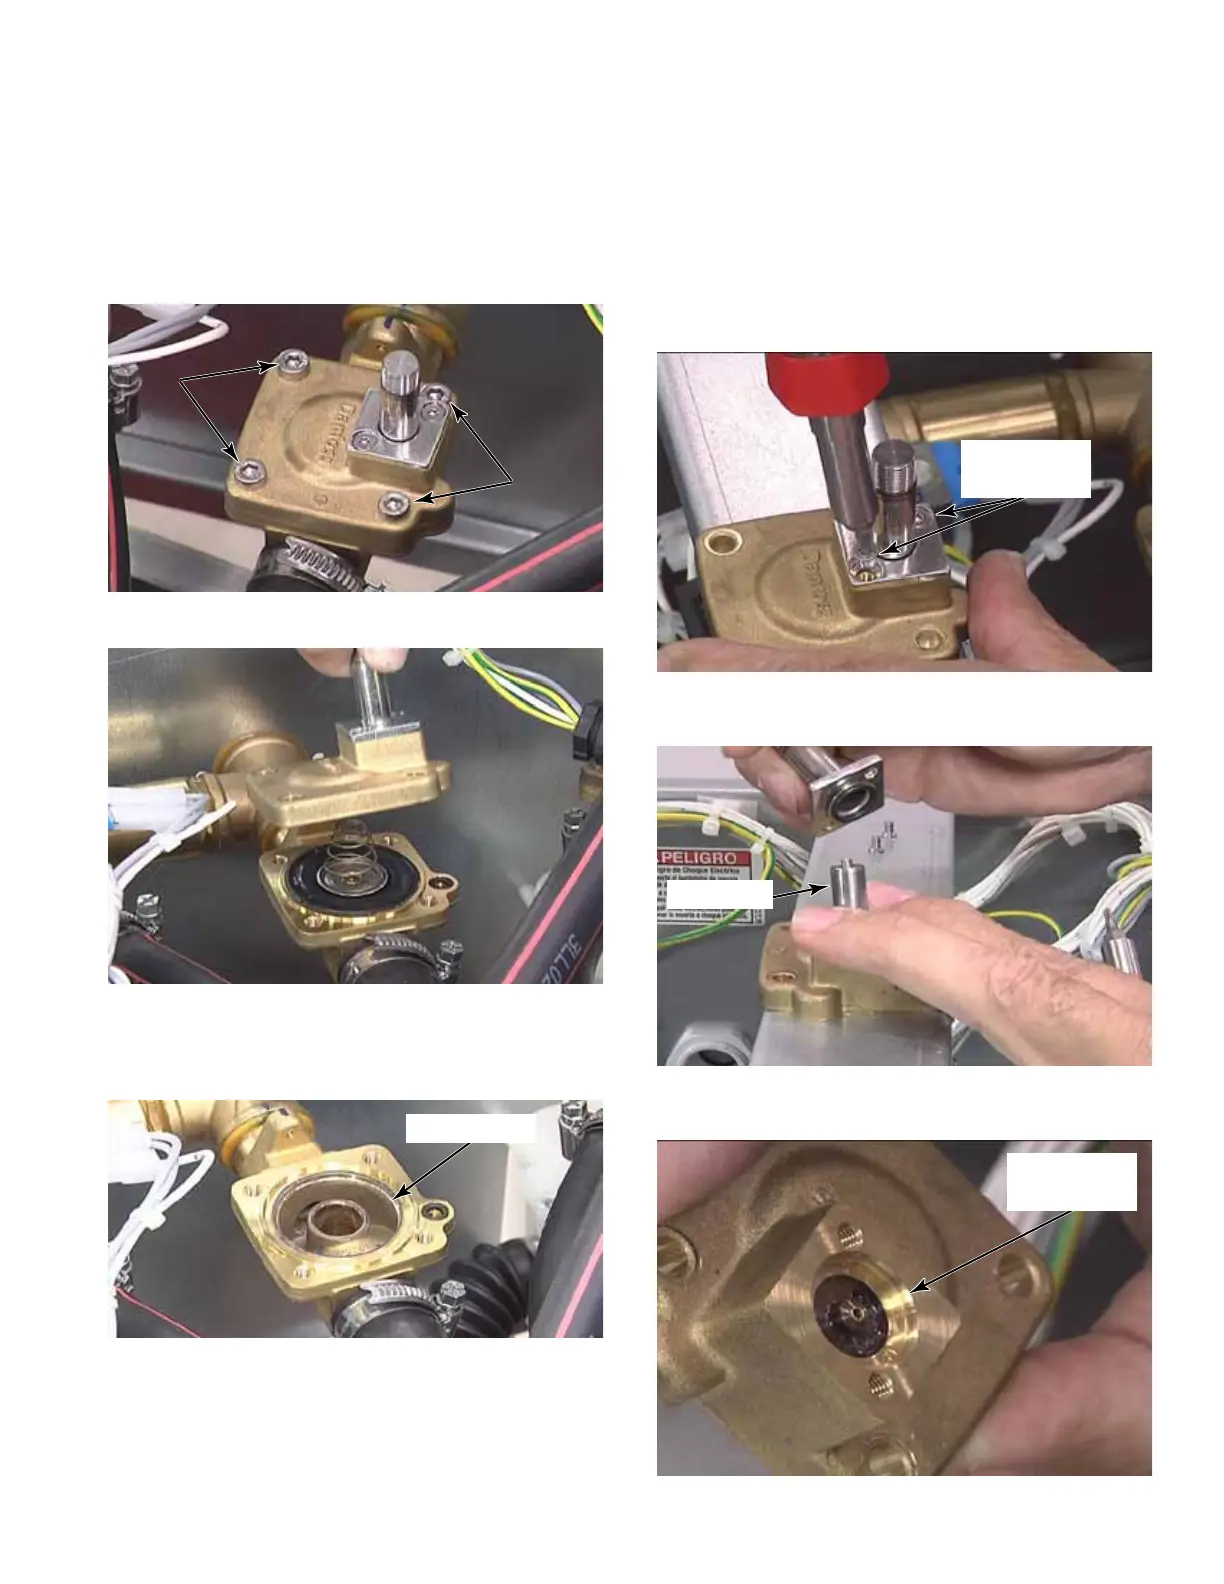
13. To remove the valve stem and inspect the
coil bleed off area, remove two T-10 screws.
There is a spring up in the stem that will
be pushing the stem up away from the top
valve plate.
14. Lift the valve stem up. The plunger in the
valve stem is spring loaded.
15. Inspect the bleed off area for damage or
debris. Replace or clean as necessary.
9. To remove the top valve plate, use a V4 size
hex key to remove four screws from the top
of the valve.
10. Lift the top valve plate and stem off.
11. Lift the spring and diaphragm off.
12. Inspect valve seat for damage or debris.
NOTE: When reinstalling the diaphragm,
make sure the brass disc faces down, and
the silver disc faces up. Place the spring in
the center of the silver disc.
Valve Seat
Two T-10
Screws
Plunger
Bleed Off
Area