18
Authorisation required
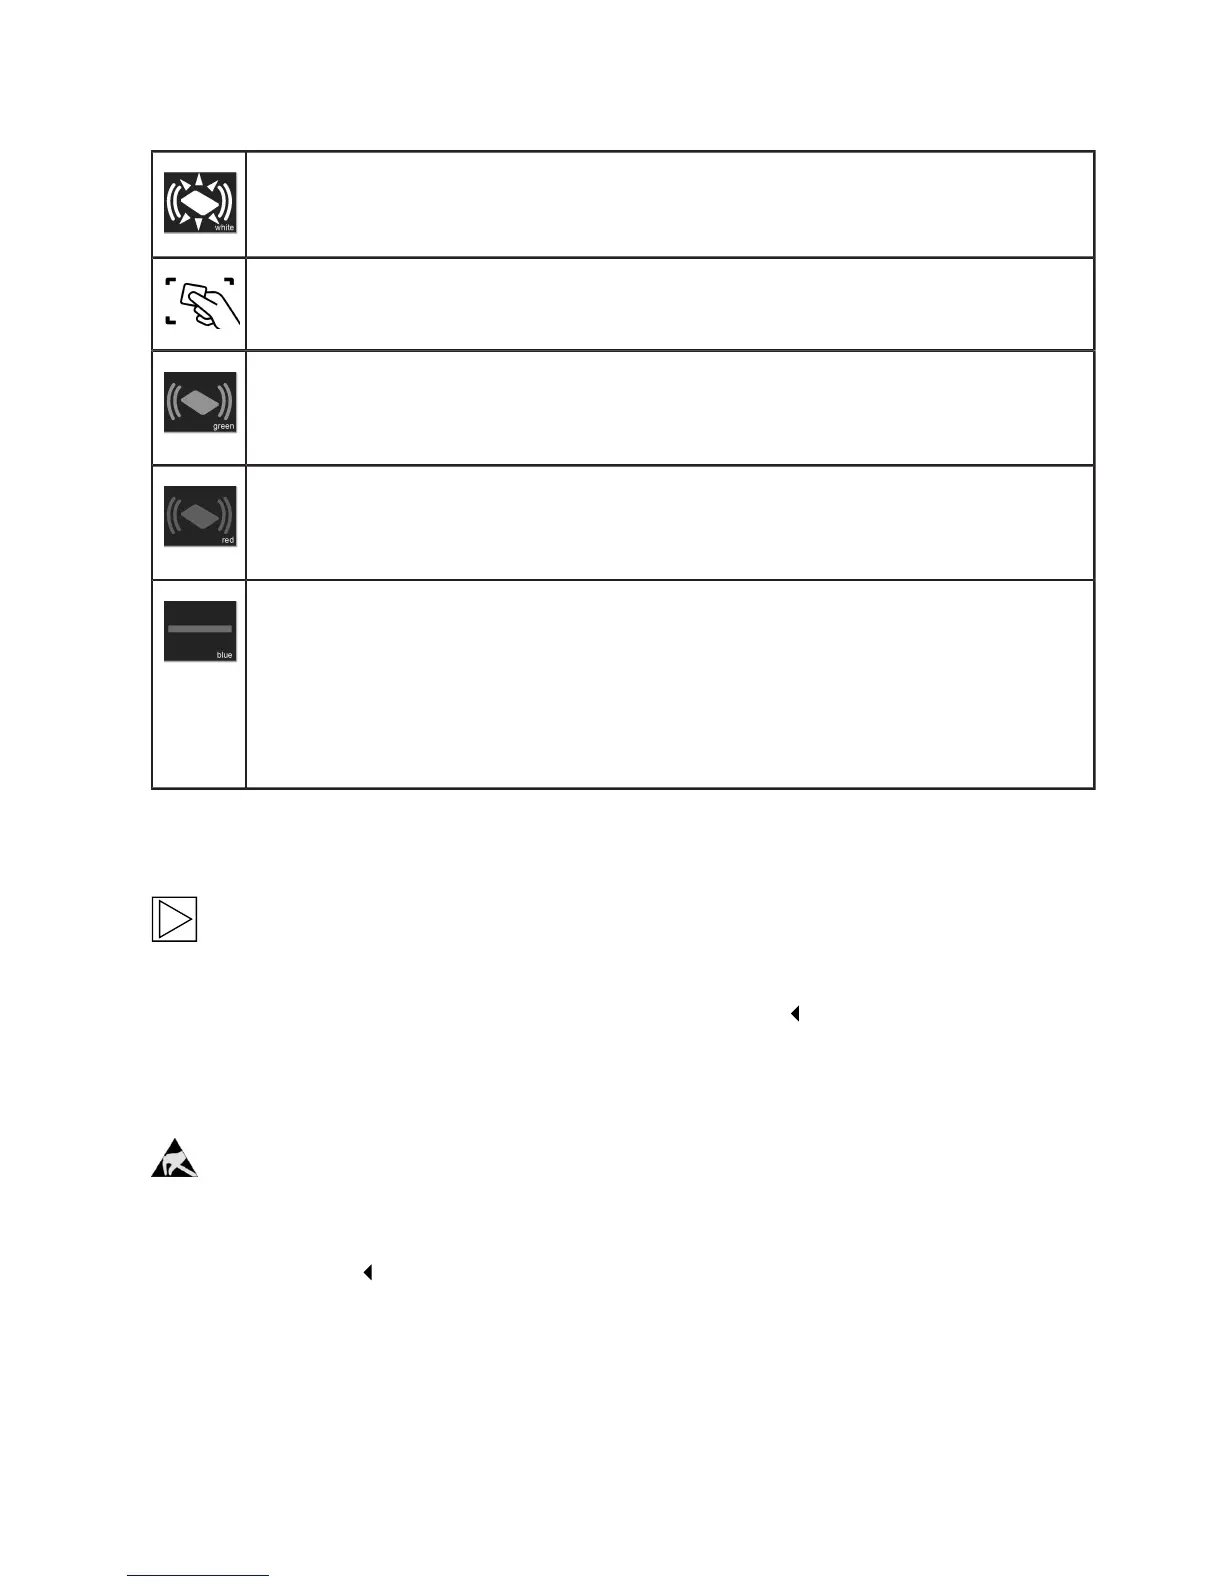
The RFID status indicator 2 and the border of the RFID reading area 3 flash in white.
1. Hold the RFID card in front of the RFID reading area 3.
Authorisation successful
Successful authorisation is indicated by a rising sequence of tones, and the RFID status
indicator 2 will be lit for 2 seconds in green.
Authorisation failed
Failed authorisation is indicated by a falling sequence of tones, and the RFID status
indicator 2 will be lit for 2 seconds in red.
Charging process enabled
If the charging process is not started within 60 seconds of a successful authorisation,
the system enable will be revoked automatically: During the enable time, the status LED 1
will be lit in blue. During this time it is not possible to enable or disable the system using a
different card.
1. Now connect the vehicle. The charging process can then be started from the vehicle.
Configuring the authorisation function
Note
The authorisation function of the Wallbox can be disabled. To disable the authorisation function
and delete the user cards, it is necessary to remove the housing cover and the terminal panel
cover from the Wallbox to gain access to the service button.
Service button
Notes on opening the cover:
Danger of damage. Electronic components may be destroyed if touched.
Before handling modules, perform an electrical discharge process by touching a metallic
earthed object.