12
McIntosh C100 Preamplifier
Spade lug or prepared wire connection:
Insert the spade lug connector or prepared sec-
tion of the cable end into the terminal side ac-
cess hole, and tighten the terminal cap until the
cable is firmly clamped into the terminal so the
wires cannot slip out. Refer to figures 8, 9 & 10.
Note: If the cables come without prepared ends,
proceed to How to prepare cable ends.
Banana plug connection:
Insert the banana plug into the hole at the top of
the terminal and tighten the top portion of the
terminal post to secure the banana plug in place.
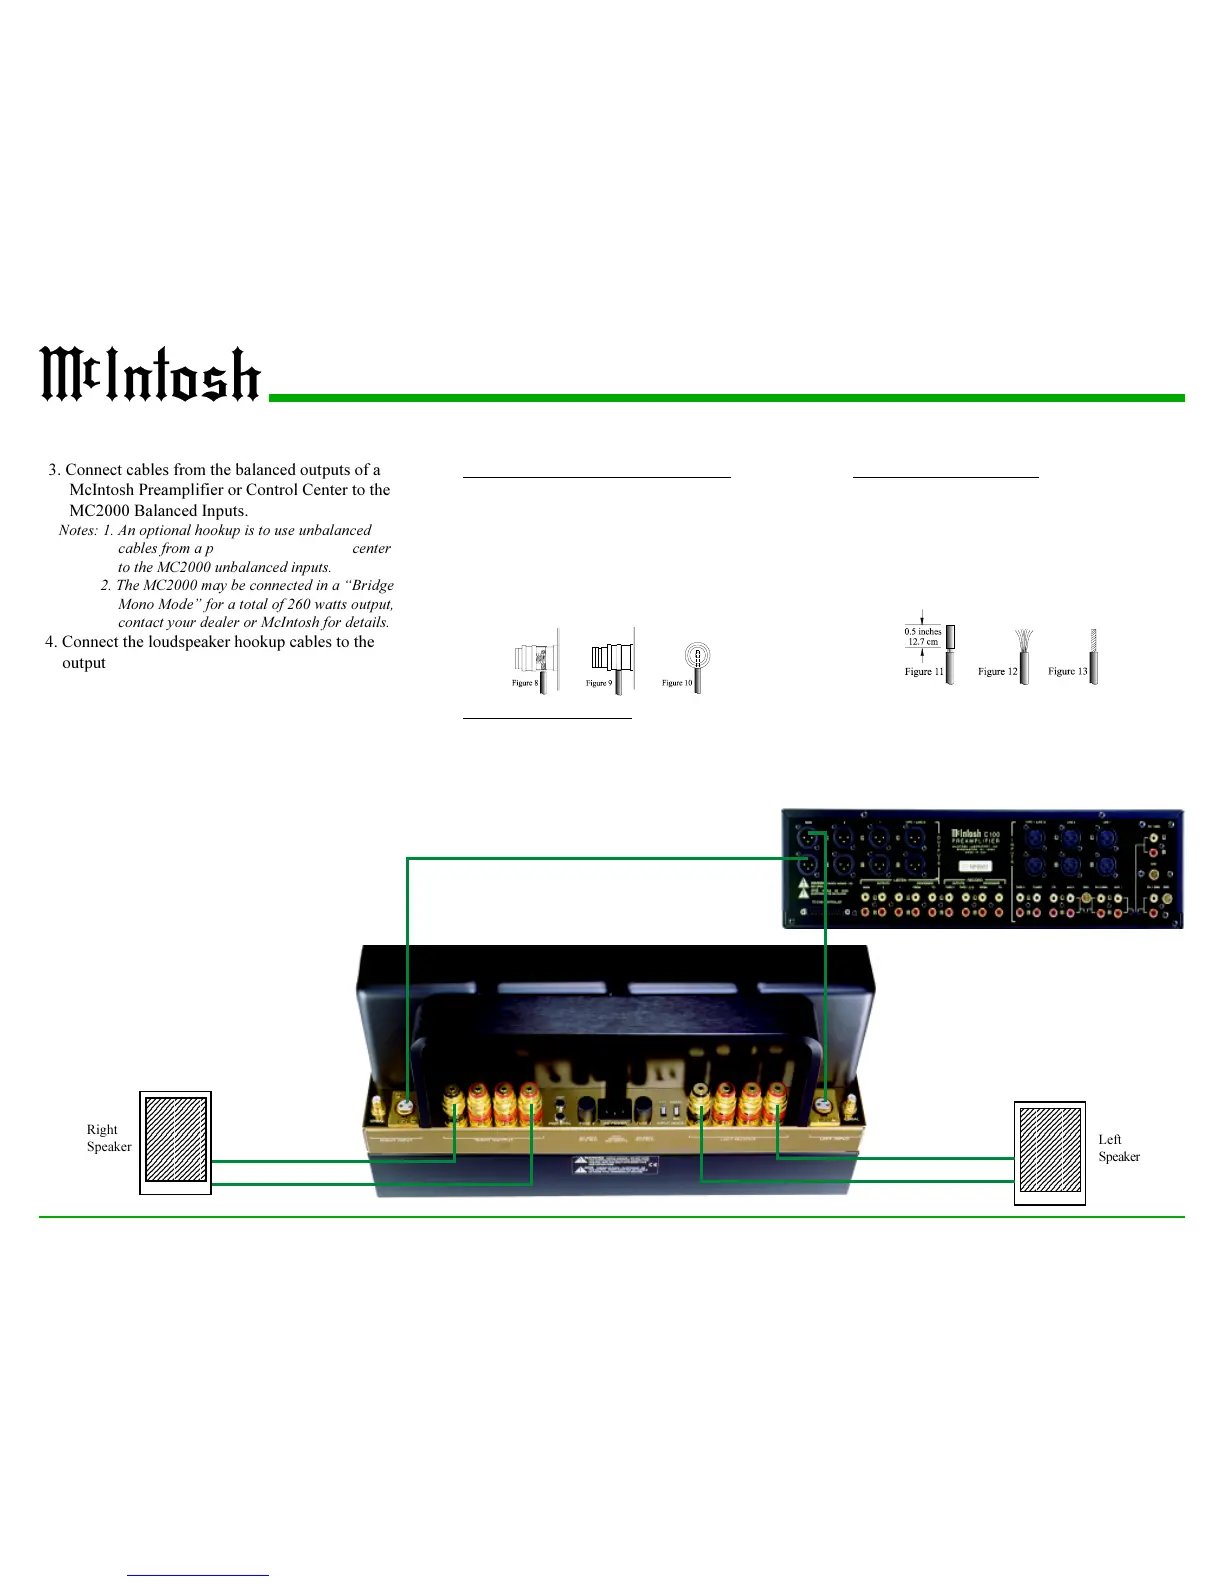
3. Connect cables from the balanced outputs of a
McIntosh Preamplifier or Control Center to the
MC2000 Balanced Inputs.
Notes: 1. An optional hookup is to use unbalanced
cables from a preamplifier or control center
to the MC2000 unbalanced inputs.
2. The MC2000 may be connected in a Bridge
Mono Mode for a total of 260 watts output,
contact your dealer or McIntosh for details.
4. Connect the loudspeaker hookup cables to the
output terminals, which will accept bare cable
ends, spade lugs, or banana plugs. Attach cables
to the terminals that match the impedance of your
loudspeakers, being careful to observe the correct
polarities. Output impedance connections of 2
ohms, 4 ohms and 8 ohms are provided.
Notes: 1. If the impedance of your loudspeakers is
different from the listed impedances, use the
nearest lower impedance connection.
2. It is very important that loudspeaker cables of
adequate size be used, so that there will be
no power loss or heating. Cable size is
specified in Gauge numbers or AWG,
(American Wire Gauge). The smaller the
Gauge, the larger the wire size:
If your loudspeaker cables are 50
feet (38.1m) or less, use 14
(AWG) wire size or larger.
If your loudspeaker cables are
100 feet (76.2m) or less, use 10
(AWG) wire size or larger.
How to Connect the MC2000, cont
How to prepare cable ends:
A. Carefully remove sufficient insulation from
the cable ends to just fit within the binding
post with no exposed wire accessible.
B. If the cable is stranded, carefully twist the
strands together as tightly as possible. Refer
to figures 11, 12 & 13.
Note: If desired, the twisted ends can be tinned
with solder to keep the strands together,
or attach spade lug and/or banana
connector.
 Loading...