SimStep Manual - 3400 Iss. D 7
th
June 2004 page 23
8.2.2 Encoder Scaling
The incoming encoder pulses are scaled by the encoder ratio (ER) formed by the
Encoder Numerator (EN) and the Encoder Denominator (ED) i.e. the number of
pulses received is multiplied by the numerator and divided by the denominator, to
become the Actual Position.
If the ratio between the number of steps and the encoder counts is 1:1 (e.g. 100 line
encoder = 400 counts per revolution mounted on a 400 step per rev motor) then the
encoder scaling factors; Encoder Numerator and Encoder Denominator can be left at
their default of 1, otherwise they will need to be changed.
If the Encoder Numerator (EN) is set to the number of motor steps per revolution and
the Encoder Denominator (ED) is set to the number of encoder counts per revolution,
then the ratio will be correct. For example, if a 400 step per revolution motor fitted with
a 500 line (2000 counts) encoder, then set the Numerator to 400 and the Denominator
to 2000 (ER400/2000 or EN400, ED2000).
8.2.3 Encoder Direction
On switch on, both the Command Position and the Actual Position will both be at zero.
Try a test move (e.g. MR1000) and query the positions with the OC and OA (or QP)
commands, to ensure the scaling is correct. If one is the negative of the other, then
the ‘sense of direction’ needs to be reversed, by either swapping the A and B signals
OR by setting the Encoder Numerator to a negative value.
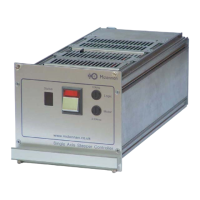
8.3 Programming via the RS232 Interface
Any suitable communication programme can be used to communicate with the
SimStep controller. For example, the MyTerminal programme (available from
www.SimStep.co.uk) or the Windows Hyper Terminal programme can be used to
make the communications link.
Whichever software is used, the communications interface is set by default, as
follows:
Baud Rate 9600
Data Bits 7
Stop Bits 1
Parity Even
Flow Control None
Once the communications software has been set up, the remote computer should be
connected to the SimStep via the RS232 IN port. Multiple SimStep units can be
daisy-chained
together to build multi-axis systems. Rotary switches SW1 and SW2 on
the PM600 card are used to set the units axis address (0 to 99). This is the address of
the serial commands that it will respond to. Each controller in a system will be set to a
different address.
The switches on the PM600 are accessible by removing the slotted top cover of the
unit. The left-hand switch SW1 sets the decade value and SW2 sets the units. They
can be set using a small screwdriver. See figures 8.2 and 8.3.
Note that the RS232 loop-back connector must be fitted to the RS232 OUT connector
of the final SimStep in the RS232 chain.