1-800-MEDLINE (633-5463) | medline.com 13
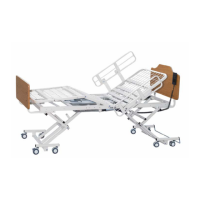
BATTERy BACkUP
In the event of a power failure, the bed comes standard with a battery backup feature that
enablesthebedtobeloweredwithoutACpower.Keepthebatterybackuppluggedinto
control box to ensure activation. Battery must be charged for a minimum of 12 hours prior to
use.
The battery backup unit will recharge when AC power is reestablished.
CAUTION
• Improperhandlingand/orexposuretoheatcouldresultinbodilyinjury.
• Thebatteryback-upisafactorysealedunit.DO NOT ATTEMPT to open/repair unit.
• Containssealedleadbattery.Batterymustberecycled.
REPLACING BATTERy
Tools Required: Flat Head Screw Driver, T25 Torx Screw Driver
CAUTION
Follow the installation instructions carefully and check that all hardware/fasteners are
properly installed and tight.
1. Disconnect AC power
2. Remove the control box cover by using a flat head screw driver. Insert the screwdriver into
the control box cover slot marked “INSERT TO OPEN”. The control box cover should now
slide away from the control box.
3. Unplug the battery backup cable from the control box. Please refer to page 13 for the
battery backup cable location on the control box.
4. Cut and remove all cable (zip) ties holding the battery backup cable.
5. Using a T25 Torx screwdriver remove the all 4 mounting screws. Support the battery when
removing the last screw. Use caution the battery backup weighs approximately 4 pounds.
6. Using a T25 Torx screwdriver install the new battery backup unit with all 4 mounting
screws.
7. Carefully route the battery backup cable from the battery to the control box. Please make
sure the cable does not get pinched or cut during normal bed operation.
8. Secure cable in place with zip-ties
9. Reconnect the battery backup cable into the control box port.
10. Replace the control box cover.
11. Reconnect AC power
 Loading...