Installing the Access Points
© 2010 Meru Networks, Inc. Installing OAP180 93
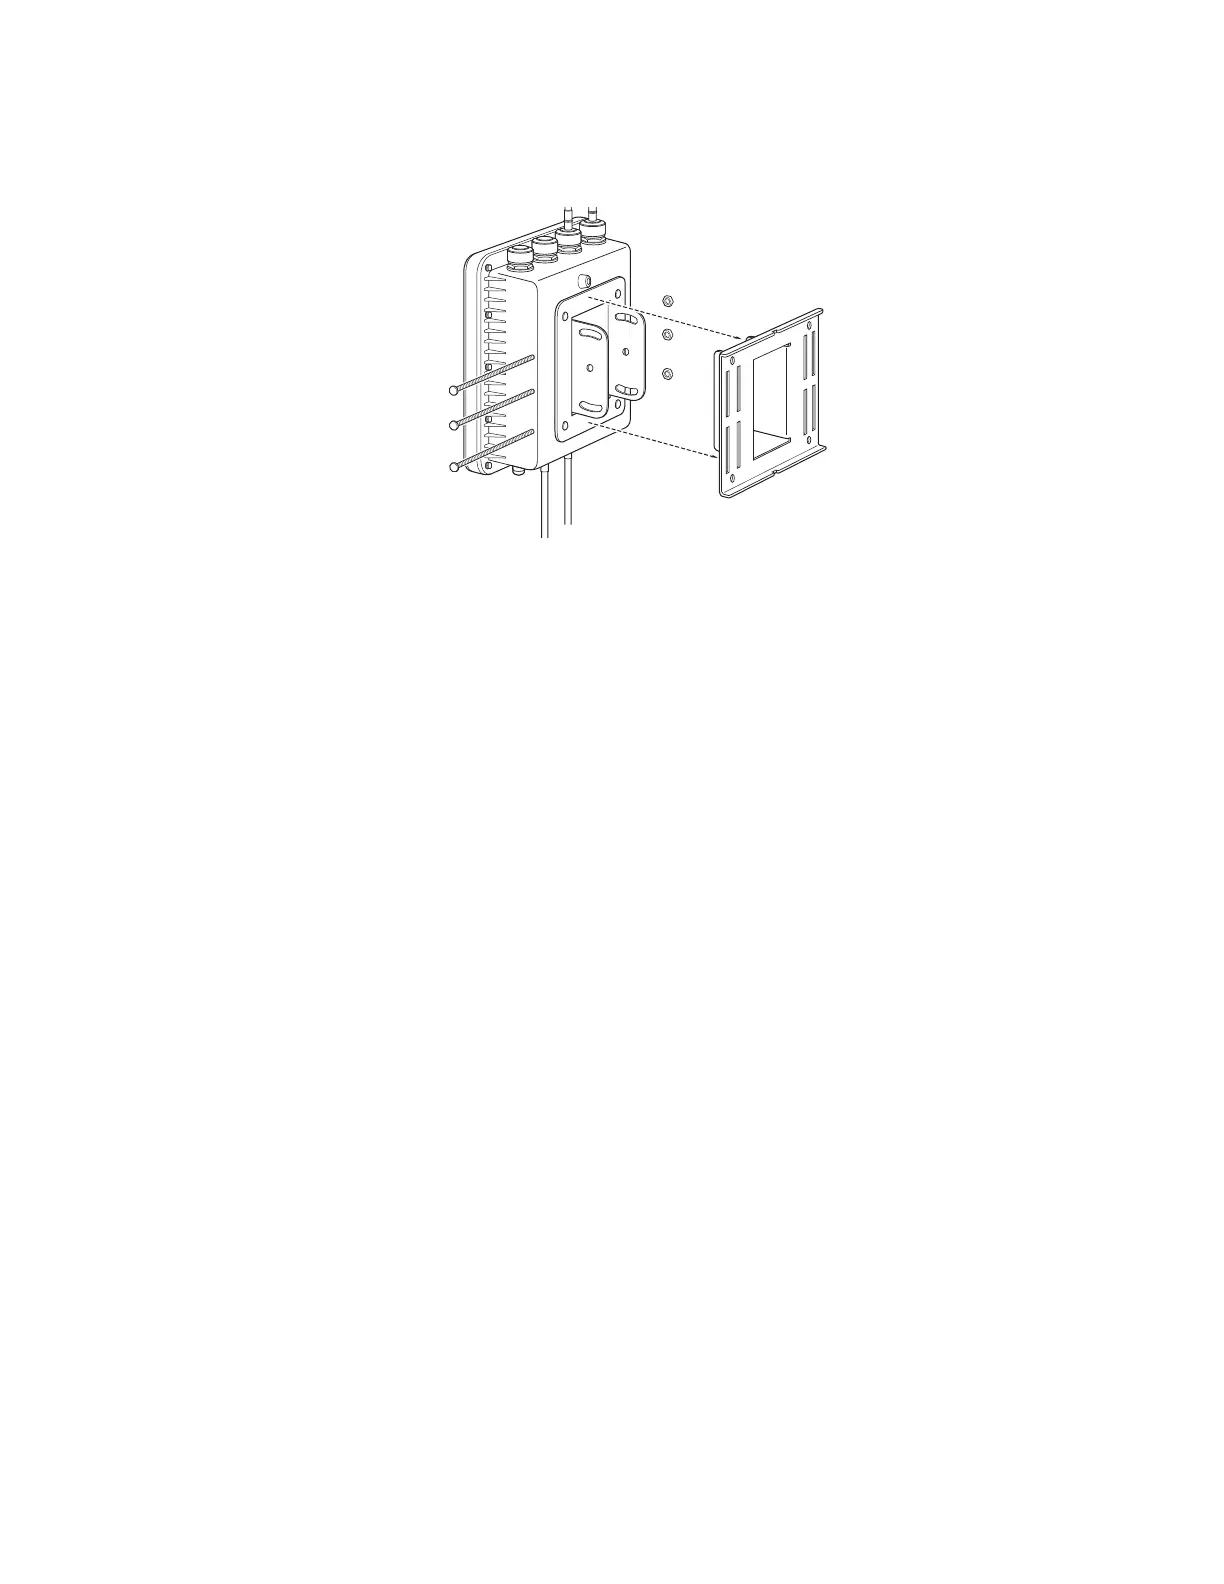
Figure 39: Mount OAP180 on Wall Bracket
Connect Antennas and Ground Wire to OAP180
OAP180 does not ship with any antenna by default. Since customers have different
outdoor applications, we suggest that you choose from the various antenna options
offered by Meru. See the list in Appendix , “AP Accessories” on page 89.
Four antennas are required if diversity is required. You can also use two antennas and
terminate the other two. The OAP180 works both with antennas that attach directly
to the unit and remote antennas. When using antennas that attach to the unit, attach
the antennas before installing the unit. Use the two connectors on the right (5G-1
and 2.4G-1) as indicated in Figure 8. When deploying an OAP180 with a remote
antenna, first mount remote antennas and then connect them to the OAP180.
Follow these steps:
1. Remove the two right-most antenna covers indicated in Figure 8.
2. Mount the external antenna on the same supporting structure as you did the
OAP180, within 3 m (10 ft.) of it, using the bracket supplied in the antenna
package.
3. Connect the antenna to the OAP180’s N-type connector (5G-1 and 2.4G-1) using
the RF coaxial cable provided in the antenna box.
 Loading...