ENGLISH
25
is thicker than, the thickness of
the riving knife.
– saw blades with visible damage;
– cut-off wheel blades.
ADanger!
– Mount saw blade using only gen-
uine parts.
– Do not use loose-fitting reducing
rings; the saw blade could work
loose.
– Saw blades have to be mounted
in such way that they do not
wobble or run out of balance and
cannot work loose during opera-
tion.
10. Slide on outer blade flange (67).
11. Screw on clamping nut (68) (left-
handed thread!). Turn clamping nut
(68) with open-jawed spanner and,
at the same time, pull the lever of the
saw blade lock (65) upwards until is
engages.
12. Hold lever firmly in position and
tighten clamping nut hand-tight by
turning counterclockwise.
ADanger!
– Do not extend arbor bolt tighten-
ing wrench.
– Do not tighten arbor bolt by hit-
ting the wrench.
13. Adjust riving knife corresponding to
the saw blade size (69).
(for riving knife setting, see 5.1)
14. Reinstall table insert.
15. Attach blade guard.
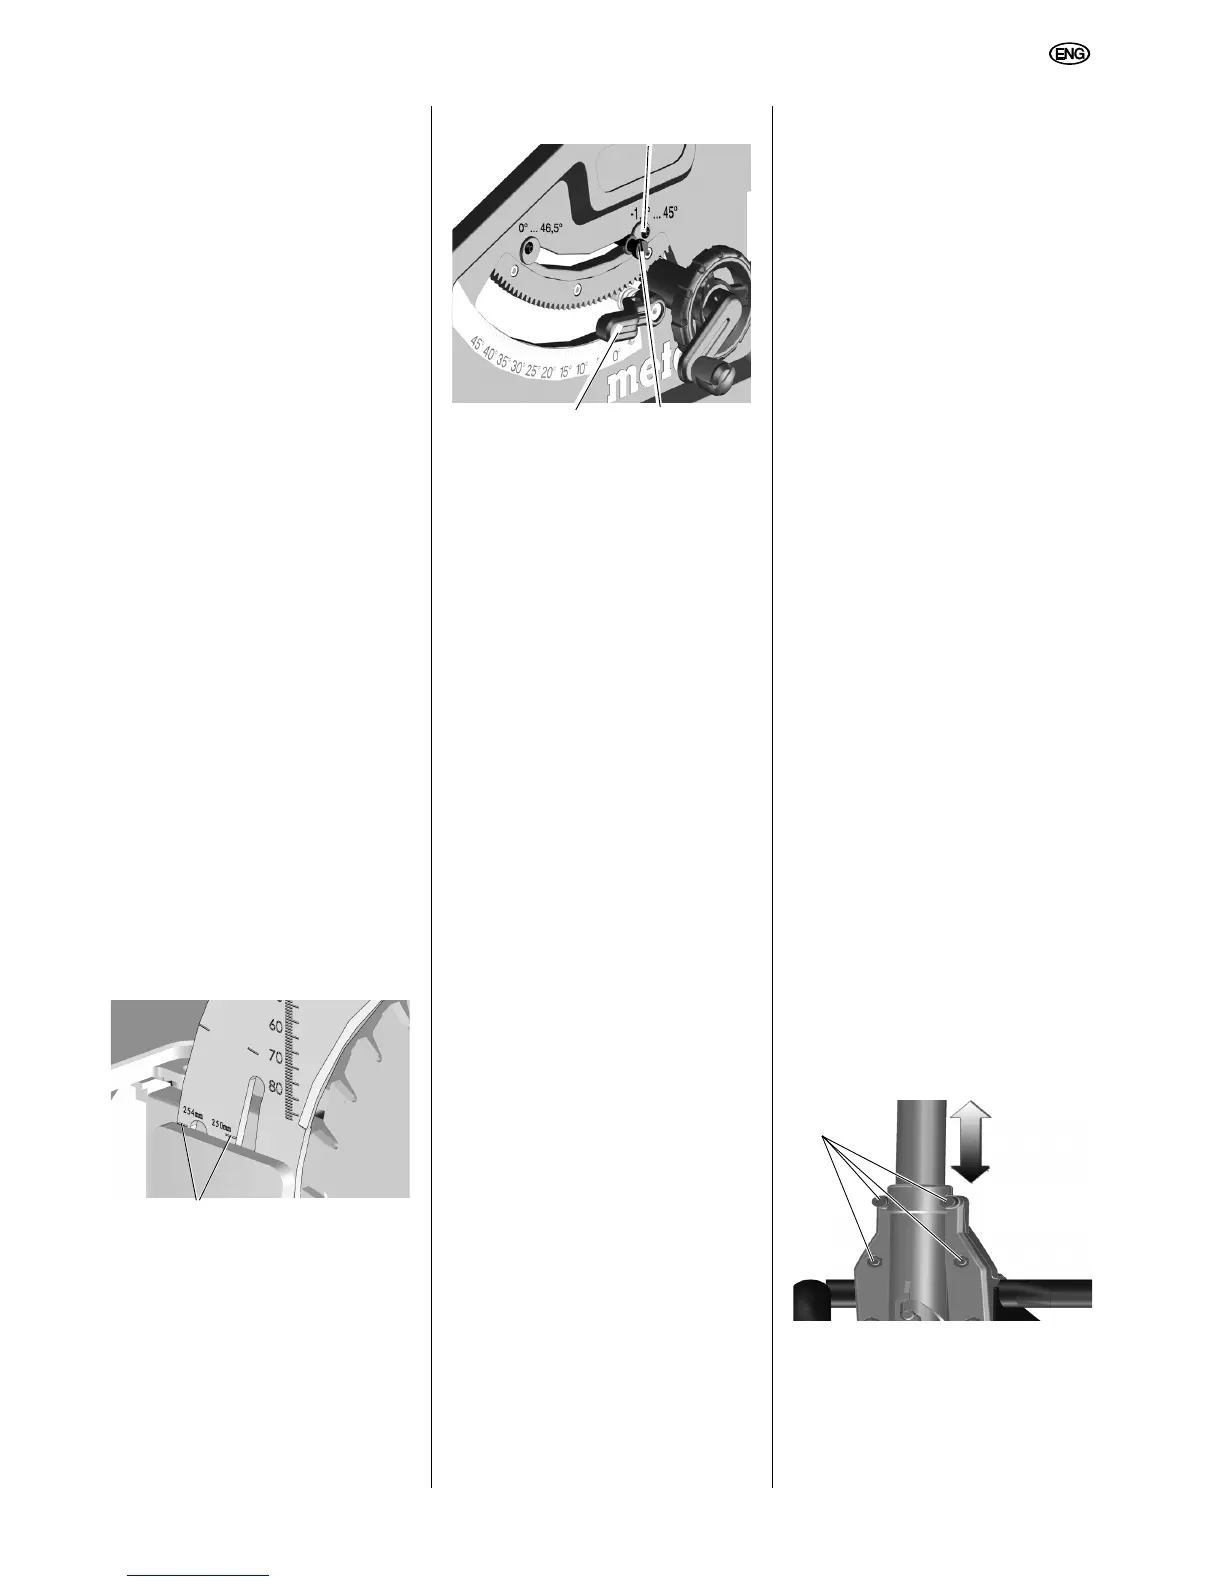
8.2 Adjusting the blade tilt
stop
1. Set the blade tilt stop lever (71) for
the angle range to 0° / 45°.
2. Lock set bevel tilt by tightening lock
lever (70).
3. Check blade bevel angle:
– 0° = at right angles to the saw ta-
ble
– 45° with separate mitre square.
If these angles are not achieved ex-
actly:
4. Release cross-head screw (72) at
respective cam disc and adjust cam
plate until the blade bevel angle in
relation to the saw table is exactly 0°
(= right angles), or 45°, in the end
positions.
5. Retighten cross-head screw at cam
plate.
6. After adjusting the stop limitation, re-
adjust angle scale at front side if
necessary.
3Note:
To set the bevel angle limitation of -1.5°
to 46.5°, the blade tilt stop lever must be
pulled out.
8.3 Saw storage
ADanger!
Store the machine beyond the reach
of children. Store the machine such
that it cannot be put into operation
by unauthorised personnel and such
that the stationary machine cannot
cause injury.
ACaution!
Do not store saw unprotected out-
doors or in damp environment.
8.4 Maintenance
Saw Cleaning
Remove chips and saw dust with
vacuum cleaner or brush:
– from saw blade setting guide ele-
ments;
– from motor vent slots;
–chip case.
–Height adjustment
– Swivel guide
Before switching ON
Visual check to see if
– distance between saw blade and riv-
ing knife is 3 to 5 mm.
– riving knife is in line with saw blade.
Visual check of power cable and power
cable plug for damage; if necessary
have damaged parts replaced by a
qualified electrician.
Monthly (if used daily)
Remove saw dust and chips with vacu-
um or brush; apply light coat of oil to
guide elements:
– threaded rod and guide rods of
blade rise and fall mechanism:
–swivel segments.
Every 150 hours of operation
Check all screwed joints, retighten if
necessary.
If necessary:
Set table leg guide bushings.
Turn Allen screws (73) clockwise =
guide sluggish.
Turn Allen screws (73) counter-
clockwise = guide moves easily.
Setting guide bushings on front leg
mount:
Turn Allen screws (74) clockwise =
guide sluggish.
Turn Allen screws (74) counter-
clockwise = guide moves easily.
 Loading...