10
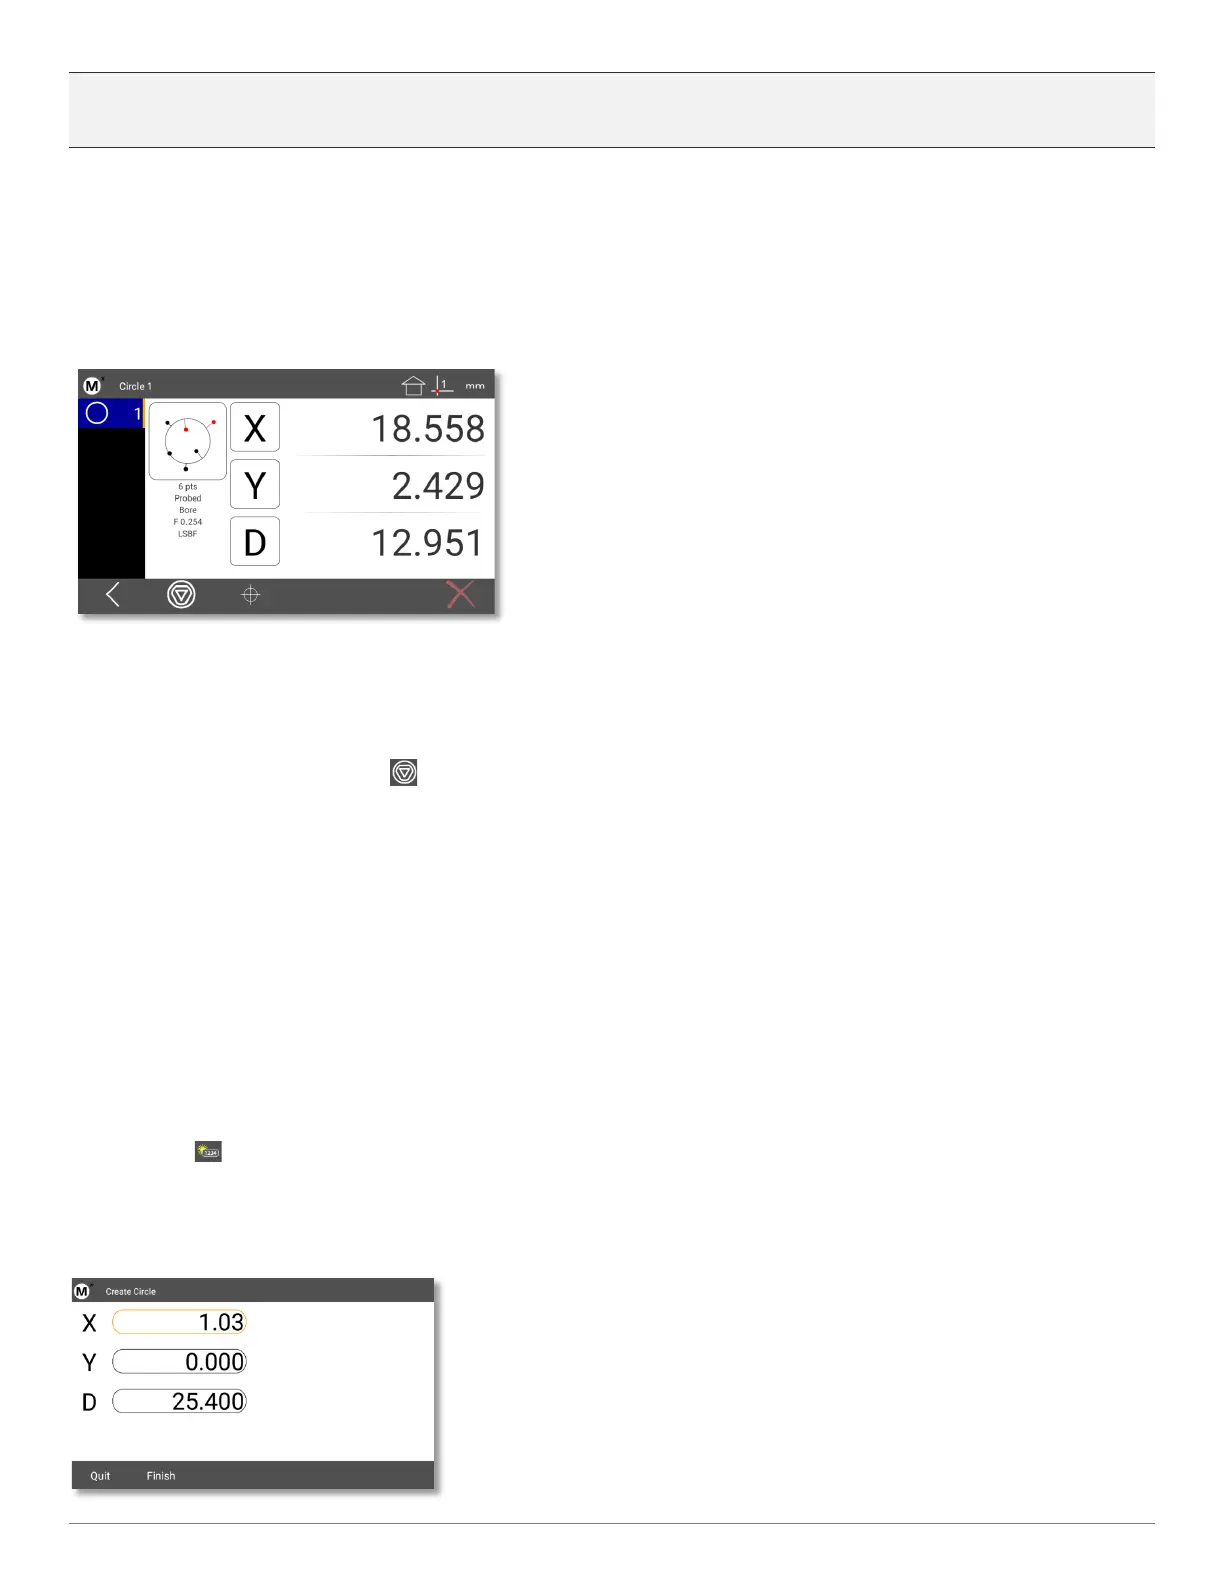
Pro-Tip: if you press the Diameter “D” button, or soft key, you will toggle from Diameter to Radius for the measured
circle.
In this screen you will also see a graphical representation of the circle with the points used for the calculation. A circle
requires a minimum of three point. If you probe more than the minimum number of required points for a feature, the
worst-case points on each side of the calculated circle will be displayed in red, as seen below. The “F” or Form error of
the feature is the radial distance between inner most and outer most points of the features point cloud.
The total number of points probed for the feature and the features currently set fit type are also displayed below the
feature graphic. The default fit type applied is a Least Squares Best Fit(LSBF) calculation. Other fit types can be applied
by pressing the “Change Type” key( ). For circles features, other fit types include;
• Max Inscribed Fit - What is the largest pin that could fit in the this hole.
• Min Superscibed Fit - What is the largest diameter created from the three outer most points.
• ISO Fit(Best Form) - Fits the feature to the best, or lowest, form.
3.3 Creating Features
On occasion, you may need to create a feature somewhere in the coordinate system. Created features are not probed or
constructed and thus cannot be played back in a program. To create a Circle, press the Circle key, then the “Create
Feature” key( ). You will see a numerical entry screen. Enter the numeric value in the X axis, which is highlighted in
orange, then press “Enter”. This will index the highlighted field to the Y axis. Enter the Y axis value and press enter. Do
the same for the diameter coefficient. Then press finish. The created feature will be added to the feature list and
displayed in the results window. Other feature types can be created using the same method.