21
7 Reporting
After performing measurements in the Mx200 you may want to view, print, or send the results.
The following settings can be configured in the “Printouts” settings menu.
Report Title
• Select the “Report Title” menu item and press “Enter”. An alpha-numeric entry dialog and keyboard will be
displayed. Enter the desired new report title and press “Ok” to confirm. This new report title will be displayed in
the header for all report printouts.
Include Date and Time
• Select the “Include Date and Time” menu item. Set to Yes or No using the softkeys to include or hide the date
and time stamp from the report header.
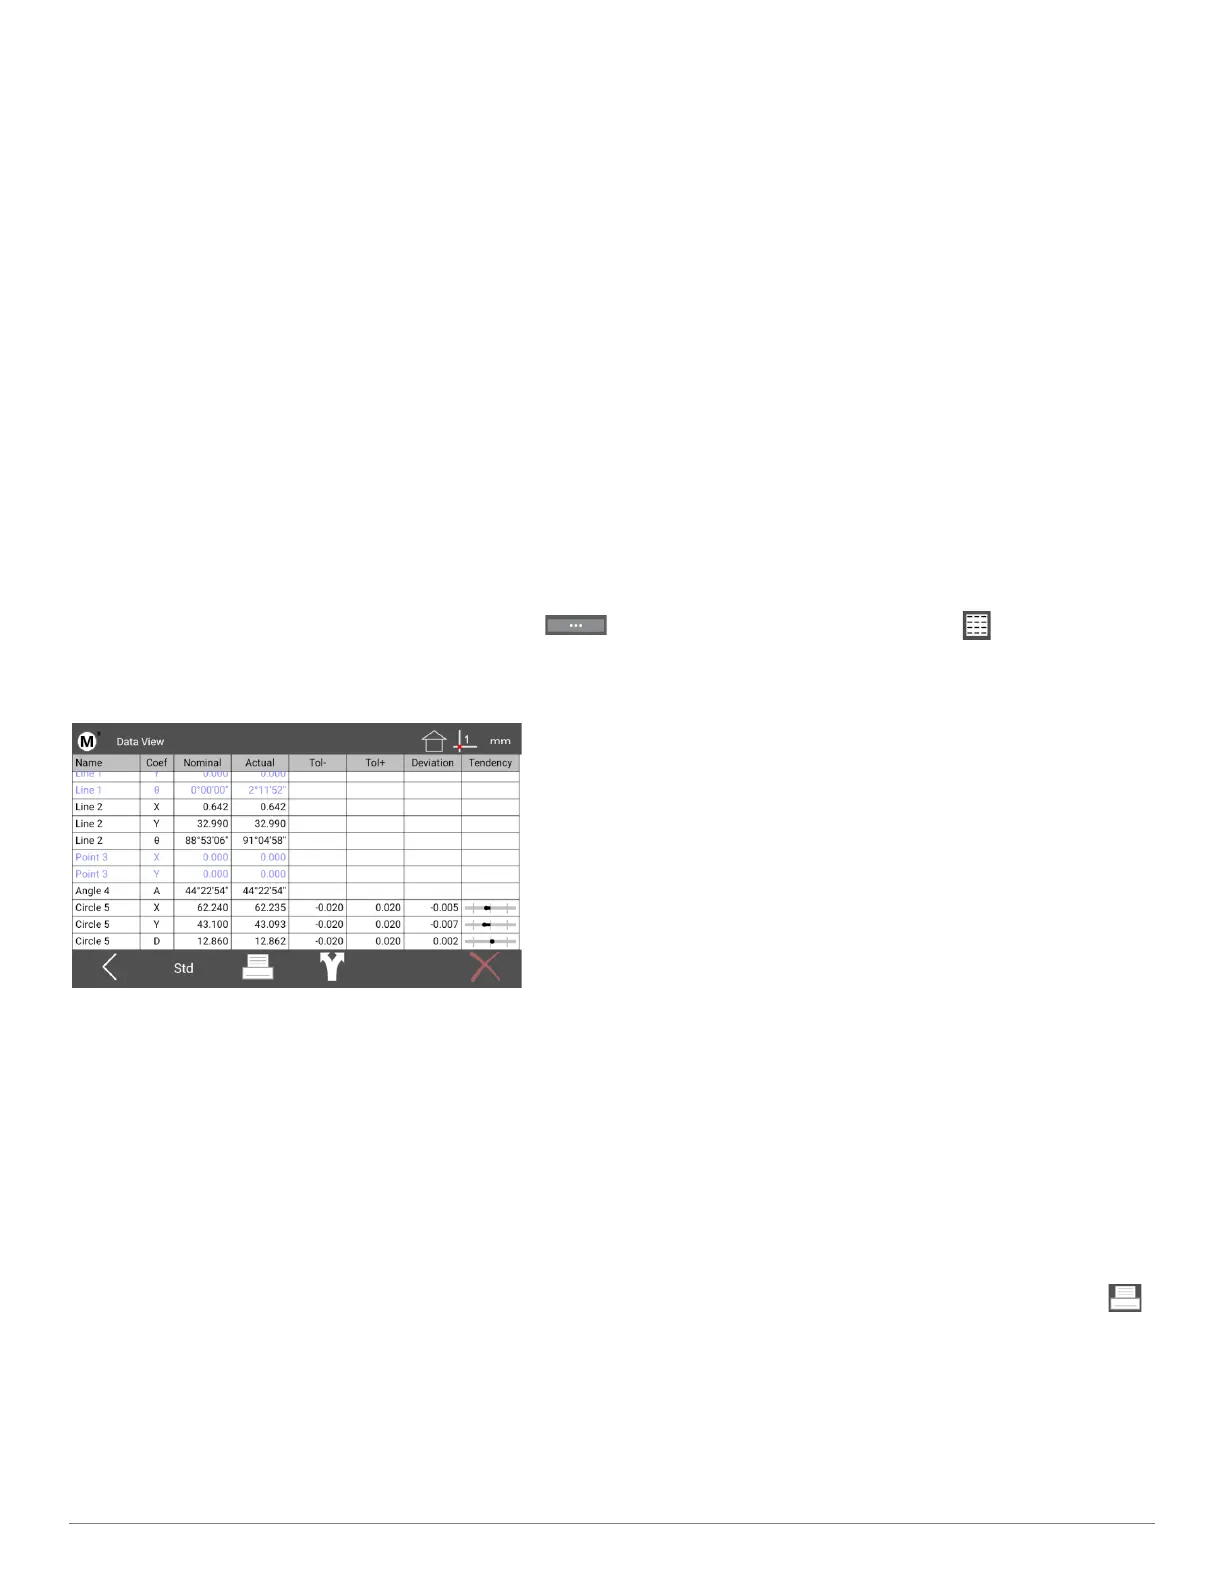
To view measuring results press the “Menu” button( ), then press the “Report View” button( ). Measuring
results can be displayed in one of three views; CSV, Standard, and Tolerance. Each has a different layout for
measurement data, select the one that best suits your needs.
You can Print, Export, or Send(RS232) your data from the Mx200, to a printer, USB storage device, or external data
collection system.
7.1 Printing report data
Before printing you must first configure the printer to be used. Once set up is complete, pressing the “Print” button( ).
from the report view menu will execute a print of the current report view you have selected.
• Step 1: Press the Mx menu button, enter Setup, and then scroll to the setting screen called “Printouts”.
• Step 2: Select the menu item called “Printer Setup”. Use the touch screen to specify your printer device from the
dropdown menu in the top left corner. NOTE: If you are printing to a wireless printer, make sure that you have
Wifi/Bluetooth enabled in the unit, and that you are connected to the correct network or device.