27
8.9 Auto Edge Detection Probe
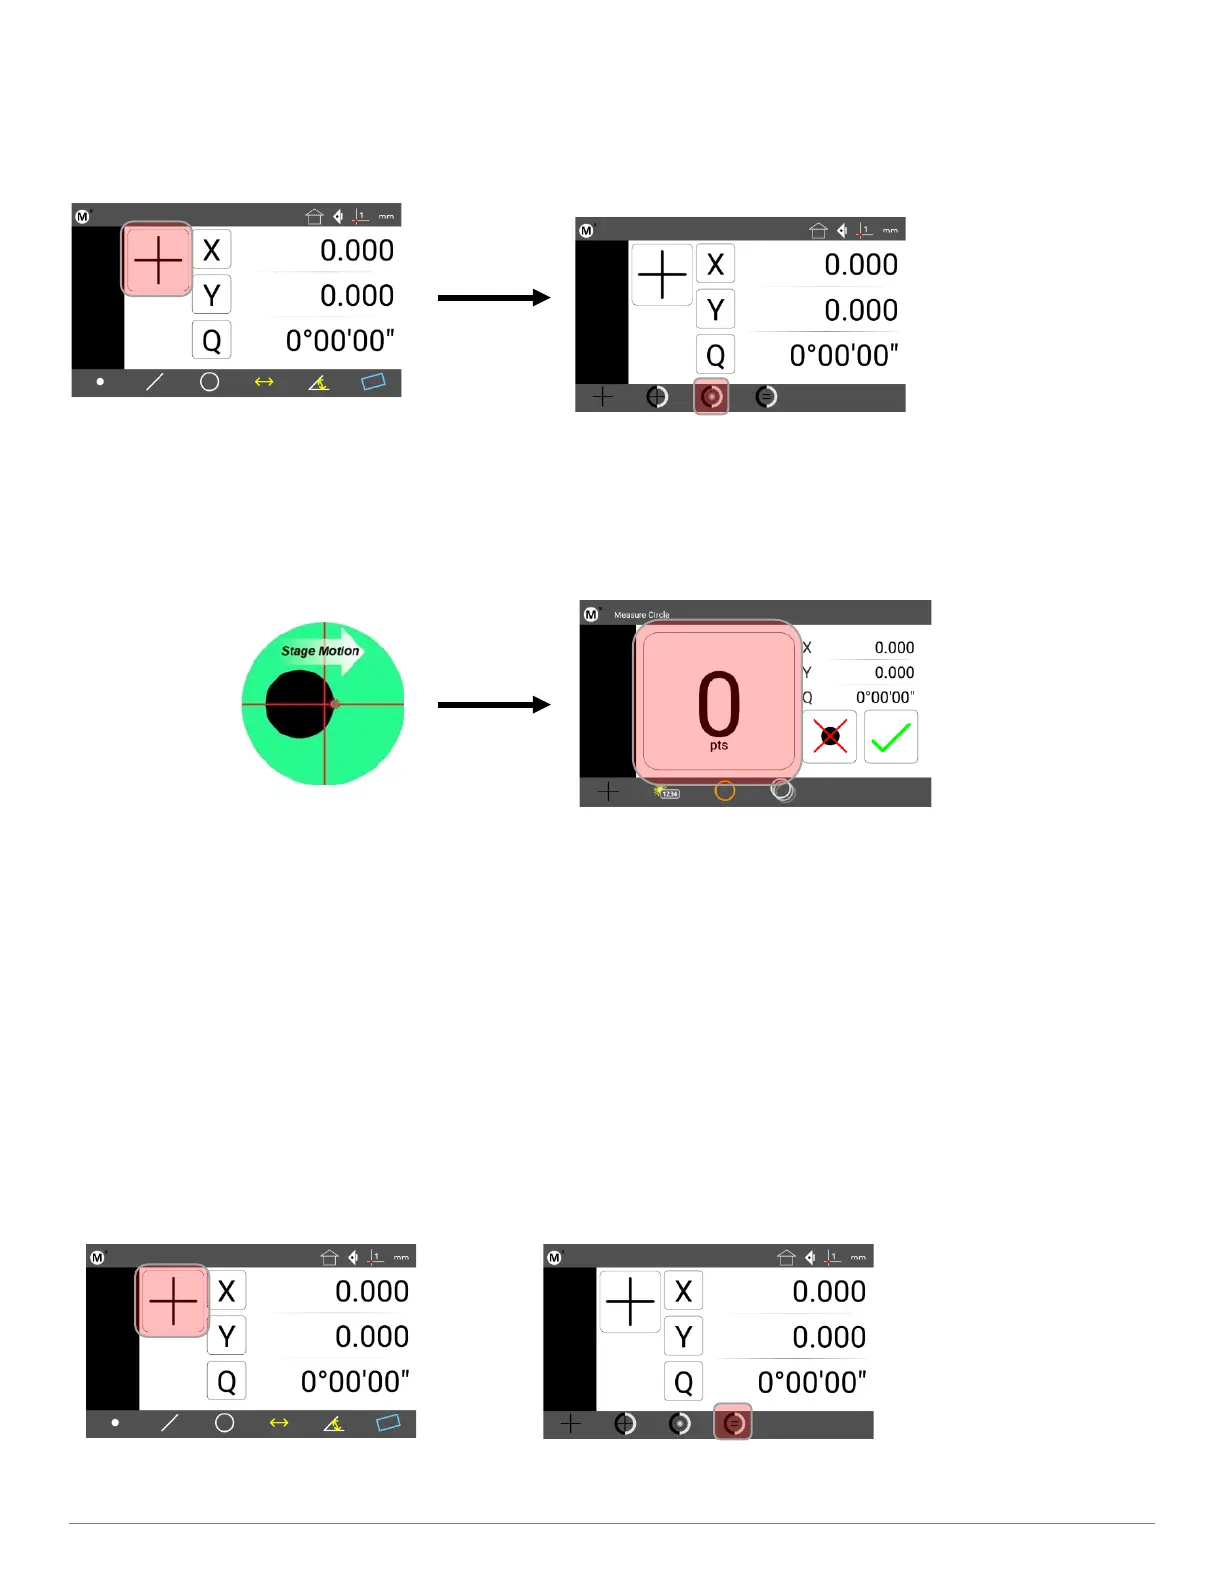
• Step 1: Press the Home button to return to the main measuring view(if necessary).
• Step 2: Press the Probe Menu button and select the Auto Edge probe.
•
• Step 3: Press the desired Measure Feature button in the Measure toolbar (circle in the example below).
• Step 4: Sweep the optical edge sensor over a feature edge. The probe will fire, and a point will be entered into
the measurement.
• Step 6: Probe the remaining points necessary to define the feature in the same way.
• Step 7: Press the “Finish” keypad button, or the green check-mark touchscreen button to complete the feature
measurement. The feature will be shown in the Feature list and Feature Detail screen.
8.10 Optical Edge Sensor Teach
Probe Teach is the basic optical edge calibration required by the Mx200 optical edge detection system. The probe teach
calibration should be performed when lighting or magnification conditions change. To perform the Probe teach
calibration:
• Step 1: Select “Edge Teach” button from the probe menu.