IMO-R23EN 5
Following approval of the welds, pneumatically test the
pressure tightness of the steam jacket connections to the
pressure rating of the steam system on the tank car, but do
not exceed 250psig (17.2 barg.). Cover the welds with a
leak detection fluid and observe for three (3) minutes. Any
indication of leakage is cause for rejection.
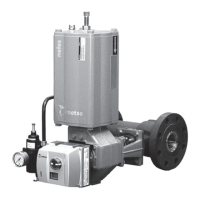
4 MAINTENANCE
4.1 General
Although Metso’s Jamesbury valves are designed to work
under severe conditions, proper preventative
maintenance can significantly help to prevent unplanned
downtime and in real terms reduce the total cost of
ownership. Metso recommends inspecting valves at least
every five (5) years. The inspection and maintenance
frequency depends on the actual application and process
condition. Routine maintenance consists of tightening the
hex head cap screws (29) in (Figure 3) periodically to
compensate for stem seal wear. Tighten the hex head cap
screws (29) to the torque values listed in Tables 1A & 1B.
Overhaul maintenance consists of replacing seats and
seals. A standard service kit consisting of these parts may
be obtained through your authorized Metso Distributor.
NOTE: Service kits include stem bearings (13), secondary
stem seal (7), seats (5), body seal (6) and stem seals (8).
Refer to the Service Kit chart (see Table 4A or 4B). Non
Fire-tite® valves have 1 stem bearing (24).
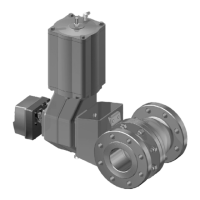
4.2 Disassembly
NOTE: If complete disassembly becomes necessary,
replacement of all seats, stem seal and bearings is
recommended. (Refer to Service Kits, Table 4A or 4B).
NOTE:
Always use original OEM parts to make sure the
valve functions properly.
1. Follow the steps in all the WARNING Sections before
performing any work on the valve.
2. Open and close the valve and leave in the closed
position.
3. Remove the handle nut (16), lockwasher (19), and
handle (17) from the top of the stem.
4. Remove hex head cap screws (29), disc springs (31) and
compression plate (20).
5. Secure the valve body (1).
6. Remove the insert (2) by turning in a counterclockwise
direction.
7. Remove the body gasket (6), seat (5). Rotate the stem
so that the ball is in the closed position and remove the
ball (3). BE CAREFUL NOT TO SCRATCH OR
DAMAGE BALL WHEN REMOVING FROM VALVE
BODY. Be careful not to damage the sealing surfaces.
May include support ring (9) used with graphite seal. A
piece of wood or other soft material may be used to
unseat the parts from the opposite side.
8. Remove the second seat (5) from the body (1). BE
CAREFUL NOT TO SCRATCH THE BODY SEALING
SURFACE BEHIND THE SEAT. A piece of wood or
other soft material may be used to unseat the parts
from the opposite side.
9. Press the stem (4) from the top into the valve body and
remove it through the end of the body. BE CAREFUL
NOT TO SCRATCH ANY SEALING SURFACES ON
THE STEM OR IN THE BODY.
10. Carefully remove the old thrust bearing (24) and stem
seal (8). BE CAREFUL NOT TO SCRATCH ANY
SEALING SURFACES IN THE BODY. NOTE:
Fire-tite
valves have 2 stem bearing (13) and a secondary stem
seal (7) as shown in Figure 3.
4.3 Checking Parts
NOTE: For detailed instructions on visual inspection of
critical components, refer to IMO-R26.
1. Clean all disassembled parts.
2. Check the stem (4) and ball (3) for damage. Pay
particular attention to the sealing areas.
3. Check all sealing and gasket surfaces of the body (1)
and insert (2). Also sealing surfaces should be clean,
with no corrosion, old seal material or commodity
residue.
4. Inspect threads of insert and body. Dry fit insert into
body threads to check fit.
5. Replace any fastener where the threads are damaged
or have been heated, stretched or corroded.
WARNING:
FOR YOUR SAFETY IT IS IMPORTANT THE FOLLOWING
PRECAUTIONS BE TAKEN PRIOR TO REMOVAL OF THE VALVE FROM
THE TANK CAR OR BEFORE ANY DISASSEMBLY:
1.
WEAR ANY PROTECTIVE CLOTHING OR EQUIPMENT
NORMALLY REQUIRED WHEN WORKING WITH THE FLUID
INVOLVED.
2
. DEPRESSURIZE THE TANK CAR AND CYCLE THE VALVE AS
FOLLOWS:
A. UPON VERIFYING THE TANK CAR IS EMPTY, PLACE THE
VALVE IN OPEN POSITION.
B
. CYCLE THE VALVE TO RELIEVE RESIDUAL PRESSURE IN THE
BODY CAVITY BEFORE REMOVAL FROM THE TANK CAR.
C. AFTER REMOVAL AND BEFORE ANY DISASSEMBLY, CYCLE
THE VALVE AGAIN SEVERAL TIMES.
3
. THESE VALVES ARE SUITABLE FOR A WIDE VARIETY OF FLUIDS
AND GASES. BE CERTAIN THAT THE VALVE MATERIALS
SELECTED ARE SUITABLE FOR THE APPLICATION.
 Loading...