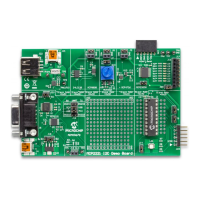
MCP2221 I
2
C Demonstration Board User’s Guide
DS50000000A-page 40 2016 Microchip Technology Inc.
These are the pin designations:
- Pin 1: Not connected
-Pin 2: V
DD
(power) must be provided by the I
2
C demonstration board and it is
user-selectable (3.3V or 5V via jumper J19)
- Pin 3: GND (ground connection)
- Pin 4: SDA (I
2
C data line)
-Pin 5: SCL (I
2
C clock line)
- Pin 6: Not connected
Additional test points are available in the case, for example, of connecting a logical
analyzer to the demo board’s I
2
C bus:
- TP6: Test point connected to the I
2
C data line
- TP7: Test point connected to the I
2
C clock line
- TP8: Test point connected to ground
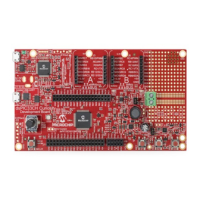
4.2 PIC16F1509 AS I
2
C MASTER
There may be the case where it is desirable to have the PIC16F1509 microcontroller
as the I
2
C master with no required USB communication. This section contains
information related to the hardware connectivity (power supply and I
2
C
communication), as well as programming the PIC16F1509.
4.2.1 Hardware Connectivity
For powering the board, there are two possibilities:
1. From the PC, via the mini-USB connector J4 (USB Host) or a from a USB charger
adapter that provides a constant 5V (DC) and at a recommended minimum of
200 mA. In this case, the board’s voltage level can be set to either 3.3V or 5V,
depending on how jumper J19 is connected.
2. By connecting an external power supply (between 3.3V and 5V) to the board’s
V
DD
power line, ideally through:
• The V
DD
pin that is available on the ICSP™ (In-Circuit Serial Programming™)
connector marked with J23;
or
• The V
DD
pin that is available on the female connector J25.
To enable I
2
C communication, make sure that:
• The PIC16F1509 connects to the I
2
C bus by short-circuiting jumpers J6 and J9.
• The I
2
C data and clock lines’ pull-up resistors are connected; if no pull-up
resistors are externally connected to the board, then jumper J24 must be
connected.
Note: If the externally connected I
2
C slave already has its own pull-up resistors
connected to the I
2
C data and clock lines, the ones available on the demo
board can be disconnected by removing jumper J24.
Note: In case a power supply is connected directly to the V
DD
line, jumper J19
should be completely disconnected to avoid unwanted current flow. This
flow could affect the board’s MCP1825 voltage regulator or the USB
connector marked with J4.