13 M32 DIGITAL CONSOLE User Manual
LIBRARY
The LIBRARY screen allows loading and saving of commonly-used setups for
the channel inputs, eects processors, and routing scenarios.
The LIBRARY screen contains the following tabs:
channel: This tab allows the user to load and save commonly used
combinations of the channel processing, including dynamics and EQ.
eects: This tab allows the user to load and save commonly used eects
processor presets.
routing: This tab allows the user to load and save commonly used
signal routings.
EFFECTS
The EFFECTS screen controls various aspects of the eight eects processors.
On this screen the user can select specic types of eects for the eight
internal eects processors, congure their input and output paths, monitor
their levels, and adjust the various eects parameters.
The EFFECTS screen contains the following separate tabs:
home: The home screen provides a general overview of the virtual
eects rack, displaying what eect has been inserted in each of the
eight slots, as well as displaying input/output paths for each slot and
the I/O signal levels.
fx1-8: These eight duplicate screens display all of the relevant data for
the eight separate eects processors, allowing the user to adjust all
parameters for the selected eect.
MUTE GRP
The MUTE GRP screen allows for quick assignment and control of the
console’s six mute groups, and oers two separate functions:
Mutes the active screen during the process of assigning channels to
mute groups. This ensures that no channels are accidentally muted
during the assignment process during a live performance.
It oers an additional interface for muting/unmuting the groups
in addition to the dedicated mute group buttons at the bottom of
theconsole.
UTILITY
The UTILITY screen is a supplemental screen designed to work in
conjunction with the other screens that may be in view at any particular
moment. The UTILITY screen is never seen by itself, it always exists in the
context of another screen, and typically brings up copy, paste and library or
customisation functions. For example:
• When you are adjusting the EQ of a channel, pressing the UTILITY
button will oer copying, pasting or loading functionality, or saving of
EQ settings
• Pressing the UTILITY button while editing a channel’s
CONFIG/PREAMP screen will oer copying, saving or loading
preampcongurations
NOTE: Pressing the UTILITY button while holding the channel Select button is a
shortcut to editing the channel’s scribble strip display icon, naming or colour.
• On the ROUTING screen, pressing UTILITY will oer the ability to load
or save dierent presets of routing scenarios
• On the CUES, SCENES, SNIPPETS, PARAM SAFE and CHAN SAFE pages,
pressing UTILITY also oers dierent levels of import/export functions:
• Cues: Utility allows importing or exporting complete Show data,
including all Cues, Scenes, Snippets and Safes to attached USB media.
• Scenes: Utility oers selecting a number of scenes for exporting or
importing on attached USB media.
• Snippets: Utility oers selecting a number of snippets for exporting or
importing on attached USB media.
• Param Safes/Chan Safes: Utility allows setting/resetting the Safe
ags for a complete column of entries at once.
(4) PUSH ENCODERS
These six push encoders are used to adjust the various elements located
directly above them. Each of the six encoders can be pushed inward to
activate a button-press function. This function is useful when controlling
elements that have a dual on/o status that is best controlled by a button, as
opposed to a variable state that is best adjusted by a rotary control.
(5) UP/DOWN/LEFT/RIGHT NAVIGATION CONTROLS
The LEFT and RIGHT controls allow for left-right navigation among the
dierent pages contained within a screen set. A graphical tab display
shows which page you are currently on. On some screens there are
more parameters present than can be adjusted by the six push encoders
underneath. In these cases, use the UP and DOWN buttons to navigate
through any additional layers contained on the screen page. The LEFT
and RIGHT buttons are sometimes used to conrm or cancel conrmation
pop-ups.
Please refer to the MAIN DISPLAY chapter for more information on
thesetopics.
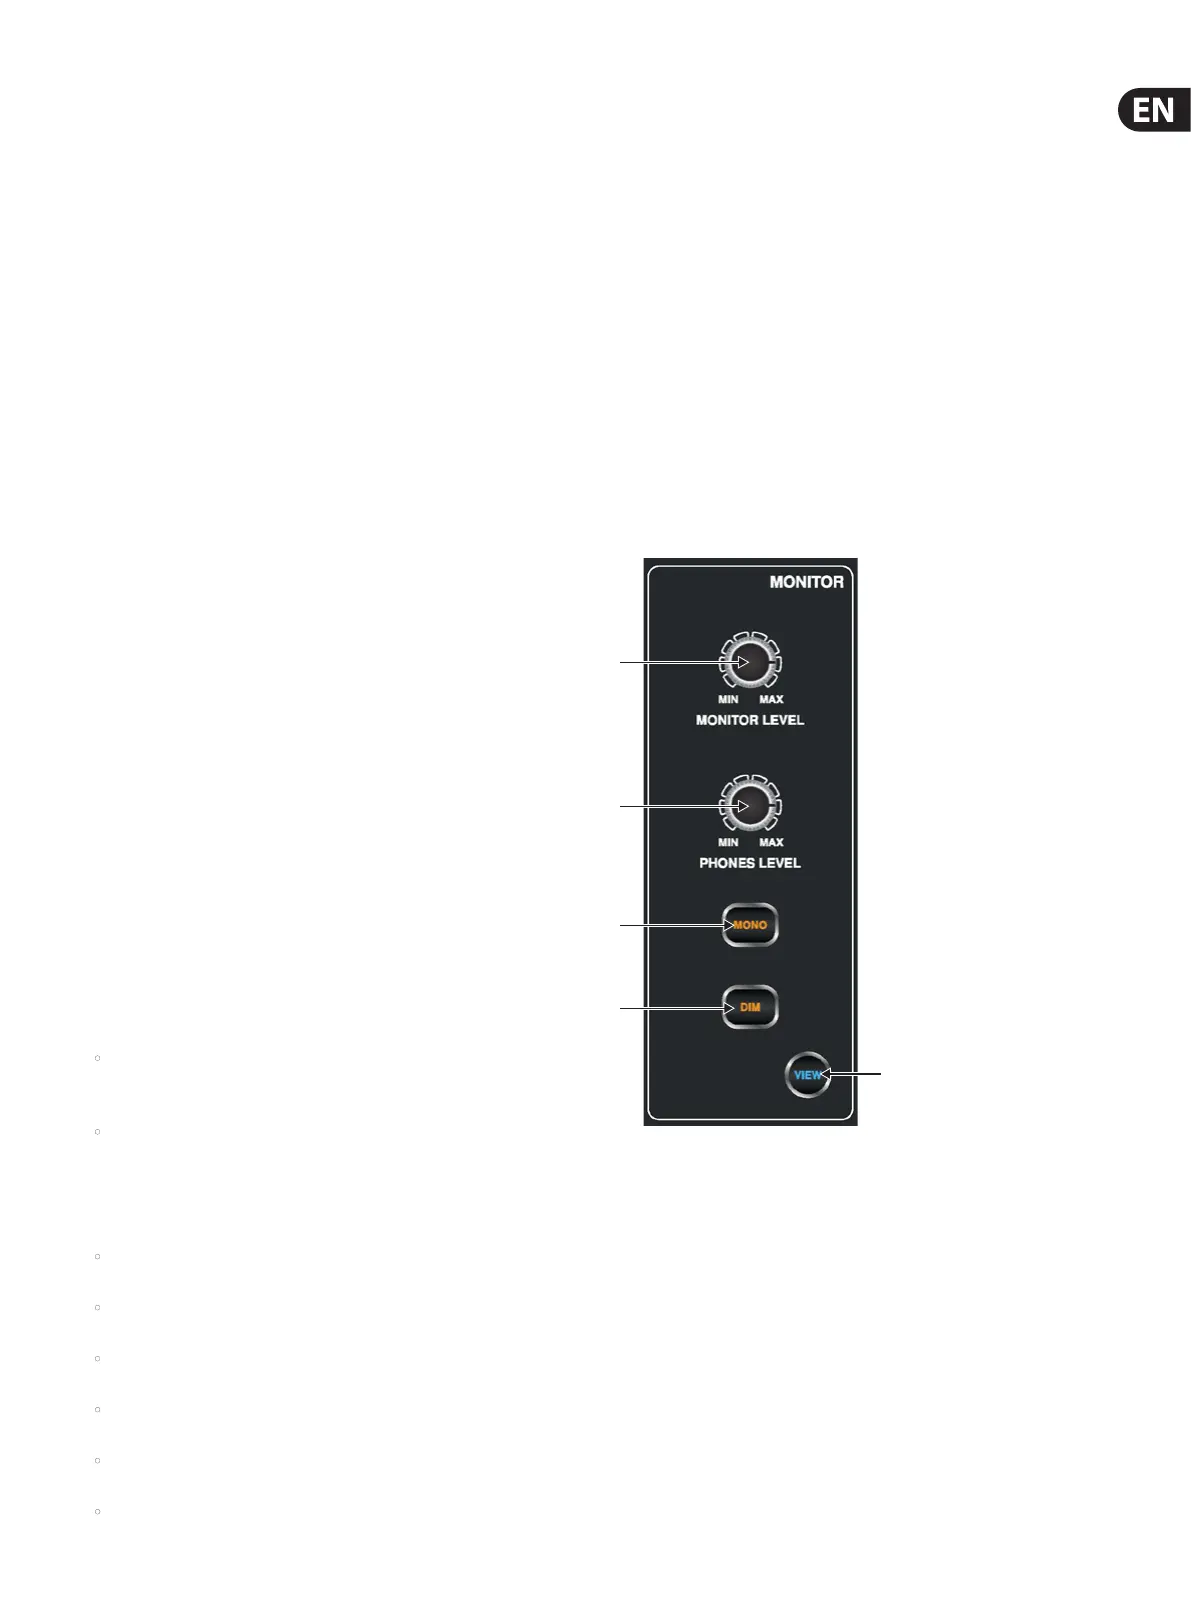
1.11 Monitor
(1) MONITOR LEVEL Rotary Control
Adjust the level of the monitor outputs with the MONITOR LEVEL rotary
control. This will be the output device connected to the sockets in the
MONITOR / CONTROL ROOM OUT section on the rear panel.
(2) PHONES LEVEL Rotary Control
Adjust the level of the signal through the headphones or other output
devices connected via the headphone jack sockets located under the front of
the console.
(3) MONO
Press the MONO button to monitor the audio signal in mono.
(4) DIM
Press the DIM button to reduce the monitor volume by a predened
amount. The amount of attenuation can be dened via the Main Display
when the VIEW button is pressed.
(1)
(2)
(3)
(4)
(5)