This document is a user manual for a Midea Dehumidifier, specifically models MAD22S1AWWT, MAD35S1AWWT, and MAD50PS1AWBL. It provides comprehensive instructions for safe operation, installation, feature usage, water collection, app integration, cleaning, maintenance, and troubleshooting.
Function Description
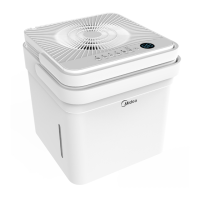
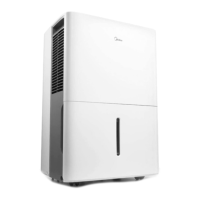
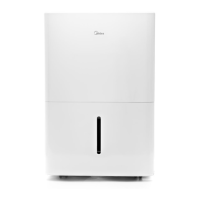
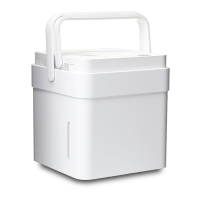
The Midea Dehumidifier is designed to remove excess moisture from indoor air, helping to prevent moisture damage, mold, mildew, and other humidity-related issues. It is intended for indoor residential use and can be particularly effective in basements or other enclosed areas. The unit operates by drawing in humid air, passing it over cooling coils to condense the moisture, and then releasing drier air back into the room.
Usage Features
The dehumidifier offers various operating modes and controls to customize its performance:
- Power On/Off: A simple button press turns the unit on or off.
- Wireless Connectivity: The unit supports wireless connection via the Midea SmartHome app, allowing for remote control and monitoring. This feature is initiated by pressing and holding the power button for 3 seconds, which activates "AP" mode for wireless connection setup.
- Timer Function: Users can set an Auto Start or Auto Stop time for the dehumidifier. The timer can be adjusted in 0.5-hour increments up to 10 hours, and then in 1-hour increments up to 24 hours.
- Operating Modes: The dehumidifier offers several modes:
- Set Dehumidifying Mode (Set): This mode allows manual adjustment of the desired humidity level between 35% and 85% Relative Humidity (RH), with 5% increments. The display shows the set humidity, and then the ambient humidity after 5 seconds.
- Continuous Dehumidifying Mode (Cont.): In this mode, the dehumidifier operates continuously to remove moisture without a specific humidity target. Humidity cannot be adjusted in this mode.
- Comfort Dehumidifying Mode (Comfort) - optional: The unit automatically controls room humidity to maintain a comfortable range of 45%-55% RH, based on room temperature. Humidity cannot be adjusted in this mode.
- Dryer Mode (Dryer) - optional: This mode is designed to help dry clothes. The unit filters out moisture and blows warmer air into the room at a higher fan speed. It operates in Continuous dehumidifying and High fan speed mode. For some models, this mode may automatically quit after a maximum of 10 hours.
- Fan Speed Control: Users can select between High and Low fan speeds. An indicator light illuminates to show the current fan speed setting.
- Display: The LED display shows ambient humidity, set humidity, set time (when the timer is active), and error codes.
- Pump Function (only for pump models): A dedicated button activates the built-in pump, which automatically drains collected water until the tank is empty. The pump mode indicator will be on when active.
- Auto Shut Off: The dehumidifier automatically shuts off when the water bucket is full or incorrectly positioned. For some models, the fan motor may continue to run for 30 seconds after shut-off. After the bucket is emptied and reinstalled, the unit will resume operation after a 3-minute delay to protect the system.
- Check Filter Feature: The unit tracks fan motor operation time. After 250 hours, a check filter light illuminates, reminding the user to clean the filter. Pressing and holding the FAN (reset filter) button for 3 seconds turns off the light.
- Auto-Restart: In case of unexpected power loss, the unit will automatically restart with its previous settings once power is restored.
- Water Collection and Drainage:
- Bucket Drainage: Collected water accumulates in a removable bucket. When full, the unit stops operation (or the compressor and fan turn off if running) and displays "P2" or illuminates the Full indicator light. The bucket can be pulled out halfway, lifted by its handle, emptied, and then reinstalled.
- Water Hose Drainage (Continuous): For continuous operation without emptying the bucket, a water hose (not included) can be attached to the drain outlet. The hose directs water to a floor drain or other suitable drainage facility. It's crucial to ensure the hose is secure, level or downward sloping, and free of kinks.
- Pump Drainage (only for pump models): This feature allows the unit to automatically pump water out through a drain hose (included with pump models) to a desired location, such as a floor drain, water container, or outside through a basement window. The maximum distance and rise for the pump hose is 5 meters.
Maintenance Features
Regular cleaning and maintenance are essential for optimal performance and longevity of the dehumidifier:
- Grill and Case Cleaning: The exterior can be cleaned with water and a mild detergent. Avoid bleach or abrasives, and do not splash water directly onto the unit. The air intake and outlet grilles should be cleaned with a vacuum attachment or brush.
- Bucket Cleaning: The water bucket should be cleaned every few weeks to prevent mold, mildew, and bacteria growth. This involves partially filling it with clean water, adding a mild detergent, swishing, emptying, and rinsing. The bucket is not dishwasher safe.
- Air Filter Cleaning: The air filter should be cleaned every two weeks under normal operating conditions. To clean, pull the filter outwards, wash it with clean water, dry it, and then re-install it. Operating the dehumidifier without a filter can clog the unit and reduce performance.
- Pump Filter Cleaning (for pump models): The pump filter should be cleaned every two weeks. This involves removing the side access tank, taking off the bucket top cover, removing a screw, and then taking out the pump drainage structure to clean the filter at the button of the hose. After cleaning, reinstall the filter and pump drainage structure into the side access tank.
- Long-Term Storage: When not in use for extended periods, the unit should be prepared for storage:
- Remove water from the bucket.
- Remove the water plug to drain any excess water, then re-insert the plug.
- Clean the grille, case, air filter, and bucket.
- Ensure the water tray is dry.
- Wrap the power cord with its buckle.
- Restore the bucket and place the unit upright.
- Cover the unit with a plastic bag.
- Store the unit upright in a dry, well-ventilated place.