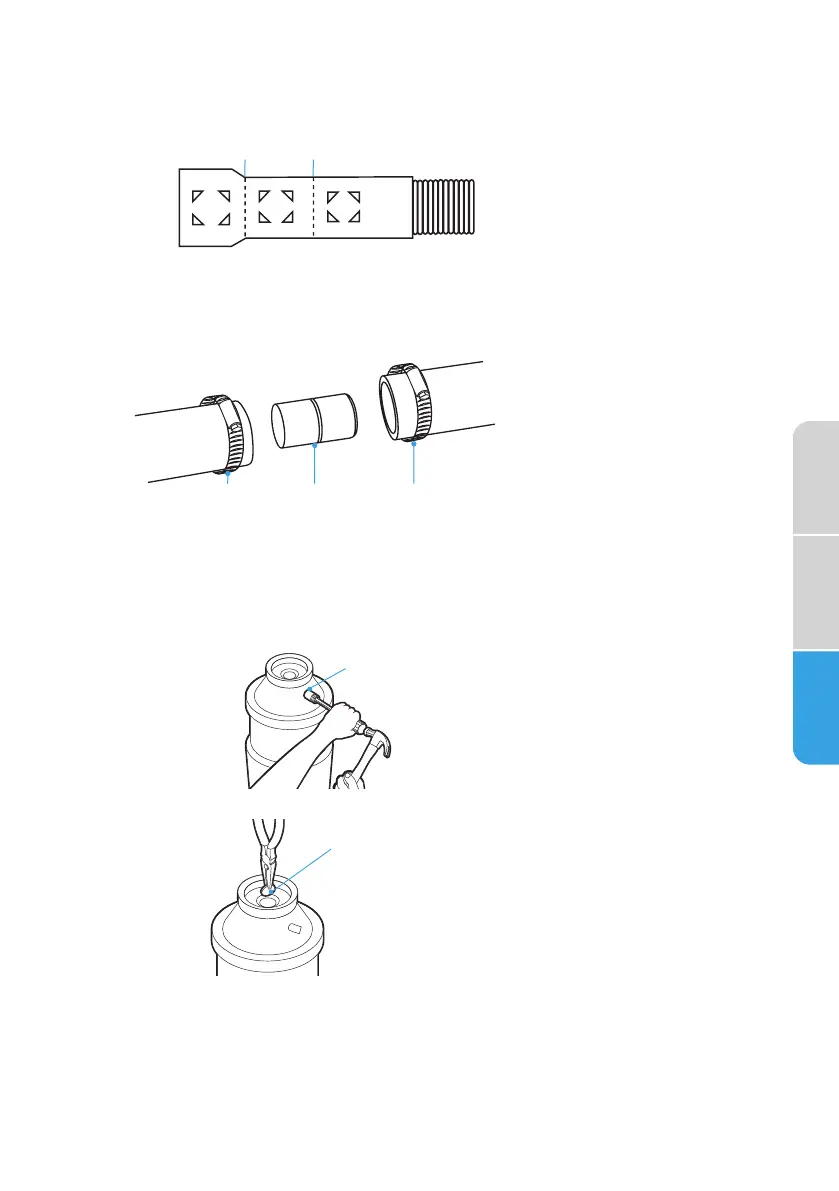
2. The molded end of the drain hose will fit
" (1.6 cm),
" (1.9 cm) or 1"
(2.5 cm) diameter connections on an air gap, waste tee or disposal. Cut
on the marked line as required for your installation.
1"
3/4"
5/8"
1”
(2.5 cm)
3
/
4
”
(1.9 cm)
5
/
8
”
(1.6 cm)
a a
a
Cutting
Lines
NOTE: Use
" or
" inside diamet
er hose and a c
oupler t
o connect the
two hose ends. Secure the connection with hose clamps if an extension
is required.
ab a
a Hose Clamp
b
Coupler
3. Secure the drain hose to the air gap, waste tee or garbage disposal
with clamps.
Option 1 – (Garbage Disposal - With Air Gap):
1. Remove the knockout drain plug from the disposal inlet. Using a
screwdriver and hammer, firmly tap the plug. he plug will separate
and fall into the disposal.
a
a Disposal Inlet
2. R
emo
v
e the drain plug from the disposal.
a
a
Disposal Drain Plug
IMPORTANT: If you need to cut the drain hose to fit the diame er of
the connection, cut only the rubber end of the hose, as shown earlier in
this section (do not cut into the ridged section).
3. Using a screw-type clamp*, attach the drain hose to the air gap. Cut
the rubber end of the hose, as needed.
Safety
Precautions
Installation
Requirements
Installation
Instructions
27
 Loading...