Service Manual, 2016-12
26 / 46
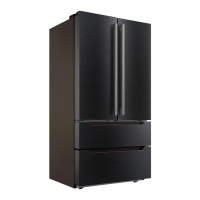
1. Remove the screws
1) Two screws outside
2) One screw inside
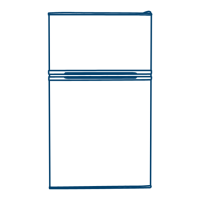
2. Remove the clipping strip
Slowly pull it out
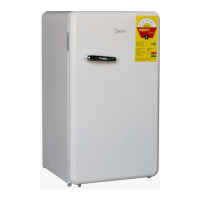
3. Remove the protective cover
1)Pry the protective cover slowly from the upper part,
2)Pull it out and remove it.
4. Remove the starter and protector
Unplug the starter and protector (you can use a
screwdriver to pry it slowly)
5. The reverse process can complete installation.
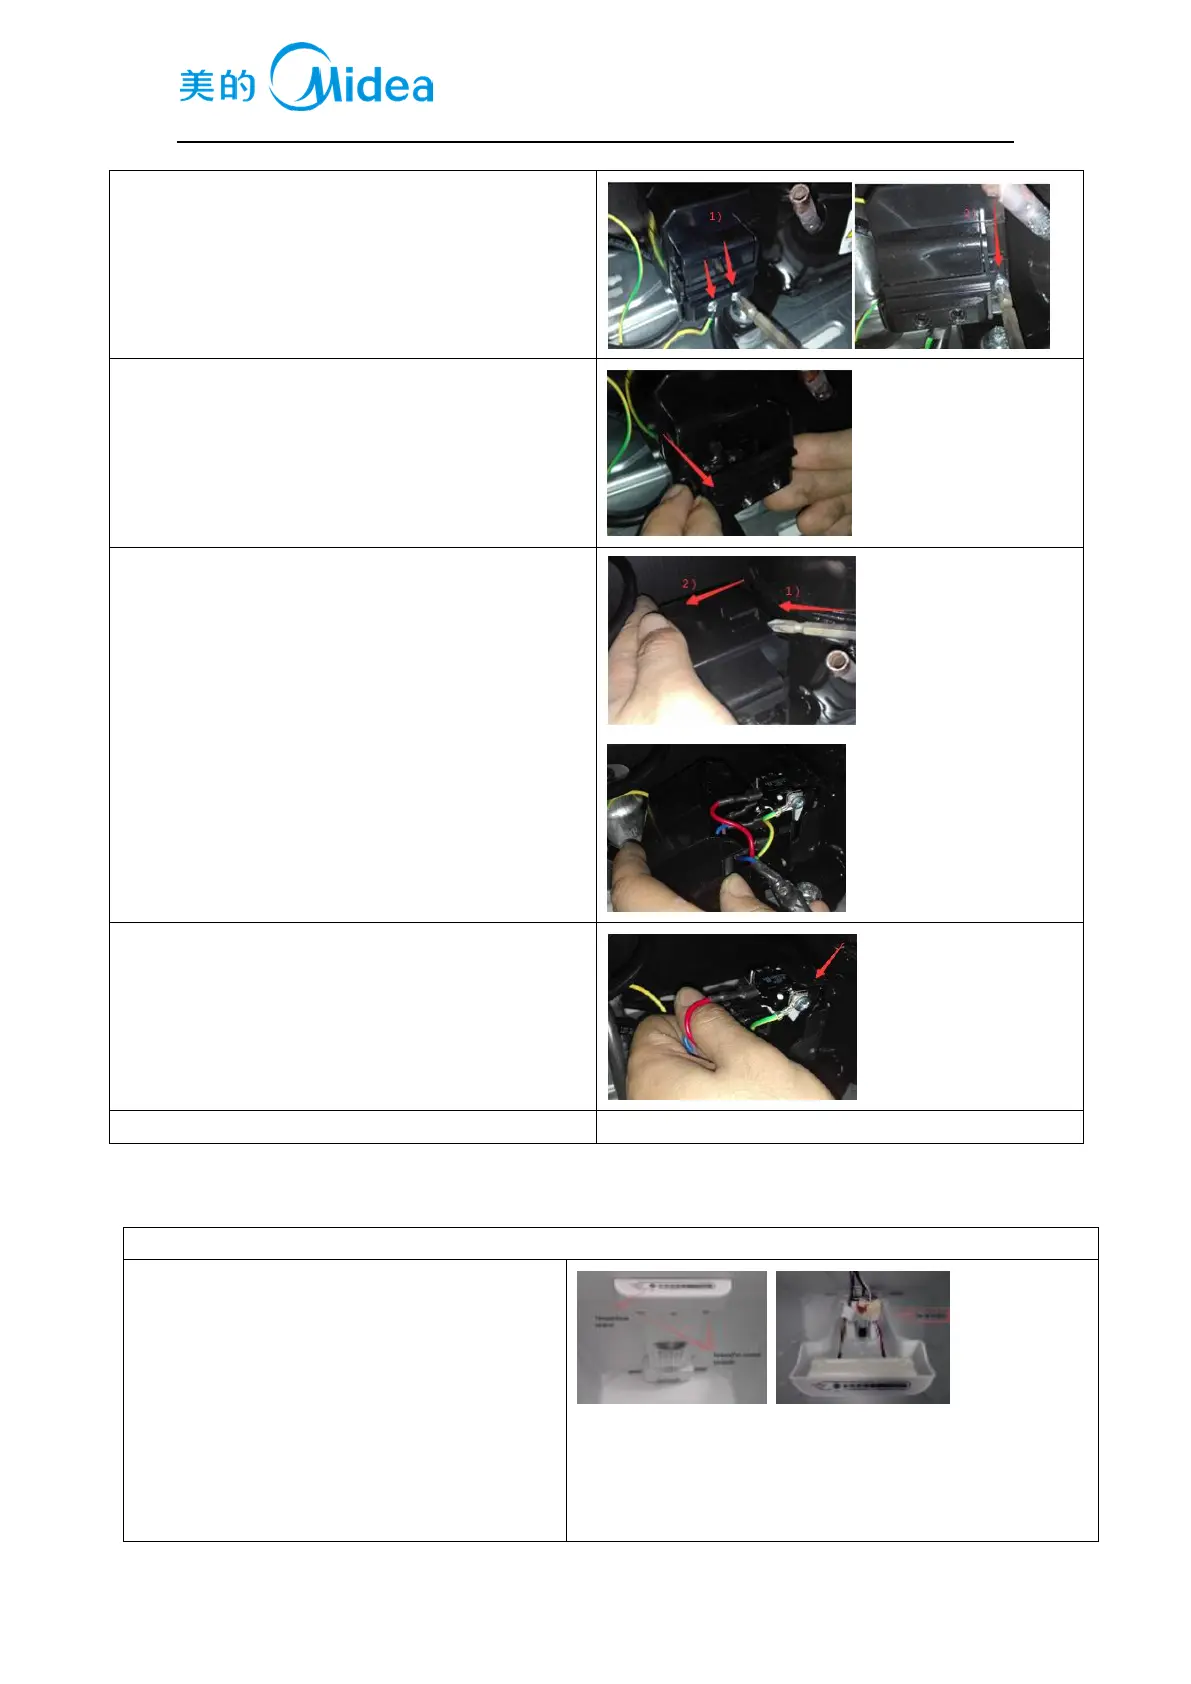
8.7Display and main control panel
1) Remove two screws from the refrigerating
air duct with a cross screwdriver;
2) Pull all connector terminals out of the
refrigerating air duct to remove its
components;
3) Uncover the temperature control indication
sticker on the cover plate of the air duct;
4) Gently pry out the PCB installation box
with a straight screwdriver to get the