4
EN
Description of the MAGNETIC mounting kit
The Midland BT Rush can be fixed onto the helmet, installing the Ma-
gnetic mounting kit in two dierent ways: By either using the plate with
Adhesive strip, or the Clip Clamp. These methods allow you to safely “fix”
the BT Rush unit onto your helmet and to remove it at any time in order
to recharge or store it.
Plate with Adhesive strip
The Adhesive plate is already assembled on the Magnetic mounting kit.
Clean the application area on the left side of the helmet surface, fold the
two little wings to better stick to the curved surface of the helmet, remove
the bi-adhesive film and place the fixing plate on the helmet by keeping it
contact with the surface for 10 seconds.
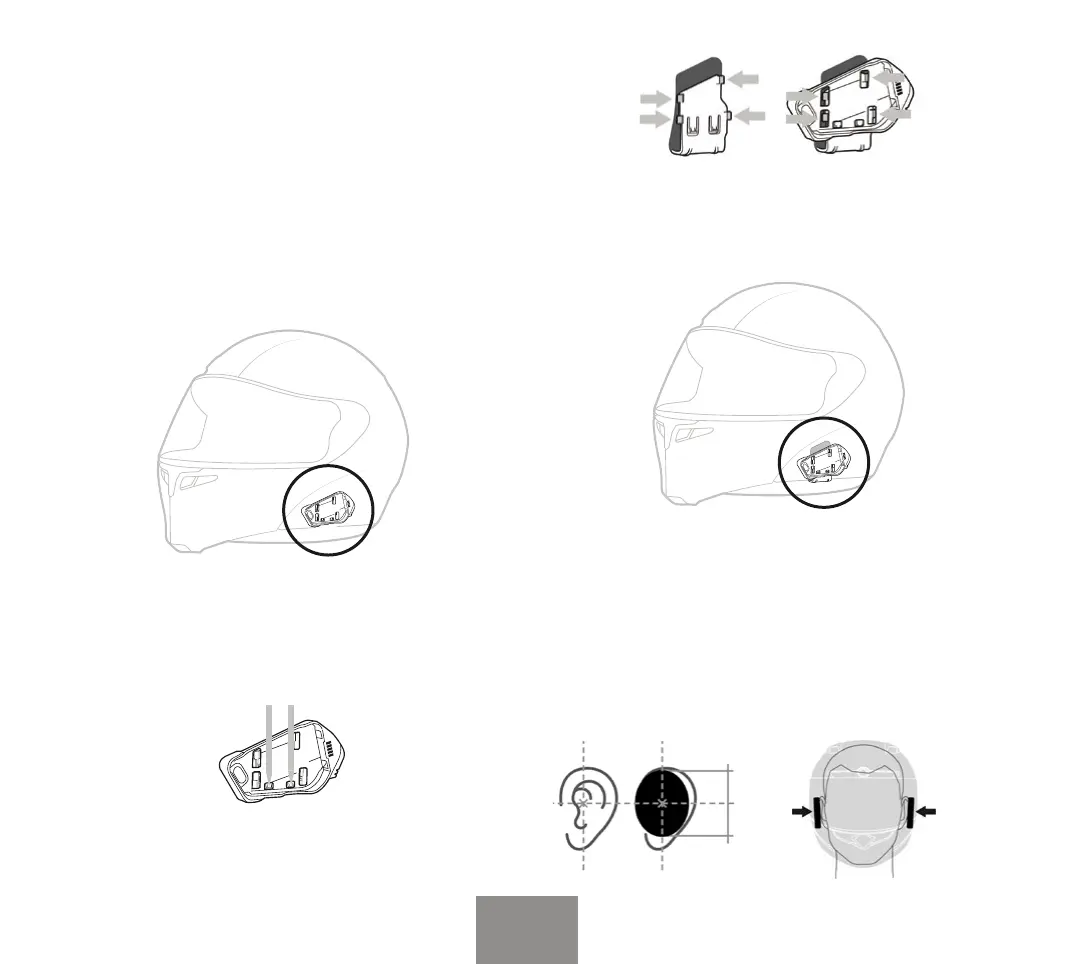
How to change the mounting kit system.
Remove the Adhesive plate from the Magnetic mount by pressing the
two levers (with a small tool) and slide it out upward.
Clip Clamp
Place the clip clamp on the back of the Magnetic mount, insert the 4
fixing point in the appropriate holes and slide downward.
Insert the Clip Clamp between the helmet and the inner padding on
the left side of the helmet.
Speakers
The speakers’ positioning is the most important point of the installation
procedure.
Attention: for the best sound clarity it is very important to place the speakers
in correspondance with the centre of your ears and as close as possible (the
speakers must almost touch your ears). In case of need, use the supplied spa-
cers to better fit the speakers closer to your ears. The recesses of the speakers
designed into the helmets are not always placed in the best location for you.
Please be sure to fix speakers properly.