© Midmark Corporation 2020
English - 30
TP202 20-42-FO-00014 Rev A1 C2169
003-1879-99
Midmark Low-Speed Handpiece
Cleaning/Maintenance continued...
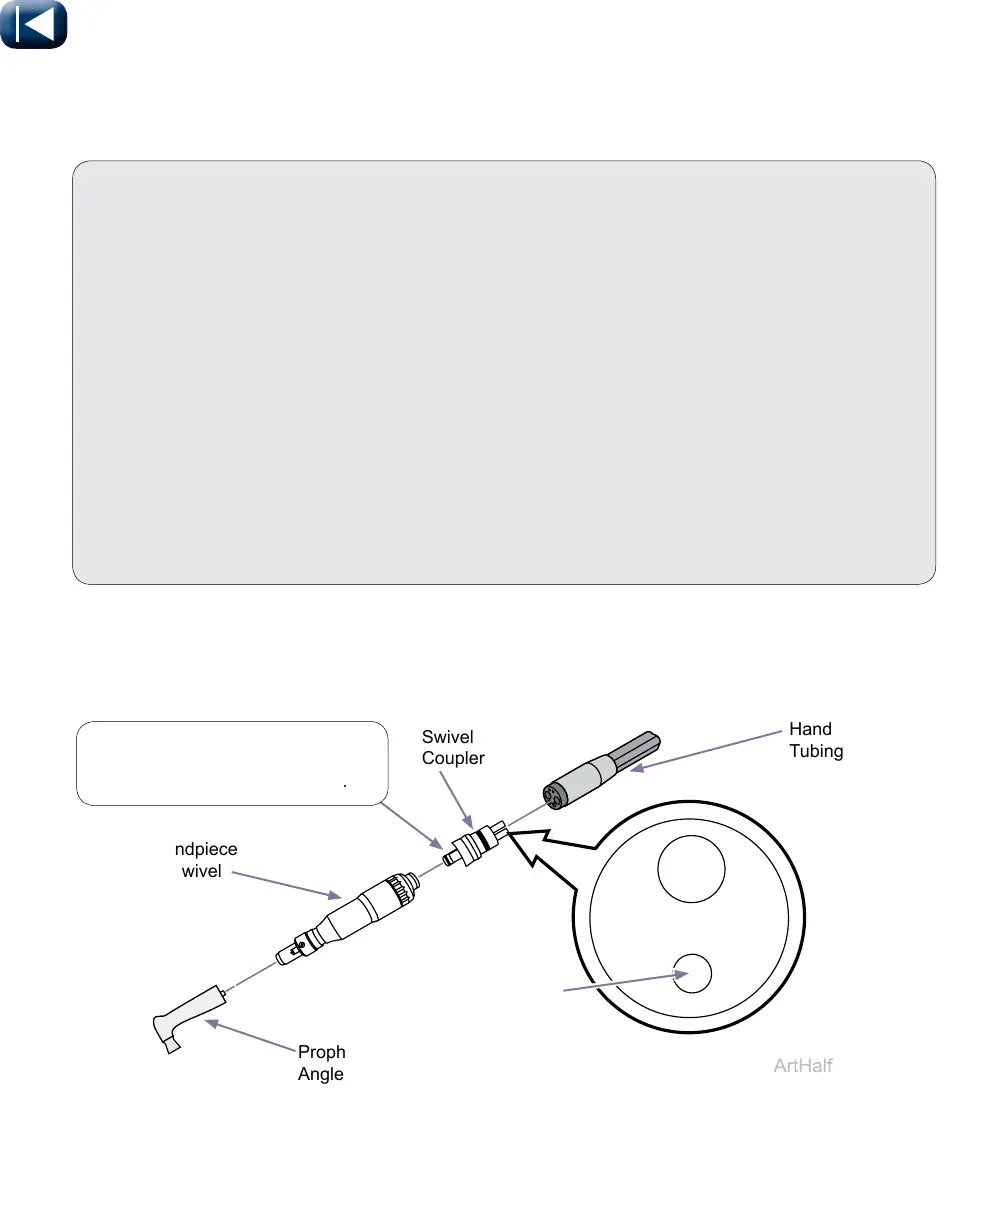
Swivel Coupler Installation and Maintenance Instructions
(only for 002-1277-00 Low-Speed w/Swivel 0-5,000 rpm)
• To attach the swivel coupler to the dental delivery tubing, grasp the swivel coupler by the “stem”
sticking out of the front of the swivel coupler, align the drive air and exhaust tubes with the correct
outlets in the delivery tube receptacle and thread the tubing nut onto the swivel coupler. Hand
tighten the delivery tubing nut onto the swivel coupler body.
• To attach the swivel coupler to the motor, pull back on the release collar and insert the swivel firmly
into the motor connector. Release the collar. Assure that the collar returns to its normal position
and is up against the motor body. There must not be a gap between the motor and the release
collar.
• To remove the motor from the swivel coupler, pull back on the release collar until the swivel pulls
out of the motor connector.
• The swivel coupler o-rings and the motor swivel ring should be lubricated daily with handpiece
conditioner. For the motor swivel ring, the lubricant should be applied to the joint between the
swivel ring and the motor. Detach handpiece / motor from the swivel coupler at the end of each day
and prior to other extended periods of non-use.
• The swivel coupler can be sterilized in a bag at the same temperatures as the other Midmark
Low-Speed components. Allow to cool down after sterilization and prior to use.
To install or remove swivel coupler
hold onto stem of swivel coupler
firmly while attaching it to tubing.
Swivel
Coupler
Handpiece
w/Swivel
Handpiece
Tubing
Prophy
Angle
Drive Air Port -
Apply Cleaner/
Conditioner Here