OM-223 586 Page 41
. The illustration shows remote control
connected through the wire feeder.
The wire feeder is not connected to the
power source output..
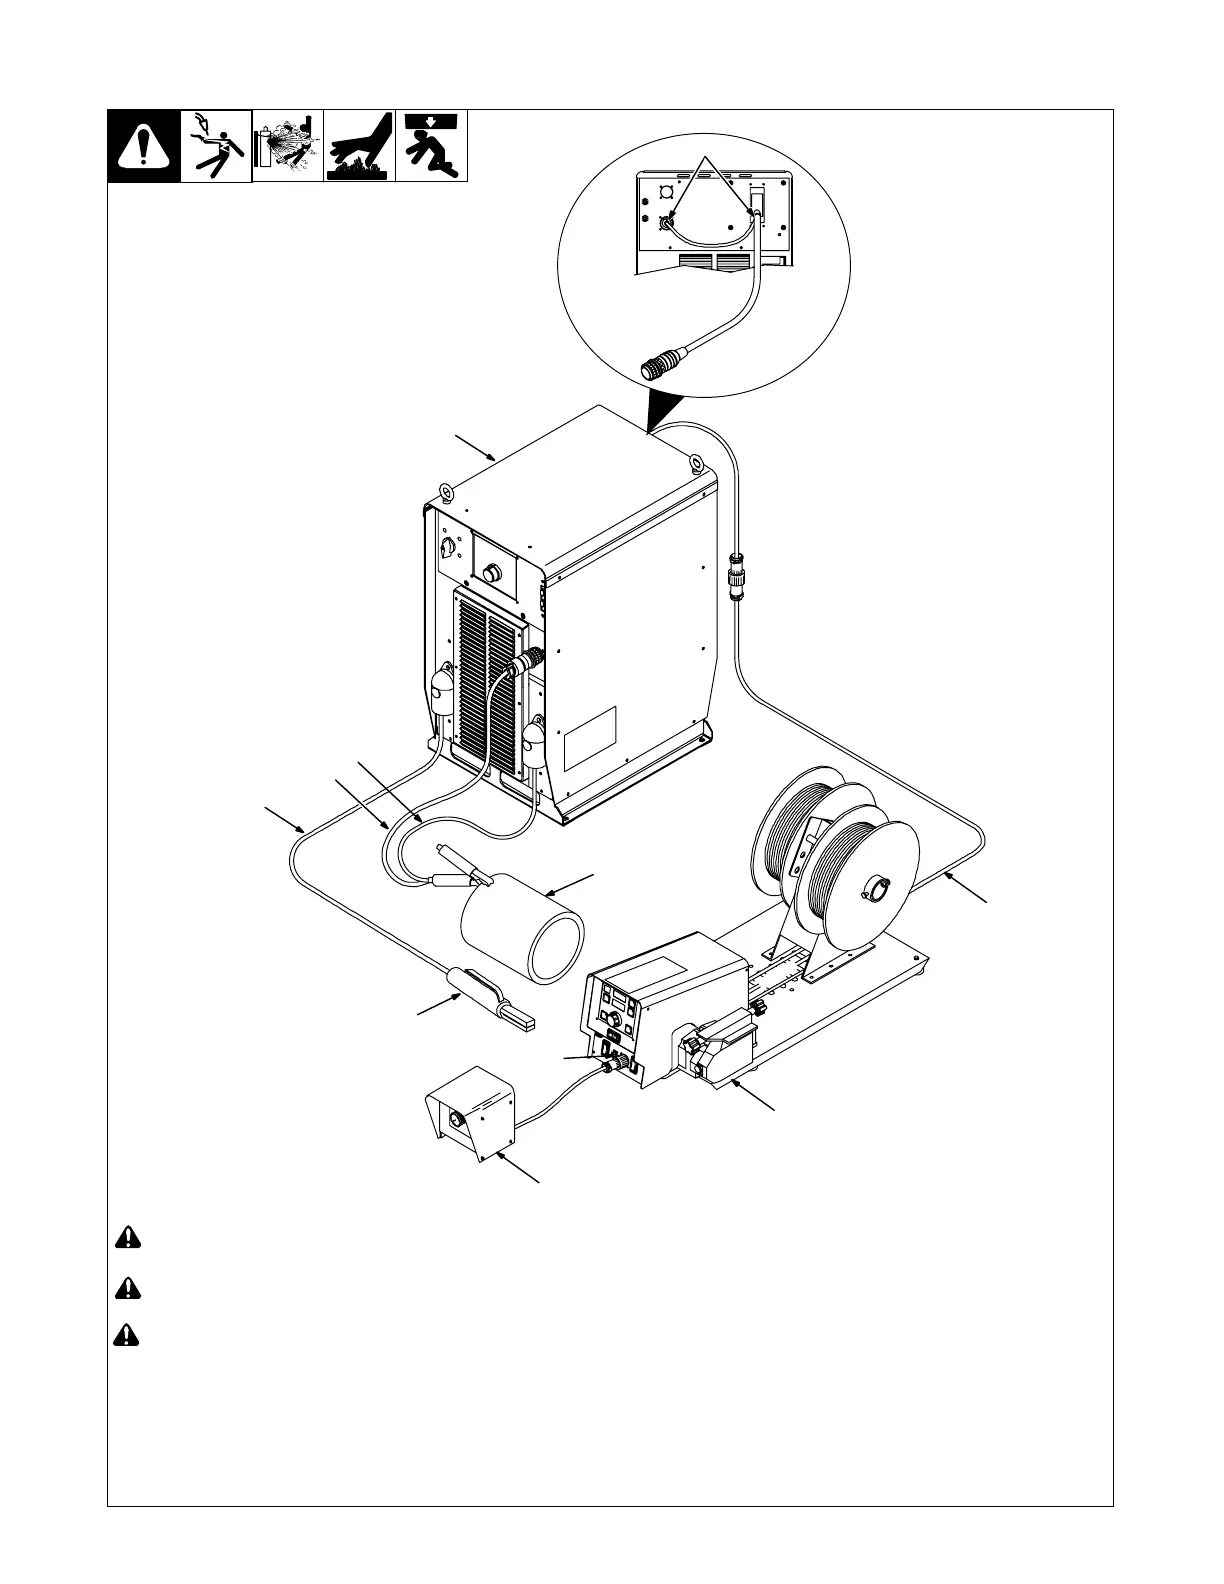
5-12. Typical Connection Diagram For Stick (SMAW) Equipment Using A DX Feeder
804 780-B
9
8
10
1
5
4
6
7
11
2
3
! Do not mount feeder on top of pow-
er source.
! Do not put feeder where welding
wire hits cylinder.
! Do not move or operate equipment
when it could tip.
1 Welding Power Source
2 Interconnect Cable
Connect 14-pin socket into remote foot
control cable or optional extension cable.
Connect 72-pin connector to I/O receptacle
RC72 on rear of power source. Connect
10-pin connector into receptacle RC8 on
rear of power source.
. Attach volt sense lead to work clamp
and attach work clamp as close to arc
as possible.
3 Volt Sense Cable
4 Negative (−) Weld Cable
5 Positive (+) Weld Cable
6 Workpiece
7 Electrode Holder
8 Hand Control
9 Wire Feeder
Turn off welding power source before
connecting to wire feeder 14-pin plug.
. Extension cable maximum length not
to exceed 150 ft (46 m).
10 Extension Cable (Optional)
11 Remote Switch To STICK/TIG





 To Next Page