TM-273245 Page 12
S-74 MPa Plus
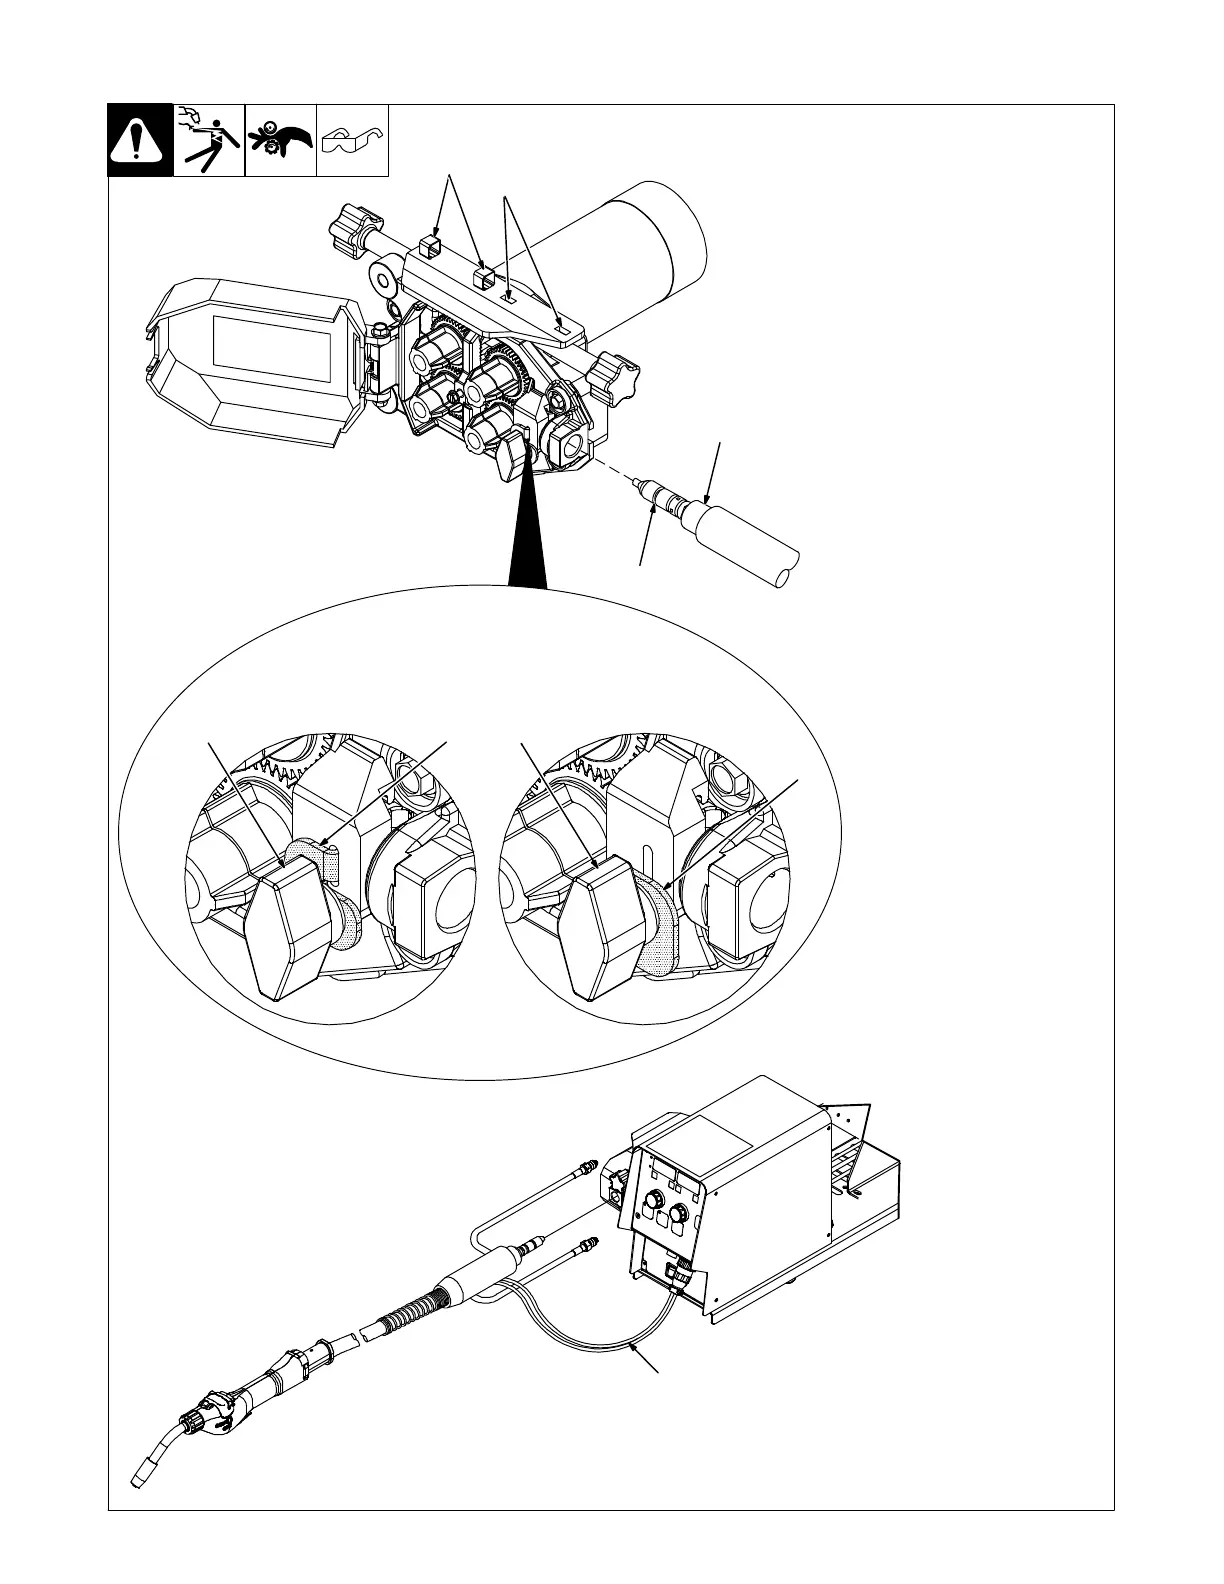
4-6. Installing Welding Gun
245985-B / Ref. 246040-C
1 Power Clamp Knob
2 Gun Locking Tab
3 Power Pin Groove
4 Gun Connection End
Installing gun with Accu-Mate
connection
Loosen power clamp knob to allow
power pin of gun to clear the gun
locking tab.
Push power pin into power clamp
as far as possible to align the
groove in the power pin of the gun
with the gun locking tab.
Secure gun by tightening power
clamp knob.
Installing gun without Accu-
Mate connection
When using a gun without the
groove in the power pin, loosen
power clamp knob and rotate gun
locking tab 180 degrees. This pre-
vents the locking tab from extend-
ing into the power pin gun connec-
tion.
Push power pin into power clamp
as far as possible.
Secure gun by tightening power
clamp knob.
5 Gun Control Cable
Insert plug into Gun Control
receptacle, and tighten threaded
collar.
6 Pressure Blocking Clip
7 Empty Pressure Slots
Installing A Push/Pull Gun
When using a push/pull gun, leave
pressure blocking clips in position.
Do not adjust pressure as shown in
Section 4-7.
Installing A Push Only Gun
When using a push only gun, re-
move the blocking clips and place
them in the empty pressure slots for
storage and adjust pressure as
shown in Section 4-7.
3
Installing gun with
Accu-Mate connection
Installing gun without
Accu-Mate connection
4
2
2
1
1
5
6
7
 Loading...