16 - 34 Operator’s Manual
16 Probes and Biopsy
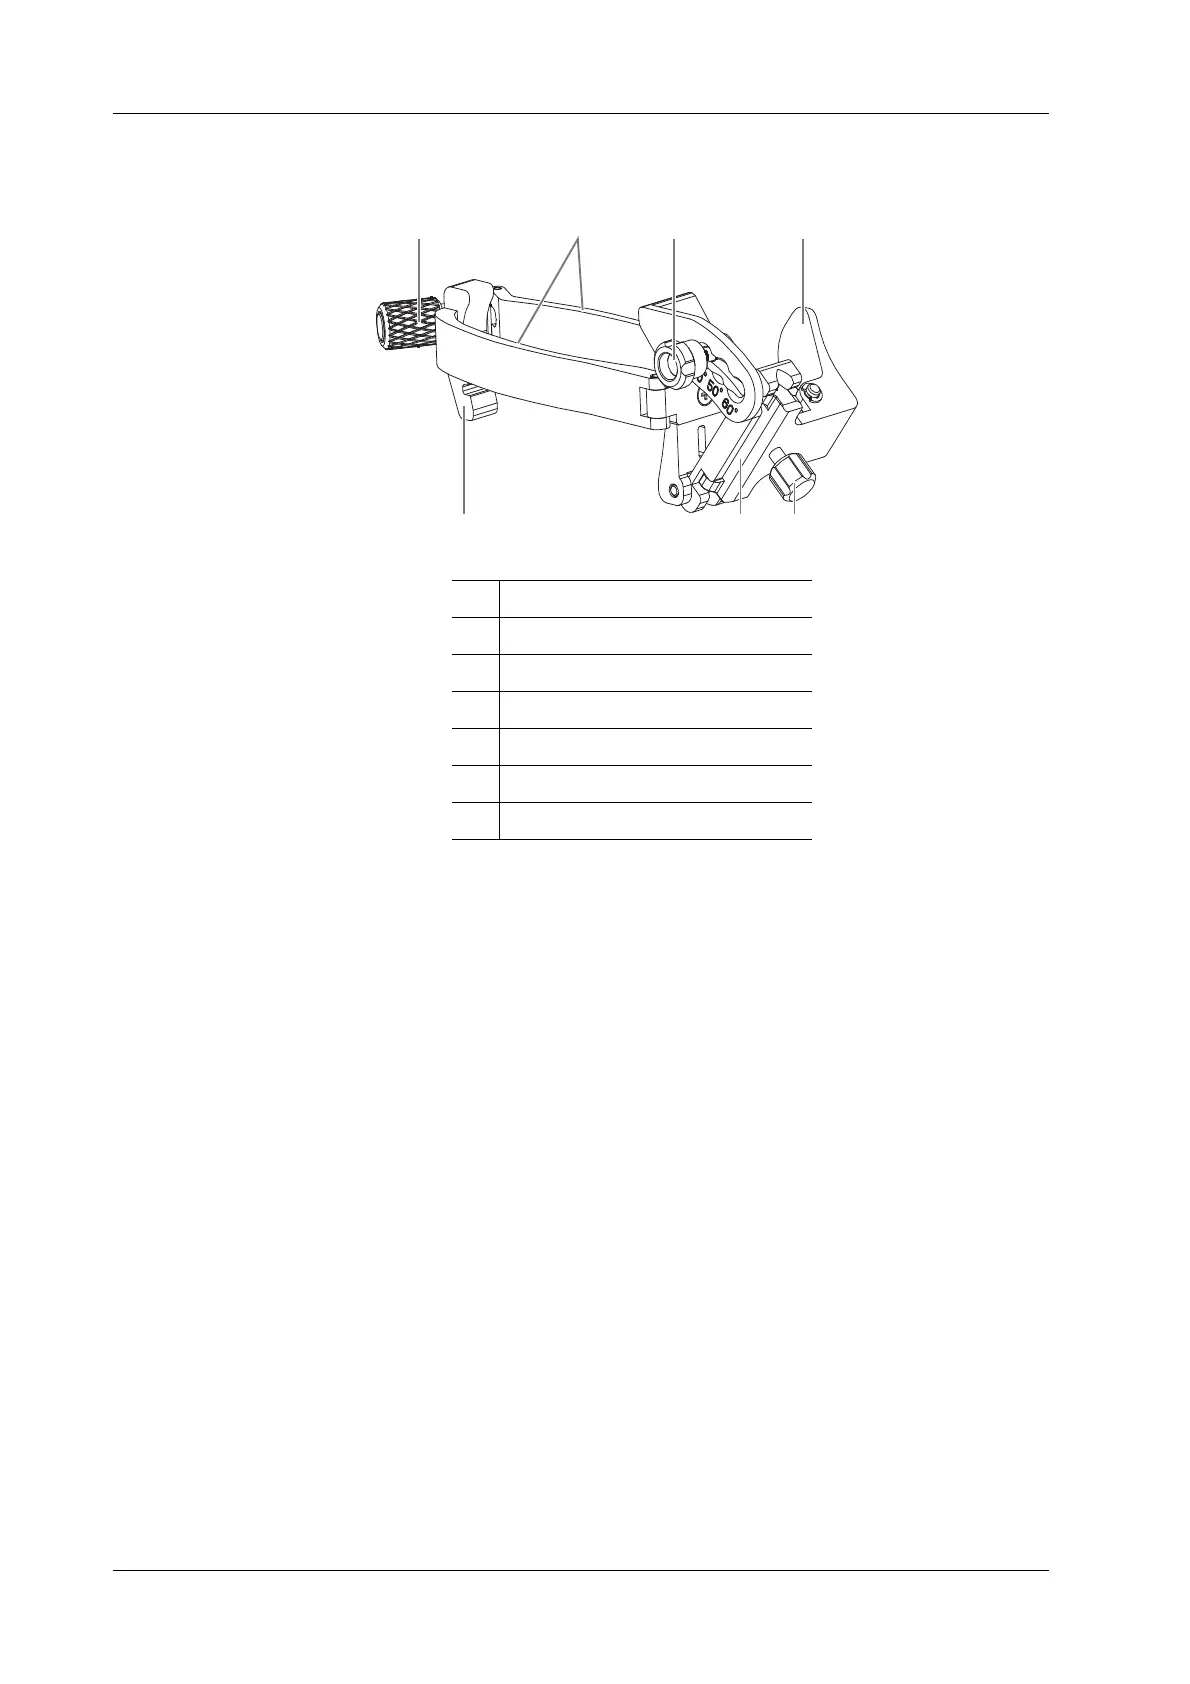
NGB-053 Metal-needle detachable needle-guided bracket
Perform the following procedure:
1. Install the needle-guided bracket:
a. Put on the sterile probe sheath.
b. Hold the probe in one hand, select the correct needle-guided bracket and hold it with the
other hand. Match the grooves of the needle-guided bracket to the tabs of the probe.
c. Mount the bracket onto the probe, and rotate the pinch nut to fix the bracket.
2. Adjust the needle angle to the proper shift as required:
a. Loosen the angle pinch nut.
b. Adjust the angle block to the desired level.
c. Tighten the angle pinch nut.
3. Insert the biopsy needle:
a. Hold the probe. Press the separation pressure position to separate needle guided V-shaped
block from pressure position of the needle.
b. Put the needle into the needle guided-bracket, and the needle leans to V-shaped block.
c. Hold the probe, and release the pressure position of the needle. Adjust the needle-type
adjusting nut manually. The needle moves smoothly at the vertical direction due to its
gravity.
4. Release the needle from the bracket:
a. Hold the probe. Press the biopsy needle to separate the needle from pressure position of
the needle.
b. Separate the bracket and the probe from the needle.
1 Clamp pinch nut
2Clamps
3 Angle pinch nut
4 Separation pressure position
5 Needle type adjusting nut
6 Needle guide hole
7 The location position block