Image Optimization 5-3
For details about menu operation of measurements, please refer to the [Advanced Volume].
Control Panel
Adjust through trackball, deflector rod, or knob.
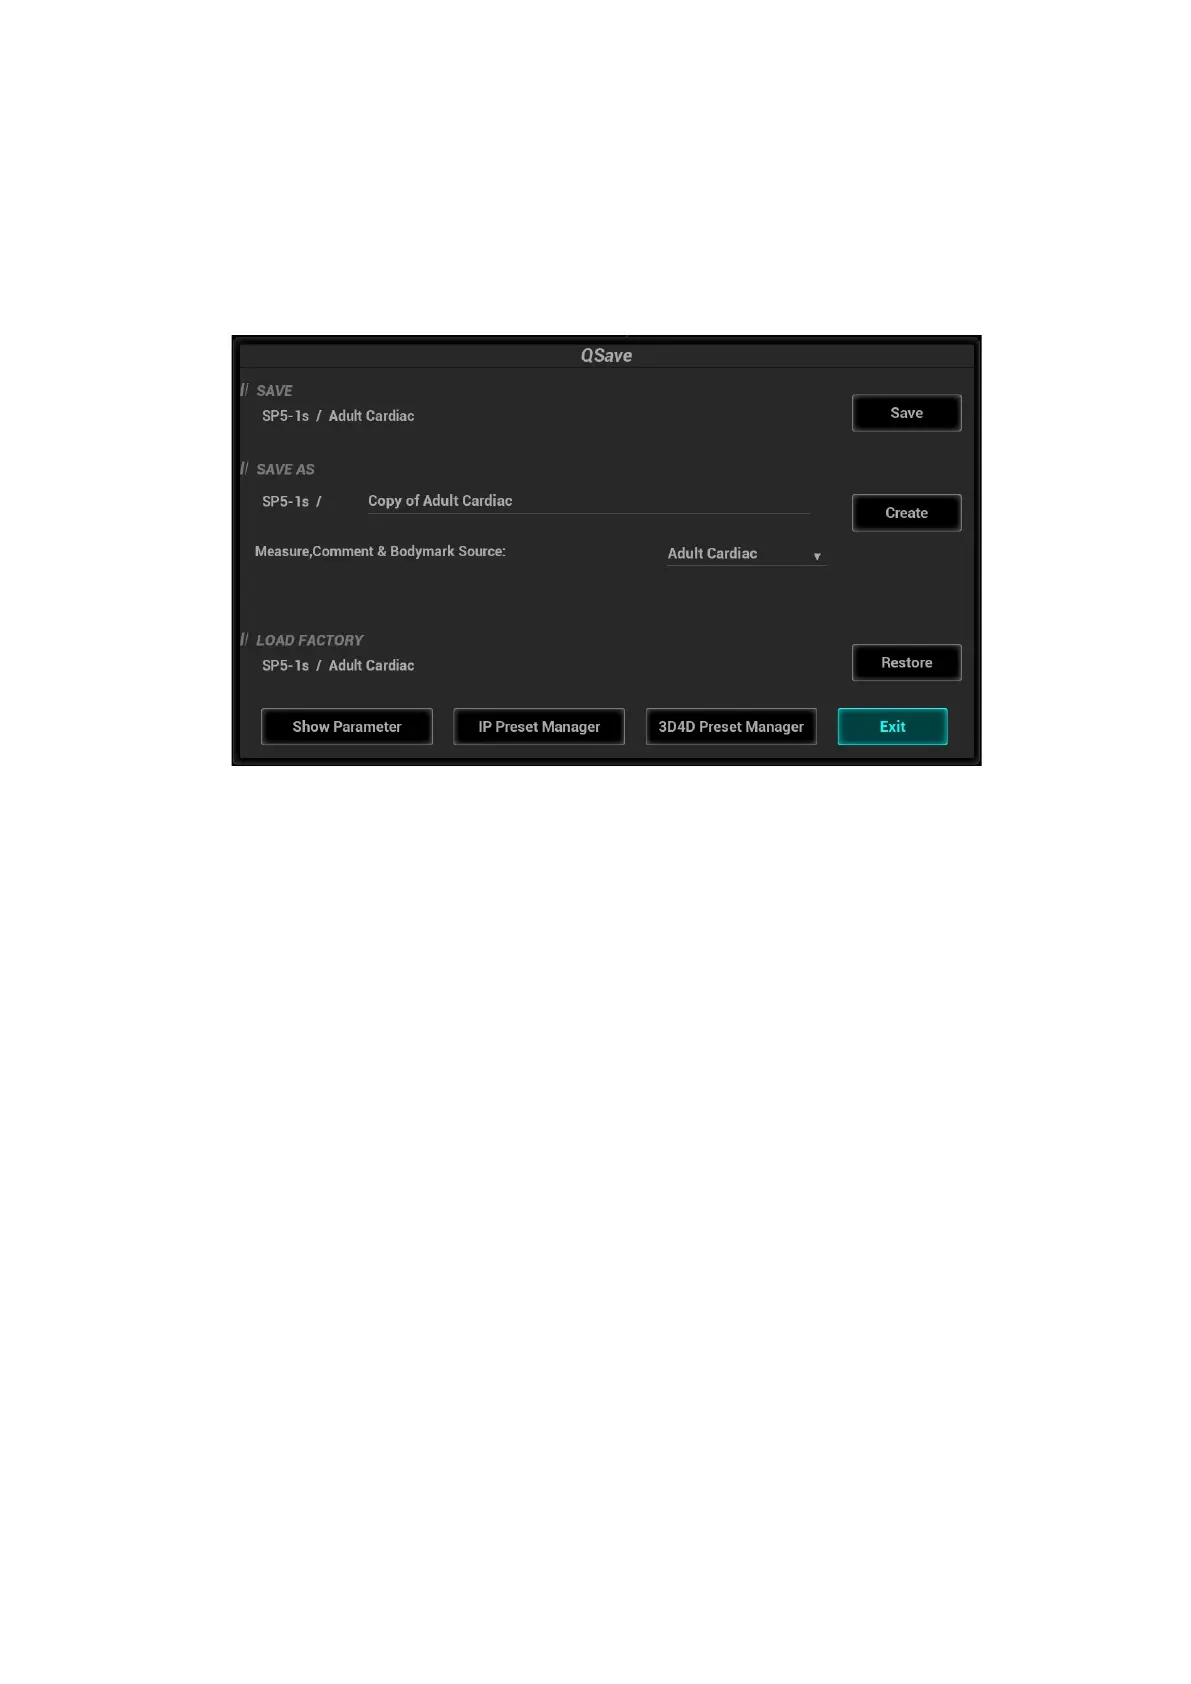
5.1.3 Quickly Saving Image Settings
Tap [QSave] on the probe and exam mode selection page, press <F7> or the user-defined key to
QSave to enter the page.
To save image parameters:
Click [Save] to save the current image values for the current exam mode of the certain probe.
New Exam
Click [Create] to save the current image parameters, measurements, comments, body mark
settings to the exam mode. The system will ask for a new name of the exam.
Restore the factory default settings:
Click [Restore] to restore the probe and exam mode to factory settings.
View image parameter
Click [Show Parameter] to view the image parameter of the current exam mode and the probe.
Click [Advanced]. The value to TIC/TIB/TIS can be set.
Click [Advanced], and then enable the M-mark line. The M-mark line always appears after
being set when entering PW/M/TVM mode for once. Press <PW>/<M>to enter the
corresponding mode one time.
Click [Advanced], and then enable “High Frame Rate STE” (it is an option) to improve the
image effect.
IP Preset Manager
Click [IP Preset Manager] to save, create, restore, or delete the IP.
3D4D Preset Manager
Click [3D4D Preset Manager].
Level: displays the scenario and subpreset item of the currently activated probe and exam mode.
The scenario and subpreset item can be renamed or restored to factory settings.
Scenario and Subpreset: the item can be deleted, added, and set to default active item, and the
position can be adjusted.