2-25 Options
2 Robot arm
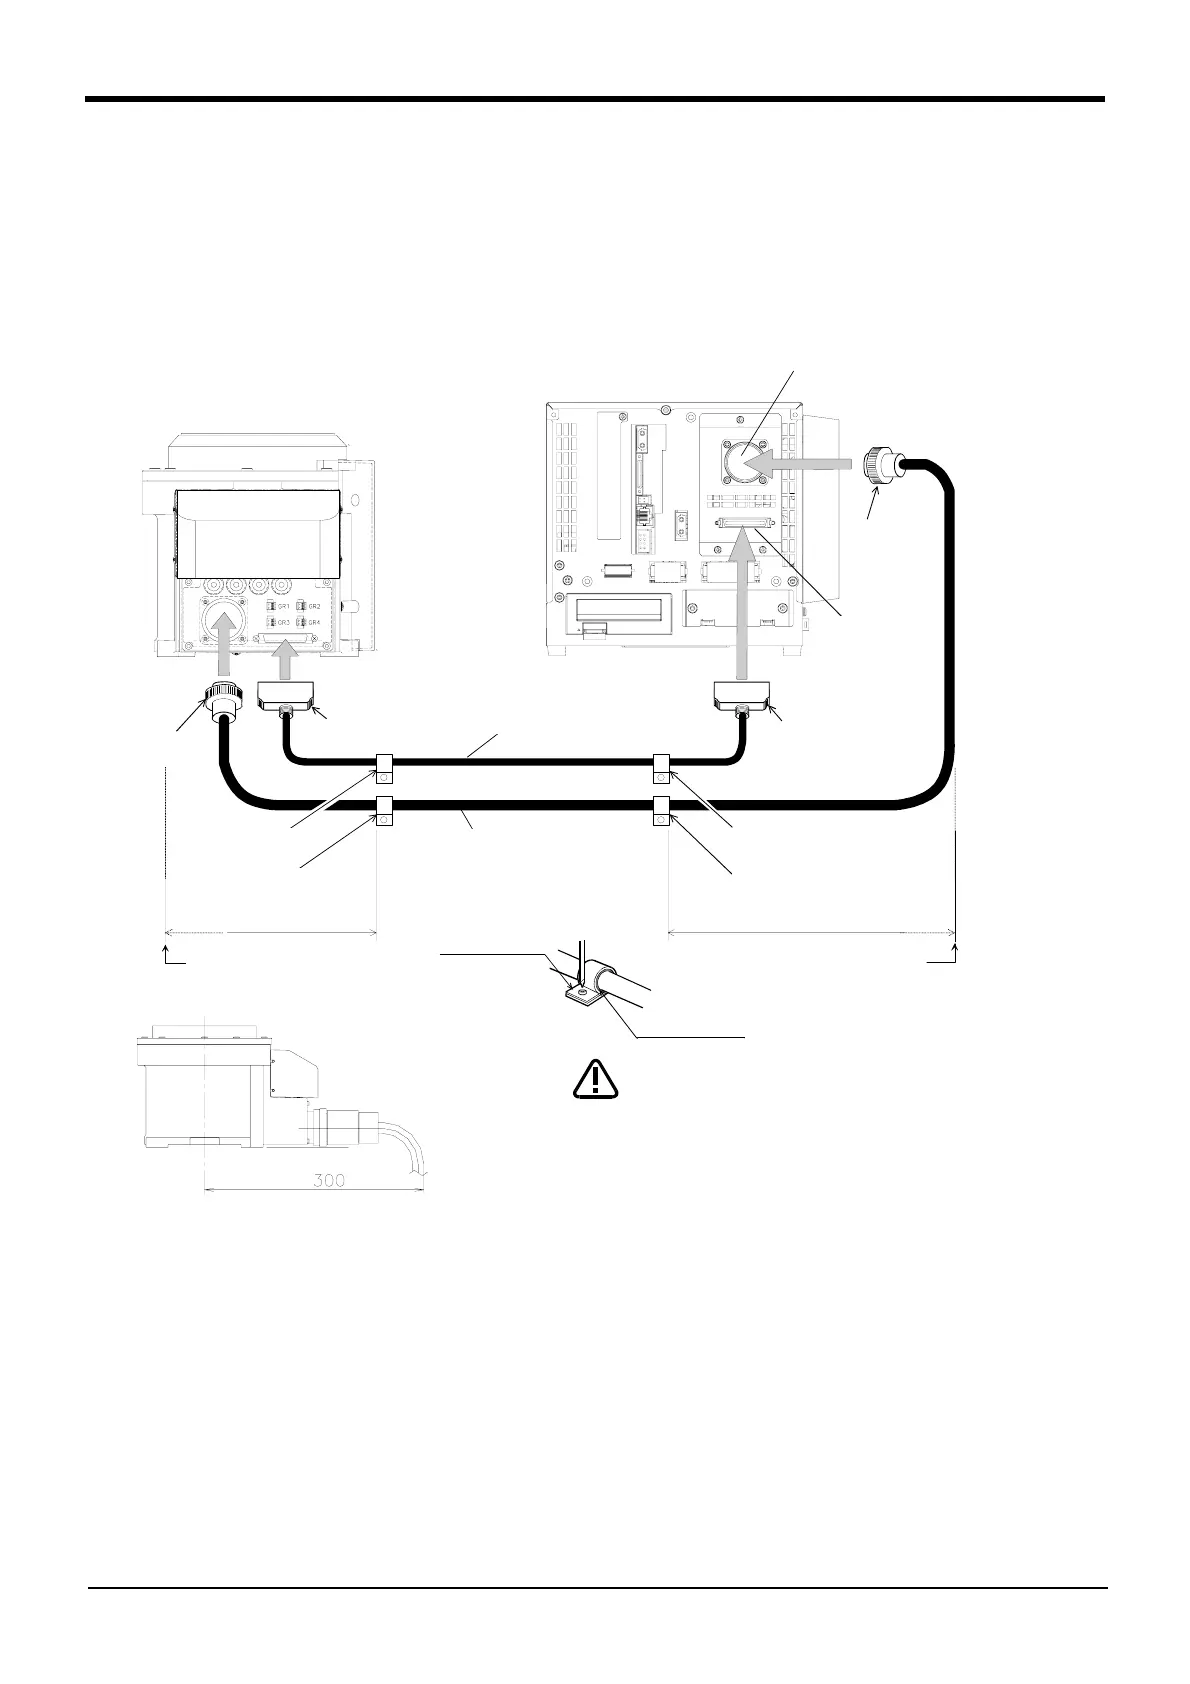
■ Fixing the flexible cable
(1) Connect the connector to the robot arm .
(2) Wind the silicon rubber around the cable at a position 300 to 400 mm from the side of robot arm and exten
-
sion section as shown in Fig. 2-11 or Fig. 2-12, and fix with the nylon clamp to protect the cable from exter
-
nal stress.
Fig.2-11 : Fixing the flexible cable (standard specification/CE marking S16 specification)
CN1
CN2
ロボット本体
(ベース部背面)
モータパワー
モータ信号
(CN2)
モータ信号ケーブル
モータパワーケーブル
(CN1)
CN2
CN1
接続リング部
(固定)
接続リング部
(固定)
ラッチ
(固定用 左右)
ラッチ
(固定用 左右)
ナイロンクランプ
NK-18N
ナイロンクランプ
NK-14N
シリコンゴム
ナイロンクランプ
300~400mm
ロボット本体コネクタ面
ドライブユニットコネクタ面
300~400mm
ナイロンクランプ
NK-18N
ナイロンクランプ
NK-14N
Robot controller
CR1DA-771/CR1DA-771-S16
Motor power cable
Nylon clamp
Nylon clamp
Nylon clamp
Nylon clamp
Nylon clamp
Silicon rubber
Motor power
Motor signal
Robot arm
(Opposite side of figure)
Connection ring
(fixing)
Connection latch
(For fixing. Right and left )
Connection latch
(For fixing. Right and left )
Motor signal cable
Connection ring
(fixing)
Connector surface for the robot arms
Connector surface
for the drive unit
<RV-2SD/RV-2SD-S16(standard specification/CE marking S16 specification)>
The cable should bend and the size
should be 300mm or more from the
installation surface center.
min
CAUTION
Cover the extension connection
section with the cover etc. so
that the connector latch part may
not touch easily.
 Loading...


