11
8. Electrical work
1. Connecting to Mr. SLIM air conditioner
(1)Standard1:1
①
Connecting the signal receiving unit
Connect the signal receiving unit to the CN90 (Connect to the wireless
remotecontrollerboard)ontheindoorunitusingthesuppliedremote
controller wire. Connect the signal receiving units to all the indoor units.
2) Installing procedures
Refer to the installation manual that comes with each remote controller for details.
8.3.3. Setting
1) Setting the pair number switch
[Fig. 8-3-2]
SW1 SW2 SW5
J42 J41
CN90
CNMF
SWE
1. Setting method
Assign the same pair number to the wireless remote controller as that of the
indoor unit. If not doing so, the remote controller cannot be operated. Refer to
the installation manual that came with the wireless remote controller for how to
set pair numbers of wireless remote controllers.
Position of daisy wire on the controller circuit board on the indoor unit.
Controllercircuitboardontheindoorunit(reference)[Fig. 8-3-2]
Ⓐ
CN90: Connector for remote controller wire connection
Forpairnumbersettings,thefollowing4patterns(A-D)areavailable.
Pair number
setting pattern
Pair number on
remote controller side
Indoor controller circuit board side Point
where the daisy wire is disconnected
A 0 Not disconnected
B 1 J41 disconnected
C 2 J42 disconnected
D 3~9 J41 and J42 disconnected
2. Setting example
(1)Tousetheunitsinthesameroom
[Fig. 8-3-3]
IC IC IC IC
CN90 CN90 CN90 CN90
Pair number: 0 Pair number: 1 Pair number: 2 Pair number: 3
Pair number: 0 Pair number: 1 Pair number: 2 Pair number: 3
①
Separate setting
Assign a dierent pair number to each indoor unit tooperate each indoor
unit by its own wireless remote controller.
[Fig. 8-3-4]
IC IC IC IC
CN90 CN90 CN90 CN90
Pair number: 0
Pair number: 0 Pair number: 0 Pair number: 0 Pair number: 0
②
Single setting
Assign the same pair number to all the indoor units to operate all the indoor
units by a single wireless remote controller.
[Fig. 8-3-5]
IC
CN90
IC
CN90
Pair number: 0 Pair number: 0
Pair number: 0 Pair number: 0
(2)Tousetheunitsindierentrooms
Assign the same pair number to the wireless remote controller as that of the
indoorunit.(Leavethesettingasitisatpurchase.)
2) Setting the Model No.
[Fig. 8-3-6]
ON/OFF TEMP
FAN
VANE
TEST RUN
AUTO STOP
AUTO START
h
min
LOUVER
MODE
CHECK
RESETSET CLOCK
CHECK
②,④
③
Ⓐ
①
Insert batteries.
②
Press the SET button with something sharp at the end.
blinke and Model No. lighted.
③
Press the temp
button to set the Model No.
④
Press the SET button with something sharp at the end.
andModelNo.arelightedforthreeseconds,thenturnedo.
Indoor Unit Model
Ⓐ
Model No.
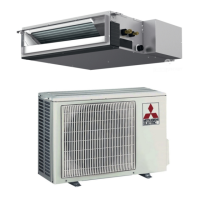
PEA 019
8.4. Function settings
8.4.1 For wired remote controller
①
[Fig. 8-4-1]
F1 F2 F3 F4
Service menu
Cursor
Main menu:
Test run
Input maintenance info.
Function setting
Check
Self check
• Select “Service” from the Main menu, and press the [SELECT] button.
• Select “Function setting” with the [F1] or [F2] button, and press the [SELECT]
button.
②
[Fig. 8-4-2]
F1 F2 F3 F4
Function setting
Cursor Address
Monitor:
Ref. address
Unit No.
Grp./1/2/3/4/All
• Set the indoor unit refrigerant addresses and unit numbers with the [F1]
through [F4] buttons, and then press the [SELECT] button to confirm the
current setting.
<Checking the Indoor unit No.>
When the [SELECT] button is pressed, the target indoor unit will start fan
operation. If the unit is common or when running all units, all indoor units for the
selected refrigerant address will start fan operation.

 Loading...