― 23 ―
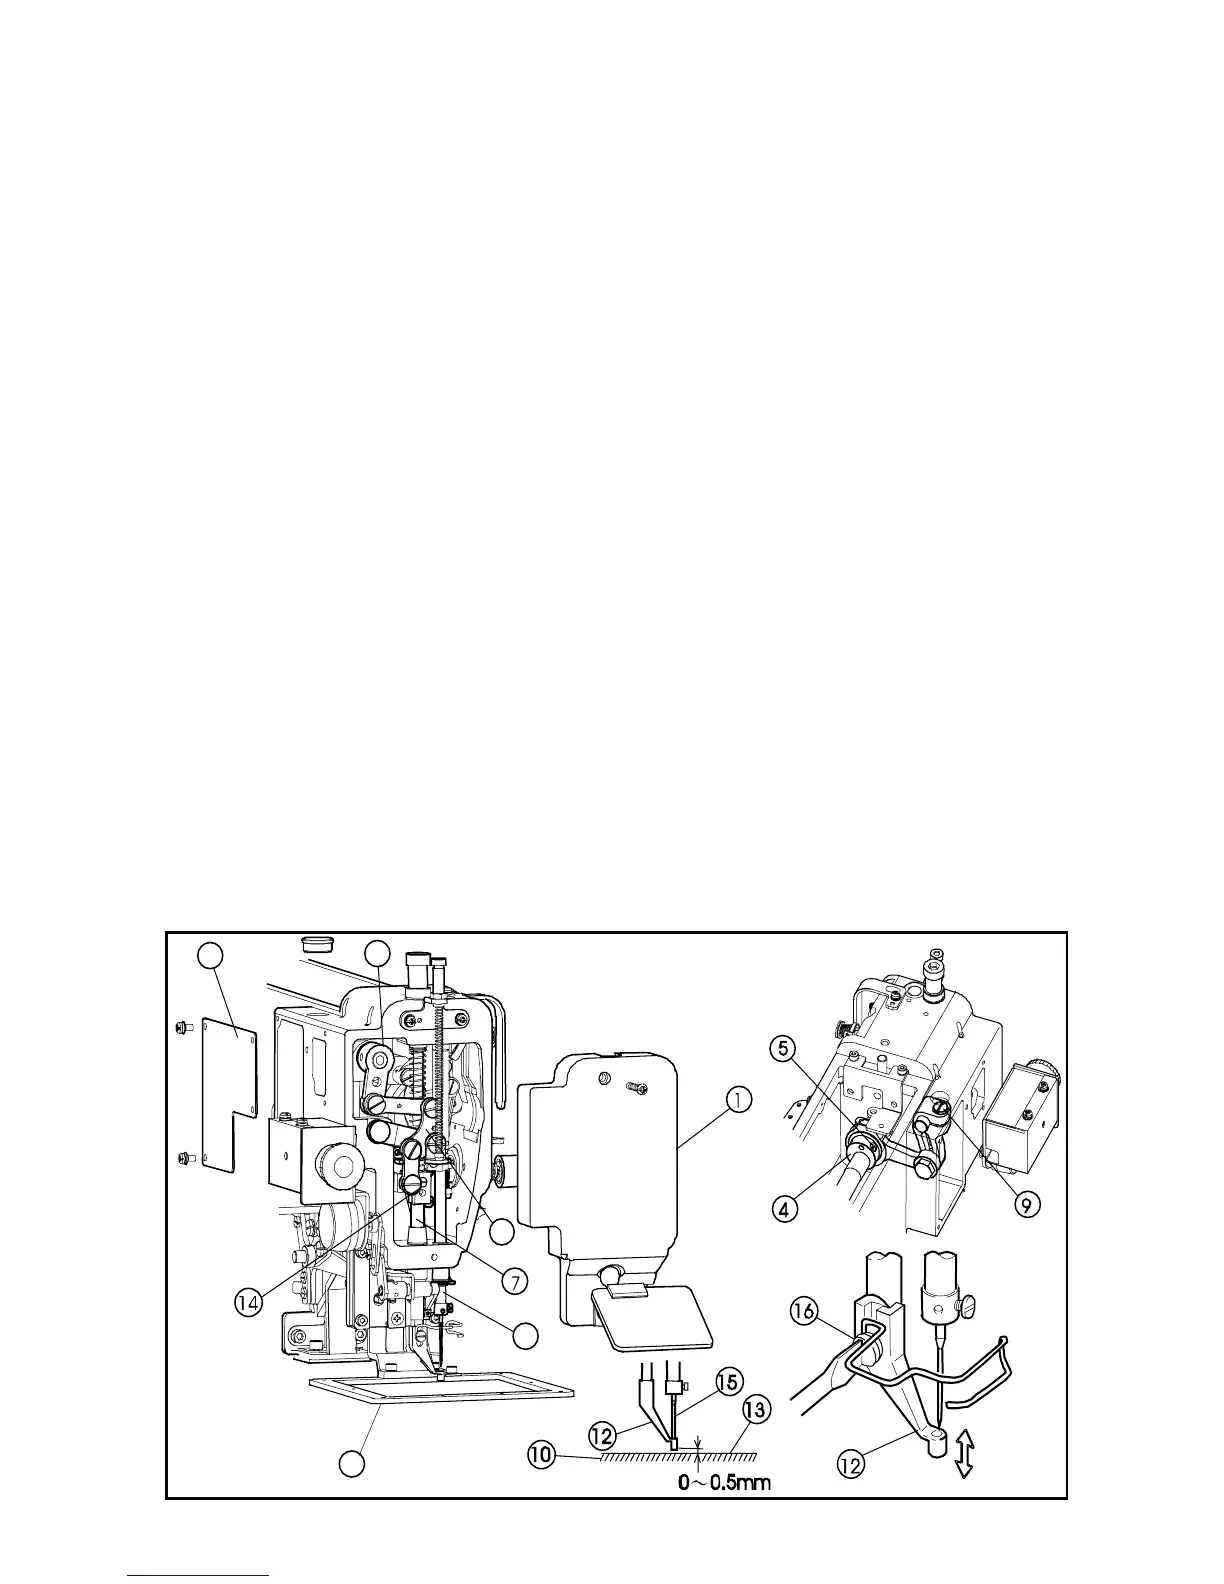
(1) Turn the power switch OFF.
(2) Remove the face plate (No.1) and the link cover (No.2).
(3) Turn the sewing machine pulley by hand and stop the needle bar (No.3) at the lowest
position. At this time, make sure the setscrew (No.5) of the eccentric cam (No.4) is
positioned right beside the center line of the upper shaft. This is the standard position of
the eccentric cam (No.4).If the eccentric cam (No.4) is off from this position, set it back to
the standard position with the instructions on the paragraph [7-6-3. Adjustment of the
presser foot timing] in the following page.
(4) Turn the sewing machine pulley by hand and stop the needle at the highest position (this
is also the thread take up lever's highest position).At this time, loosen the setscrew (No.9)
of the upper feed lock crank shaft(No.8) and adjust the center line of the bell crank (No.6)
to be parallel with the presser foot bar (No.7).
(5) Insert the sewing material (No.10) under the work holder (No.11) and turn the sewing
machine pulley by hand then, stop the presser foot (No.12) at the lowest position.
(6) Loosen the presser foot bar setscrew (No.14) and move the presser foot bar (No.7) then,
adjust the presser foot (No.12) position to be become the clearance between the bottom
surface of the presser foot (No.12) and the surface of the sewing material 0~0.5mm. At
the same time, rotate the presser foot bar (No.7) for the needle (No.15) to come down to
the center of the needle hole of the presser foot (No.12).
(7) After the adjustment, put the face plate (No.1) and the link cover (No.2) back on the
original location.
[NOTE] The lower position of the presser foot, the more effective for the skip stitches.
However, if the presser foot becomes to press the sewing material, the movement of
the presser foot mechanism generates a slight noise. And also, the presser foot stays
longer to hold the sewing material, so the upper thread tension becomes loose or the
sewing pattern forming gets out of shape because the presser foot catches the
surface of the sewing material. For avoiding these troubles, please lower the presser
foot as small as possible.
11
3
6
2
8
 Loading...


