― 28 ―
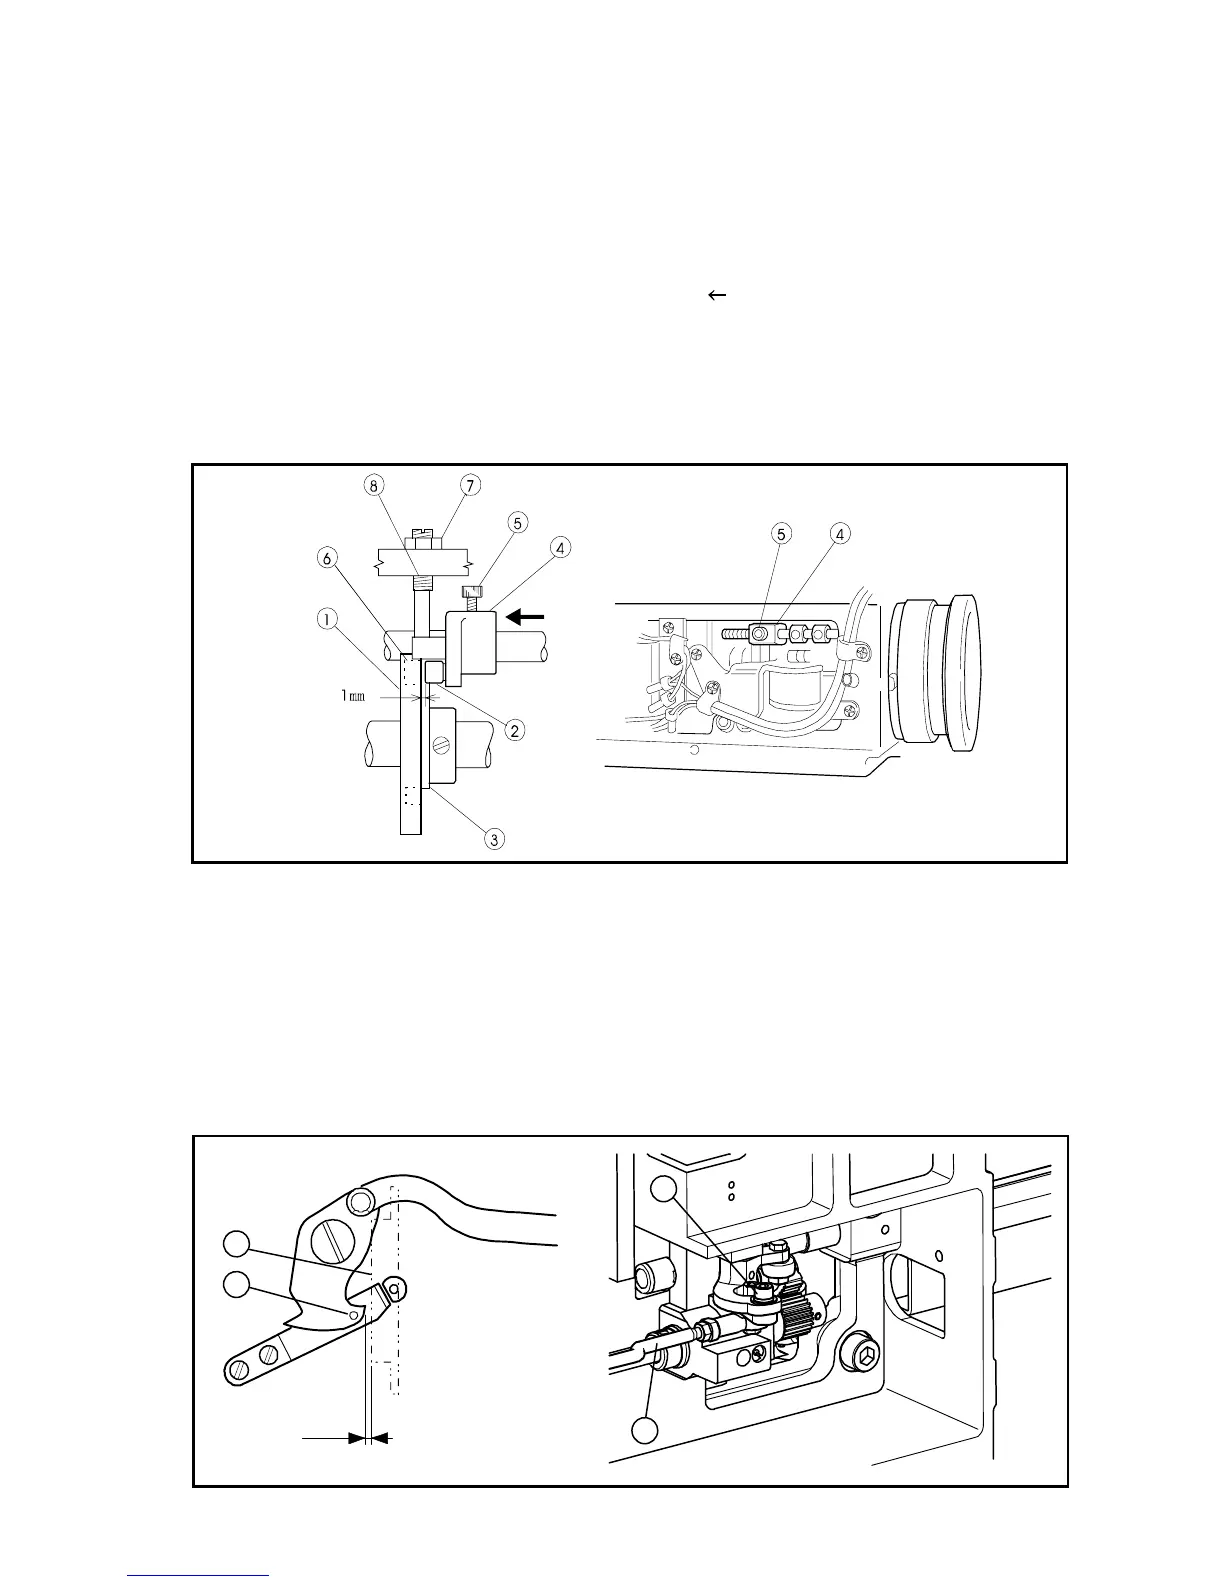
7-10. Adjustment of the trimmer cam follower
(1) Turn the power switch OFF and remove the top cover.
(2) Under the sewing machine regular stop condition (the needle stop position is upper and the
take up lever stop position is highest), loosen the setscrew (No.5) of the cam follower lever
(No.4) and adjust the cam follower (No.2) to be positioned to contact with the shoulder
portion (No.3) of the trimmer cam (No.1) with having about 1mm clearance between the
cam follower (No.2) and the trimmer cam (No.1). After this adjustment, tighten the setscrew
(No.5) of the cam follower lever (No.4).
(3) Push the cam follower lever (No.4) by hand to the
arrow direction and make sure that
the cam follower (No.2) is engaged into the cam groove (No.3) smoothly.
(4) If the cam follower (No.2) is not engaged smoothly, under confirming with the condition
which the cam follower (No.2) contacts with the shoulder portion (No.3) of the trimmer cam
(No.1), loosen the nut (No.7) and tighten the stopper screw (No.8) until it touches with the
stopper (NO.9) of the cam follower lever (No.4) then, loosen the stopper screw (No.8) back
about 1/3 turn and fix the nut (No.7) firmly.
7-11. Adjustment of the position for the movable knife point
(1) Tilt the sewing machine head to the left to be able to see the bottom component parts.
(2) Open the cylinder cover
(3) Check with the point (No.1) of the movable knife whether it is located at the position apart
0.5mm from the front face of the hook retainer (No.2).
(4) For the adjustment of the movable knife point (No.1), loosen the adjusting screw (NO.3)
and move the rod end (No.4) right and left then, adjust the position of the movable knife
point.
(5) After the adjustment, tighten the adjusting screw nut (No.3) securely.
7-12. Adjustment of the fixed knife position
2
1
4
3
0.5mm