― 22 ―
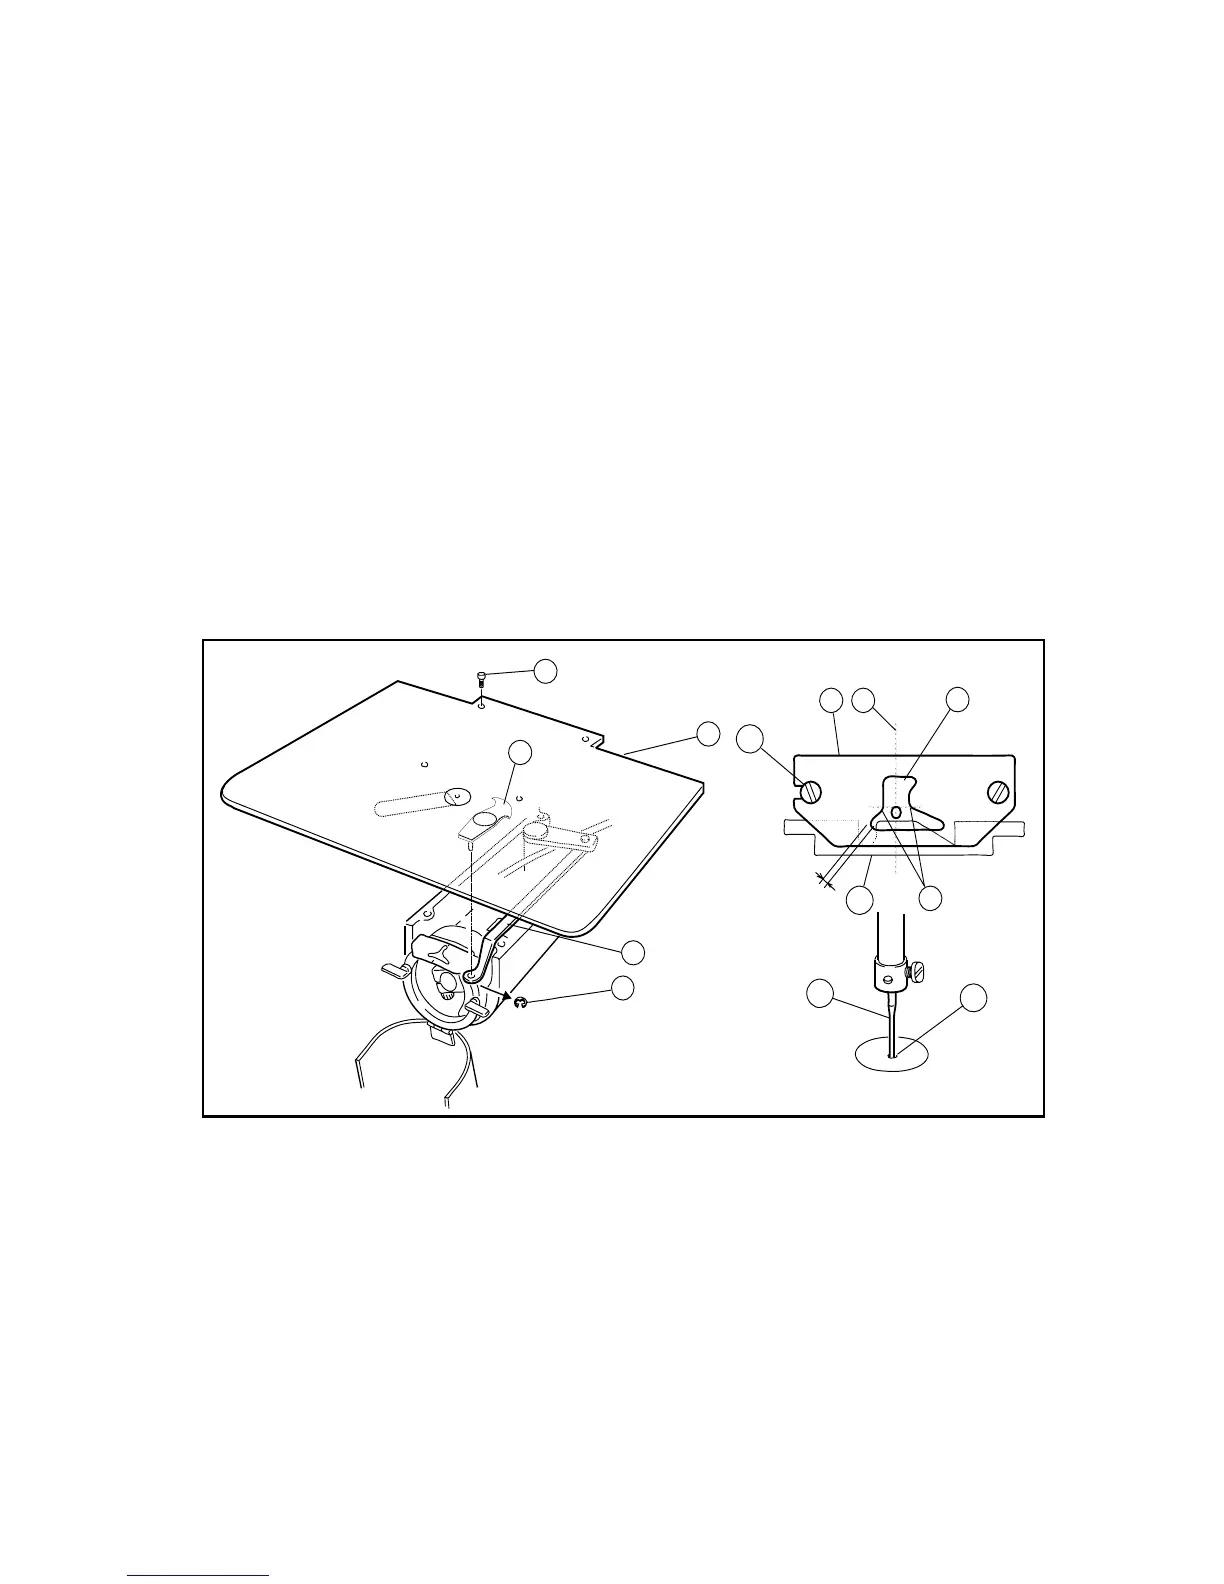
7-5. Adjustment of the thread guide
(1)
Remove the E-shaped snap ring (No.3) which is engaging the movable knife (No.2) and the
link (No.1) then, loosen the setscrews (No.4) and remove the sliding plate (S)(No.5).
(2) Loosen the setscrews (No.10) and move the thread guide (No.6) to the position where the
needle center line (No.8) divides the needle groove (No.7) evenly and the rear side line
(No.9) of the needle is aligned with the shoulder (No.9) of the thread guide (No.6). At this
time, make sure that there is some clearance between the hook retainer and the thread
guide (No.6) at least the upper thread can be passed smoothly through it (standard
clearance is 0.8mm).If this clearance is too wide, it causes the trimming failure and if this
clearance is too narrow, it causes the sewing condition disturbance, the trimmed upper
thread tail uneven and the locking up the hook with the upper thread.
(3) After the adjustment, engage the link (No.1) of the trimmer mechanism with the movable
knife (No.2) with the E shaped snap ring (No.3) and put the sliding plate (S)(No.5) back on
the original location then, tighten the setscrews (No.4).At this time, set the sliding
plate(S)(No.5) so that the needle (No.11) can come down to the center (No.12) of the
needle hole of the needle plate.
7-6. Adjustment of the presser foot
[NOTE] The presser foot is a very important part to form the fine stitches.
It moves simultaneously with the needle and stabilize the needle penetrating area of the
sewing material with pressing down it, when the needle sticks into or pulls out the
sewing material and prevent the skip stitch or the over penetration happening. Please
adjust the presser foot properly to the sewing materials with the following instructions.
7-6-1. Adjustment of the presser foot position
[NOTE] Please always adjust the presser foot position when the thickness of the sewing
material is changed.
0.8mm
1
1
3
4
5
10
13
11
12
6 8
7
9