Page 8
DSP8 Signal Input (High Level/Speaker Level)
If your installation requires the continued use of your factory
radio the DSP8 has a flexiable “Manual Set” Hi Level/Low Level
input stage.
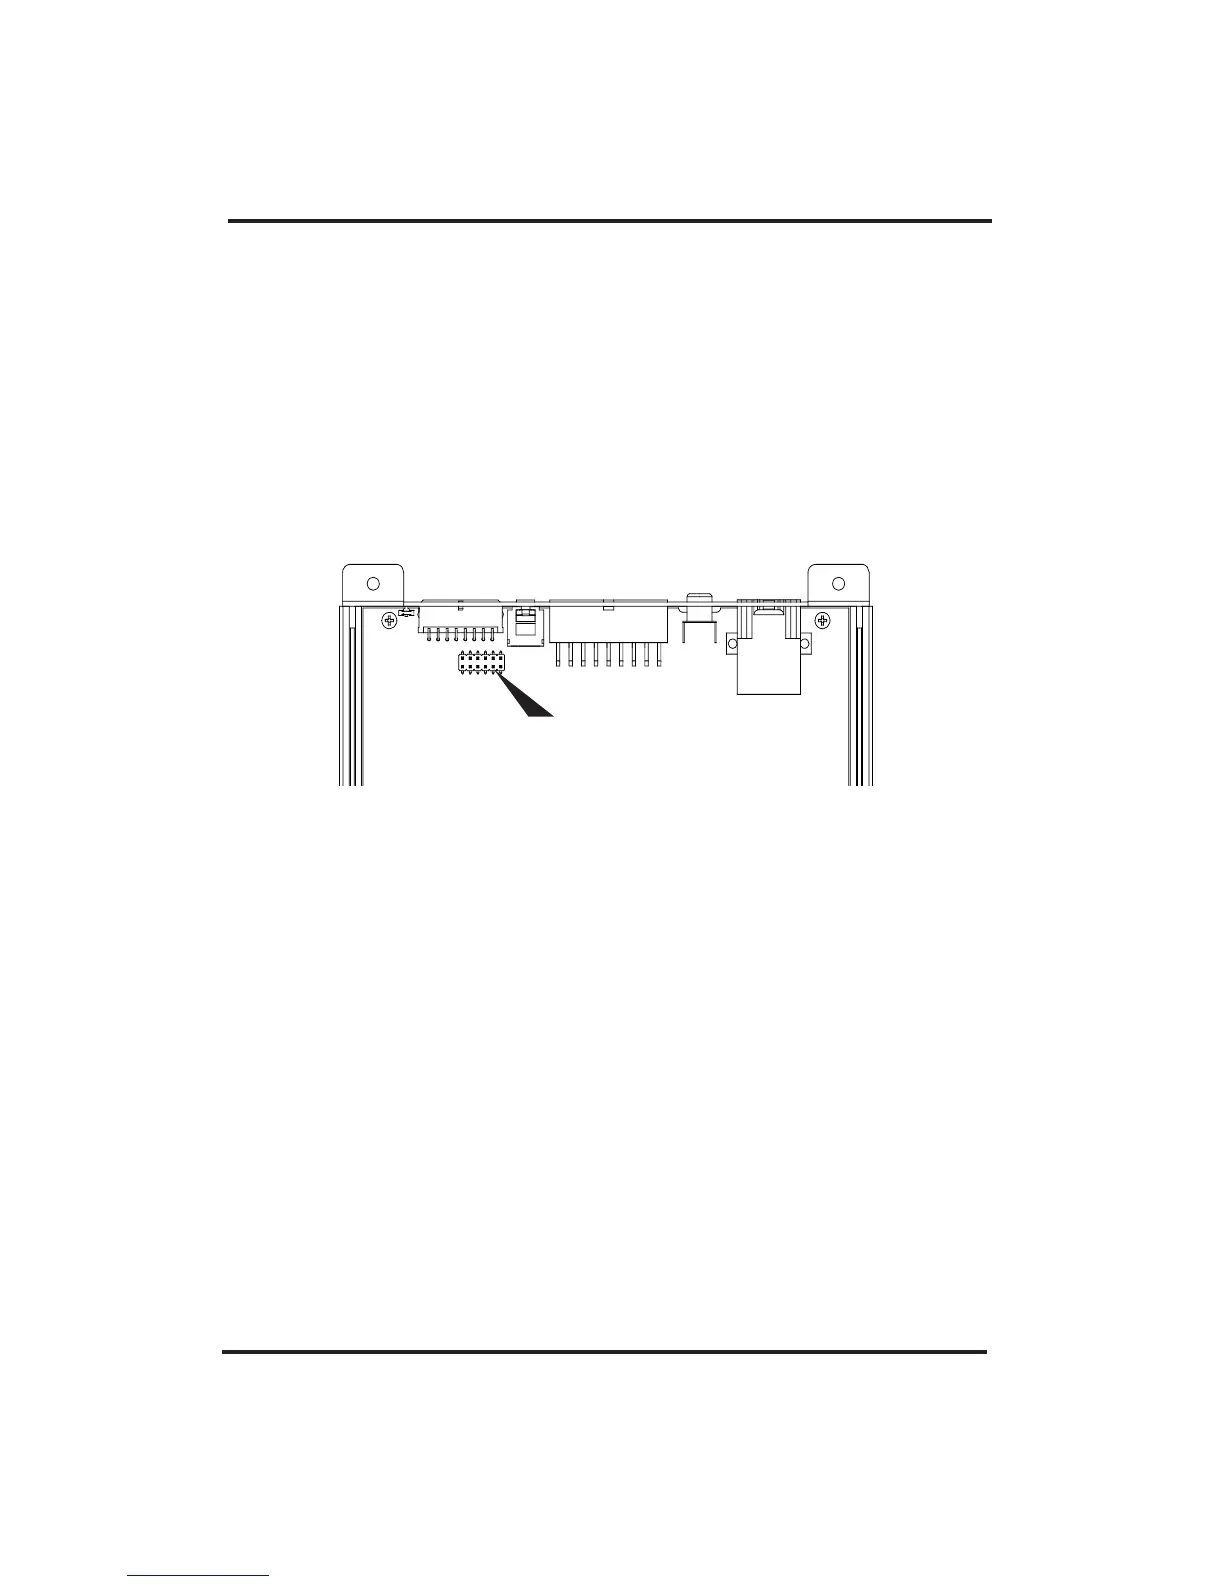
To achieve this opration you will be required to open up the
bottom of the DSP8 and configure the intrnal jumpers as directed
below. (Jumpers provided in packaging of DSP8) Next cut and
remove the RCA plugs off the end of the cables and direct solder
your OEM speaker connecitons to the dedicated inputs of the
DSP8
If your factory radio does not have a dedicated full range
(20Hz-20kHz) signal output you will need to retrieve the dedicated
frequency signal leads (Highs, Mids, Lows) and connect to all 6
channels of input on the DSP8. Next using the onboard input
signal VU meter and the input Codec sensitivity control level
match all three dedicated signals till they produce a single full
range signal input. (See Setup, Tuning and Adjustment)
Note: some factory systems require loading of the outputs to
achieve nominal operation. To simulate a load on the outputs of your
factory radio install a 30 ohm 5 watt resistor across the positive and
negative speaker leads of each factory channel and then connect to
the assigned inputs of the DSP8. This should work on most instances
where loading is required but may require different values depending
on the exact electrical needs of your factory system
Speaker Level Input
Jumpers Install Here
 Loading...