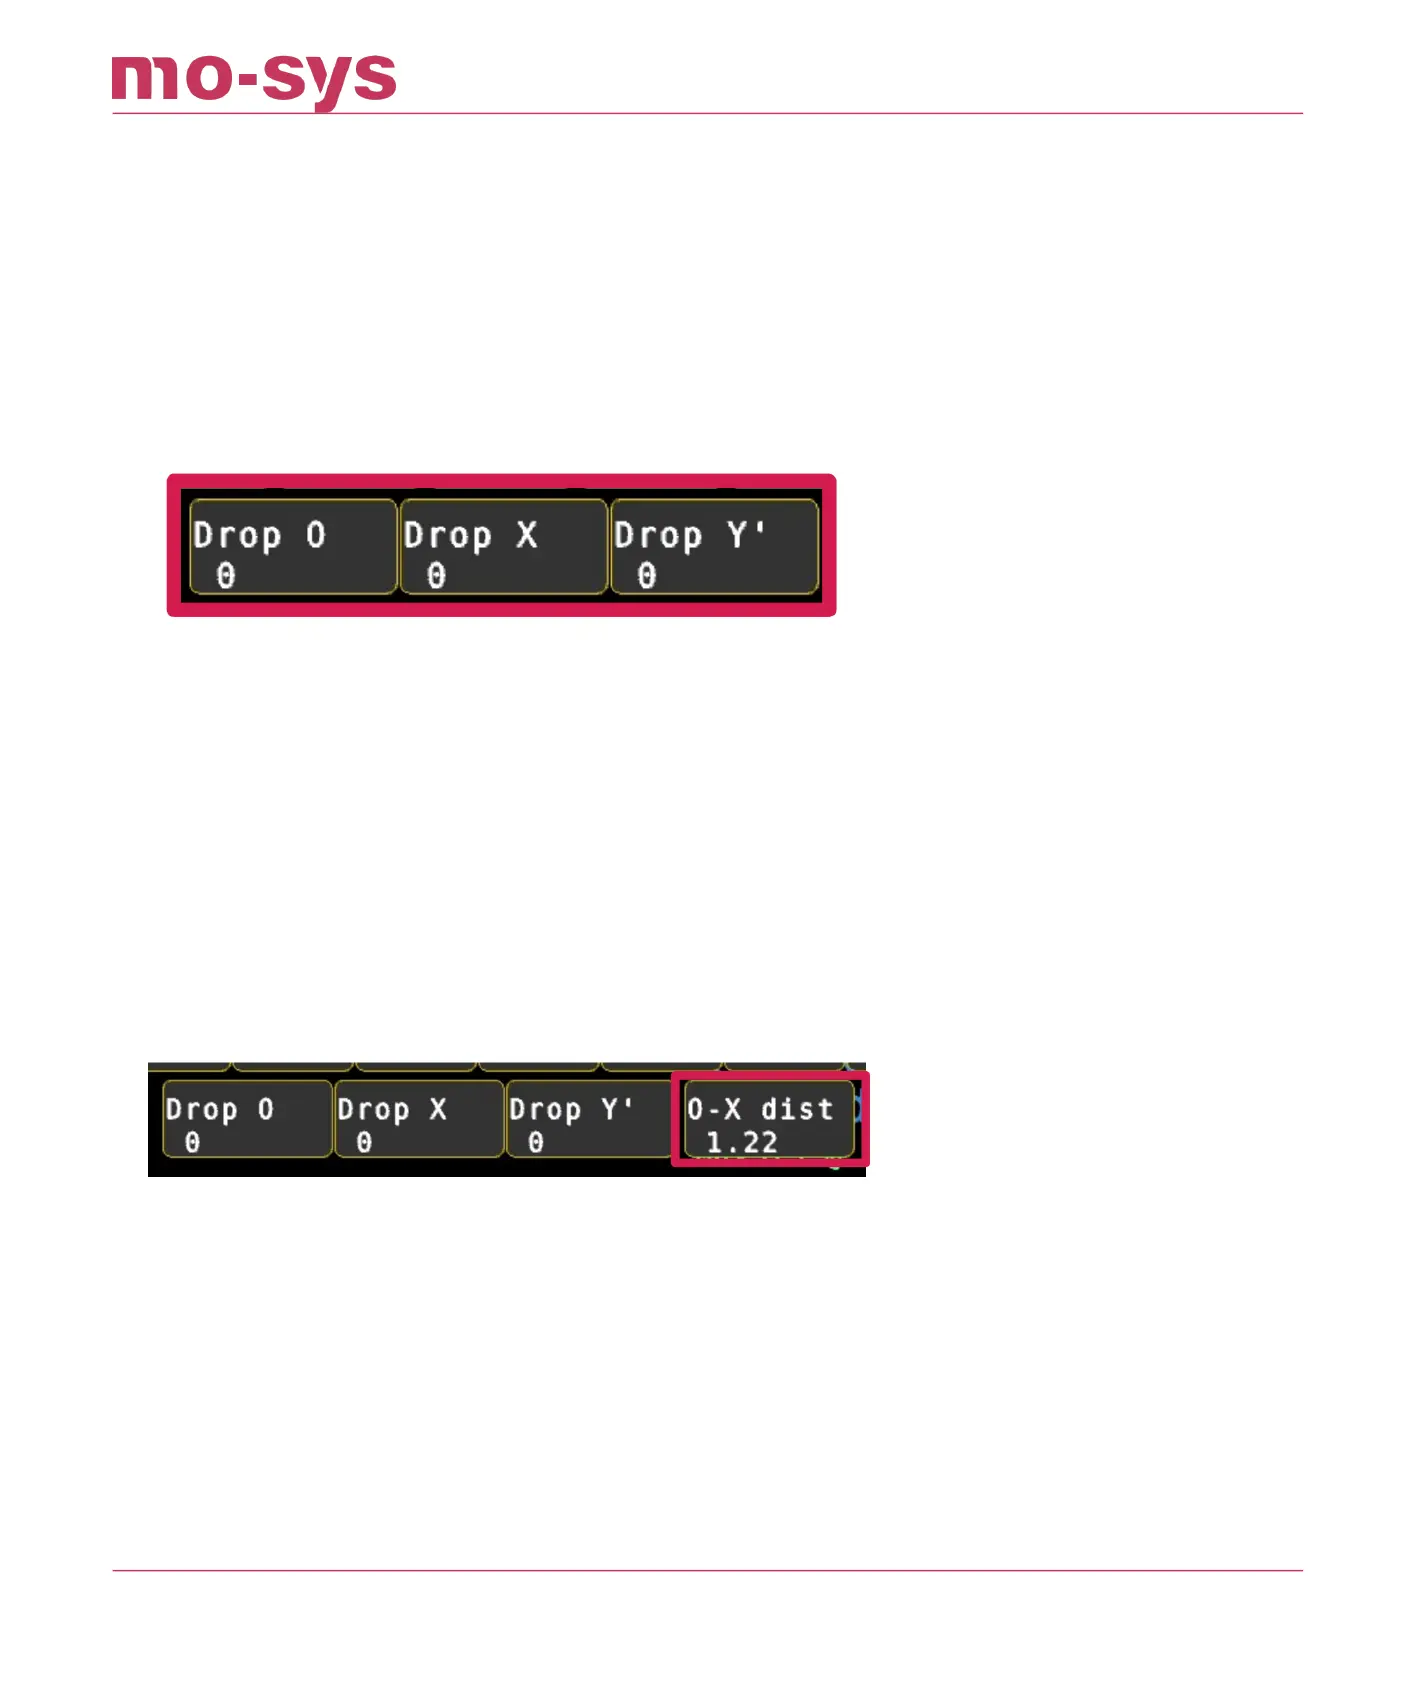
8.3 Dropping 0,X,Y
To begin move the ST sensor to the O position. Go to Mapping → Create , click Drop O. It won’t
show changes in the map as it is only regarded as a temporary marker. If you are successful a
message will ash briey below saying “Added pose datum”.
The number displayed in the button increments each time you successfully drop the origin, O.
The value of that number doesn’t matter, it is simply a success counter, similarly for X and Y.
Seen here as a zero-value having not been dropped yet
Ensure you have OPTICAL GOOD status when dropping O or consider a dierent location.
Next move the sensor to the X marked position on the oor and click Drop X Finally move to the
Y position and click Drop Y Maintain the same physical height on the oor as O & X. The
distance of O-Y is not crucial, but should be like O-X. Points O,X & Y do not have to be dropped
90deg relative to each other. Just ensure that the Y point is to the left when looking at X from
the O point. The O-X distance should be roughly half of the star height for good results.
8.4 Setting Dimensions
Enter the distance from O to X in meters in Mapping → Create , click O-X dist
Transform the map in Map Transformations: All and type Y to conrm. The map should snap
into place and message will report “Successfully transformed map”. Click again if you are
unsure – the map will not change again if you successfully transformed the map. Mapping
should be o.
To verify the height levels, go to various locations known to be the same height on the real-
world studio oor, and compare the height with the StarTracker screen reading.
To verify scaling move the sensor in the real world along X or Y axes and conrm
StarTracker reports a similar value.
•
•
•
•
StarTracker Max Manual
2023 - 2024 © Mo-Sys Engineering Ltd. All rights reserved 30 of 70