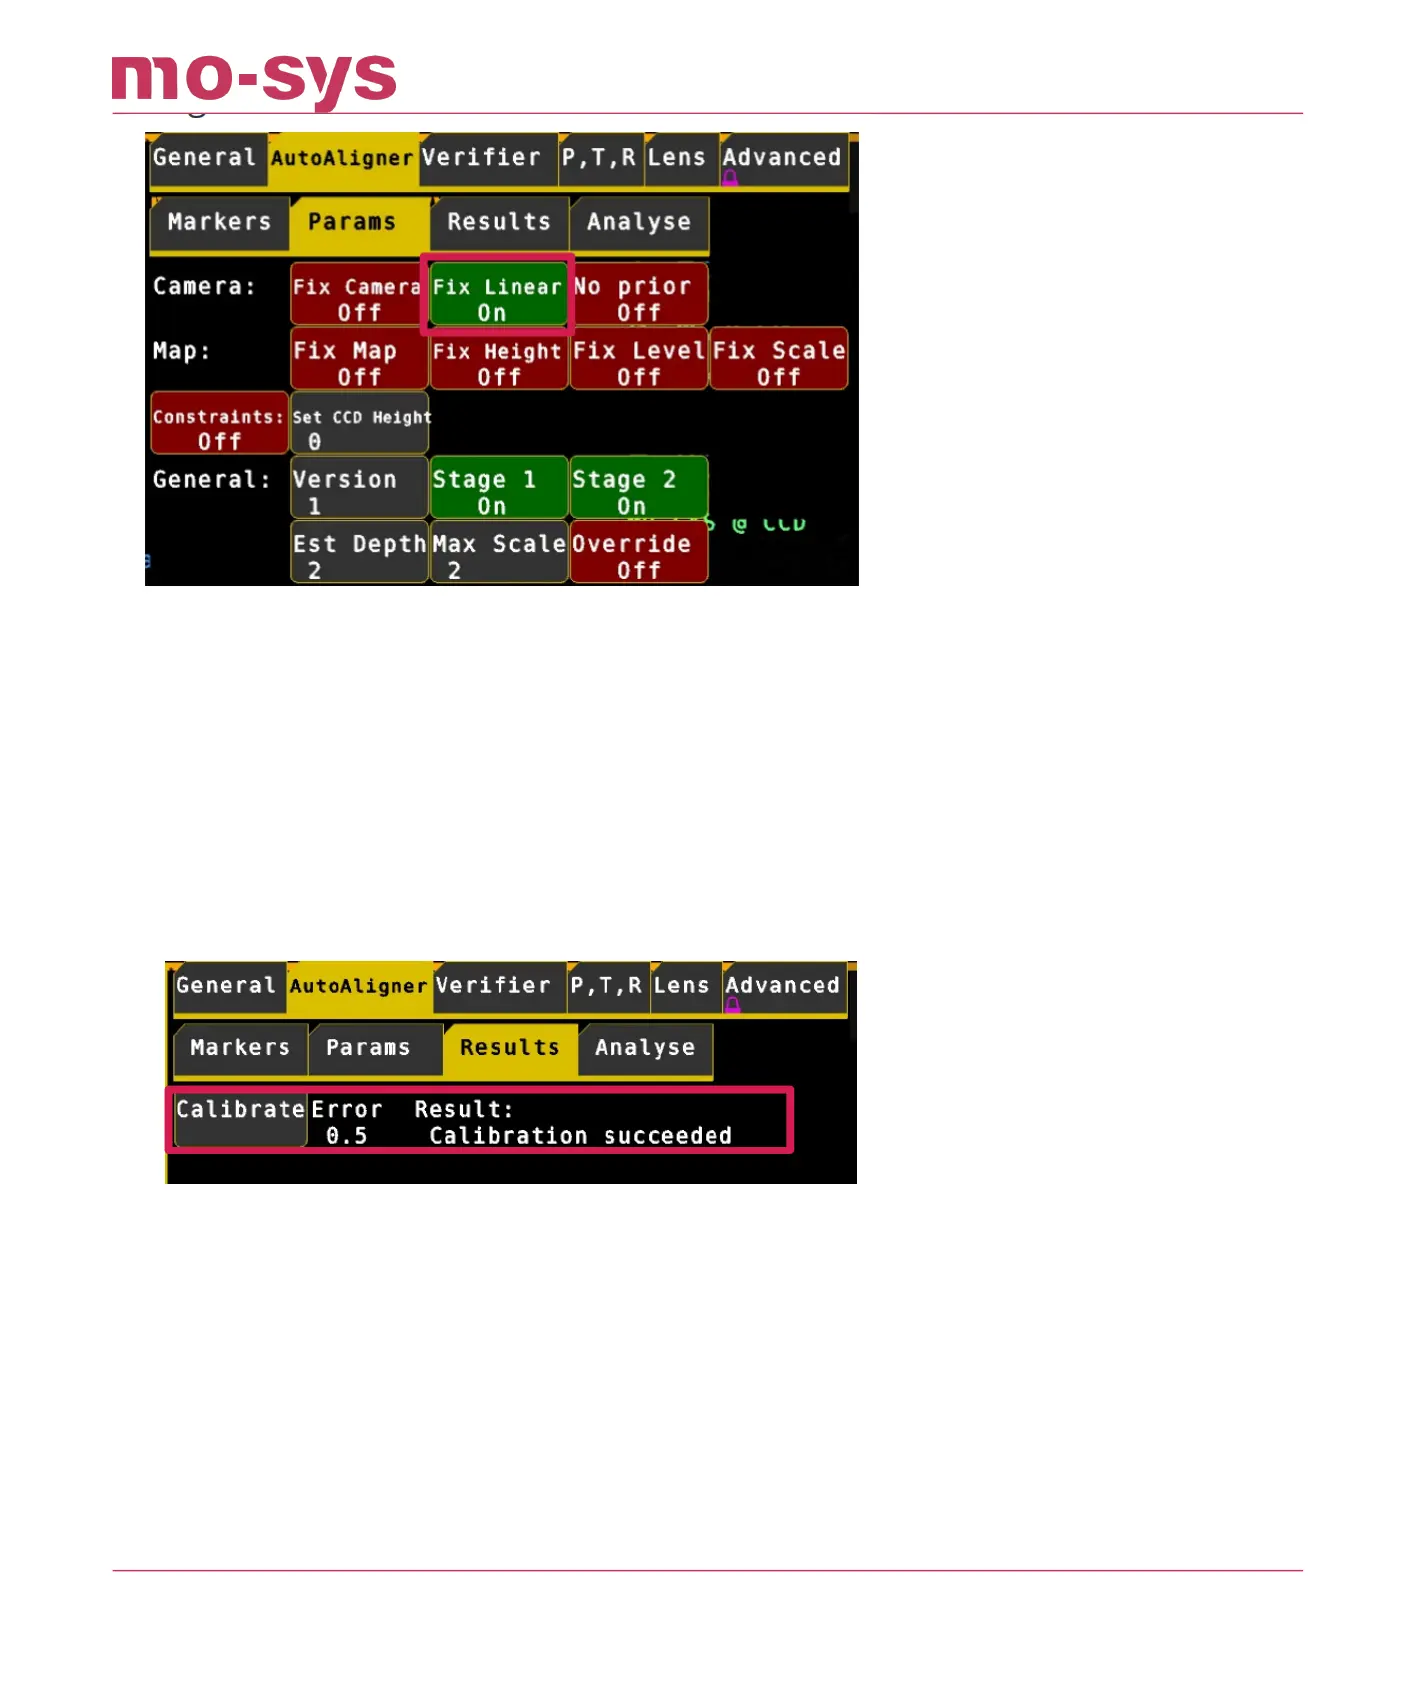
Note: The calibration process cannot tweak the “TP Forward” or “Roll Oset” values – these
should have been set using the steps before and are not modied by this calibration.
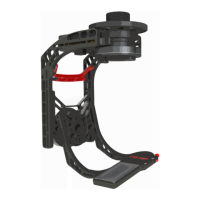
Click on the Results menu at the top, then click on Calibrate. The optimisation error and result
will be shown to the right of the Calibrate button. In general, you are aiming for a low error,
ideally less than 1.
If the result says, “Calibration succeeded”, the calibration worked, and you will see the
calculated osets. Check they look sensible. For the Sensor-camera osets, check the linear and
angular osets look about right.
You can apply the calculated osets to the camera and map, by pressing the Apply button next
to the Sensor-Camera osets.
Look at the “Results” status to see if there was a problem applying the osets
The TP osets applied are saved automatically and will show up once you go back to the Osets
menu.
If your Verify values (see next section) are o do a second calibration round. Go back to Auto-
Aligner -> Results and hit Calibrate again. Then hit all three APPLY buttons. Now verify again
StarTracker Max Manual
2023 - 2024 © Mo-Sys Engineering Ltd. All rights reserved 55 of 70