EasyManua.ls Logo

modway EEI-2700 User Manual

Default Icon
3 pages
To Next Page IconTo Next Page
Page #1 background imageLoading...
Page #1 background image
Customer Service 908-368-1025www.modwayfurniture.com Page 1 of 3
EEI –2700 DINING CHAIR
Hardware:
Component:
A
Long Bolt M6x60mm x 8
1
Chair Back x1
Thank you for purchasing the MODWAY DINING CHAIR!
Before you start, here is some helpful advice:
1.We suggest you spend a short time reading through this leaflet and then follow the simple step by step
instructions.
2.Owing to the size and weight of the dining chair, we recommend that it is assembled by two adults, on a
carpeted or padded area, in the room that it is intended for. Approximate assembly time: 30 minutes.
3.Please do not use any tools other than those provided or recommended in these instructions.
4.Please do not throw away any of the packaging or instructions until you have checked all the components and
hardware and the furniture is fully assembled.
5.Assemble all components loosely until advised to tighten. Depending on use, it may be necessary to tighten the
components from time to time, so please save the tools that have been provided.
6.Please keep all pieces out of reach of small children.
3
Chair Seat x1
3
Left Frame x1
B
Allen Wrench M4 x 1
2
4
1
Right Frame x1
5 Seat Cushion x1
4
5
2
Question and Answer IconNeed help?

Do you have a question about the modway EEI-2700 and is the answer not in the manual?

modway EEI-2700 Specifications

General IconGeneral
Brandmodway
ModelEEI-2700
CategoryIndoor Furnishing
LanguageEnglish

Summary

Assembly Preparation and Component Overview

Important Advice Before You Start

Provides essential guidance including reading instructions, assembly by two adults, tool usage, retaining packaging, loose assembly, and child safety.

Chair Components Identification

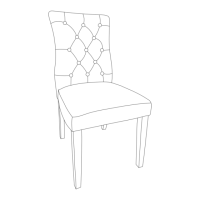
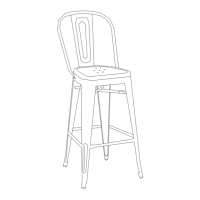
Lists and illustrates the main parts of the dining chair, including Chair Back, Chair Seat, Left Frame, Right Frame, and Seat Cushion.

Hardware and Tools Required

Details the necessary hardware for assembly, specifically Long Bolts (M6x60mm) and the Allen Wrench (M4).

Step-by-Step Assembly Instructions

Step 1: Connecting Left Frame to Seat and Back

Attaches the Chair Seat and Chair Back to the Left Frame, inserting tenons into rabbets on a carpeted surface.

Step 2: Attaching the Right Frame

Connects the Right Frame to the partially assembled chair, aligning Chair Seat and Chair Back tenons with rabbets.

Step 3: Securing the Chair Frame

Uses Long Bolts and Allen Wrench to secure the Left and Right Frames to the Chair Back and Seat through pre-drilled holes.

Step 4: Finalizing Seat Cushion Attachment

Positions the Seat Cushion within the assembled chair and secures it to the Chair Back using the provided banding.

Related product manuals