DIAGNOSTICS
8
Figure 5: The Charging Port in right hand side of the Back Panel of the Trueprep™ AUTO
7.1.4 Connect the other end of the AC Adapter to a mains socket.
7.1.5 Switch On the mains power.
7.1.6 You can now proceed to use the Trueprep™AUTO using the mains power.If the Trueprep™
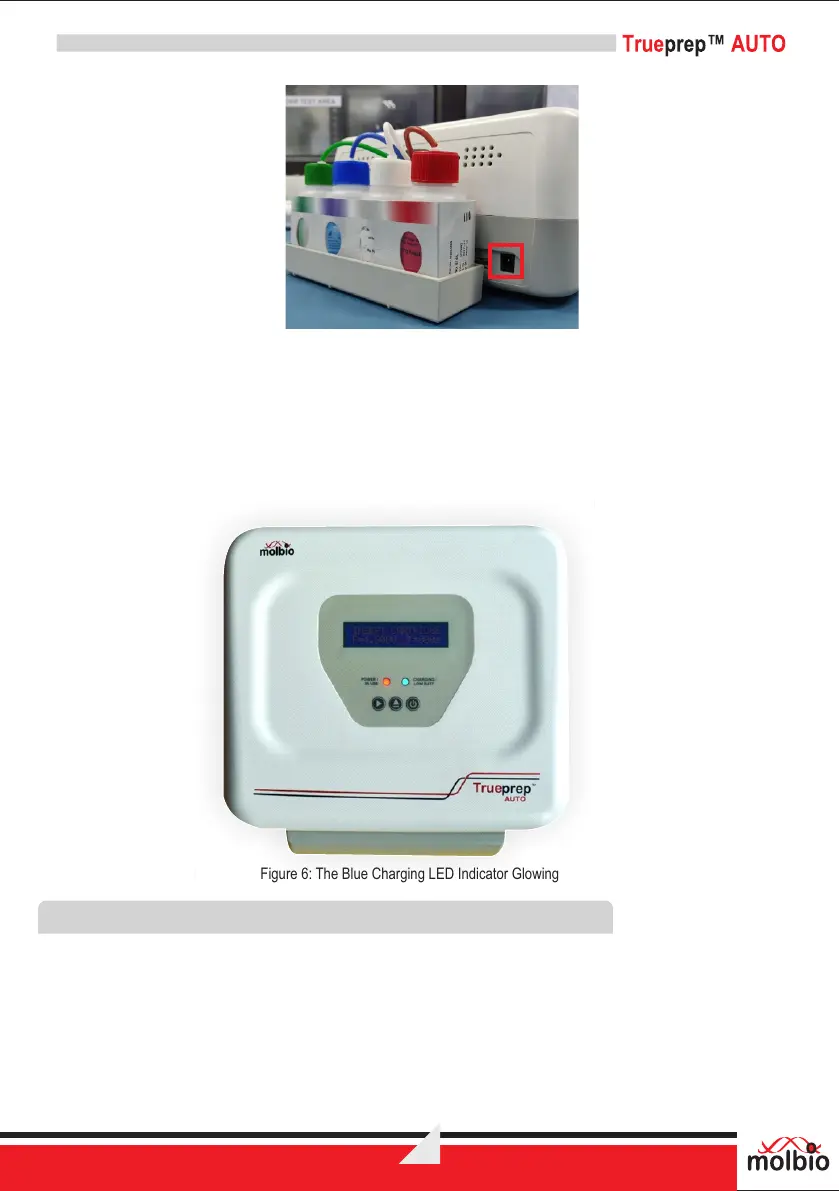
AUTO is being charged, the charging LED Indicator will glow blue. Charging takes ~9-10 hours
(overnight). When charging is complete, the charging LED Indicator will go off. When this
happens, please disconnect the AC Adapter unless it is being used to power the device.
Figure 6: The Blue Charging LED Indicator Glowing
7.2 Plugging in the reagent bottles
7.2.1 Before starting a run for the first time, plug in the colour coded reagent bottles from the
TM
Trueprep AUTO Sample Prep Kit Reagent Pack into the back panel of the device, matching
the colour of the cap on the panel with the colour of the reagent bottle cap in the kit. Discard the
reagent bottle cap once the bottle is plugged in.
7.2.2 Ensure that the tubing is fully immersed in the liquid upto the bottom of the reagent bottle.
7.2.3 A set of bottles is sufficient for 25 tests.
7.2.4 The device will prompt when 25 tests have been completed and the bottles have to be replaced.