One-Net/DASDEC User Manual 4-7v3.0 | r0616
WEB INTERFACE AND NAVIGATION
The web interface is used to set up, control, view status, and monitor all acvity.
Radio buons, check boxes, text elds, pull-down menus, and hyperlinks are found
throughout.
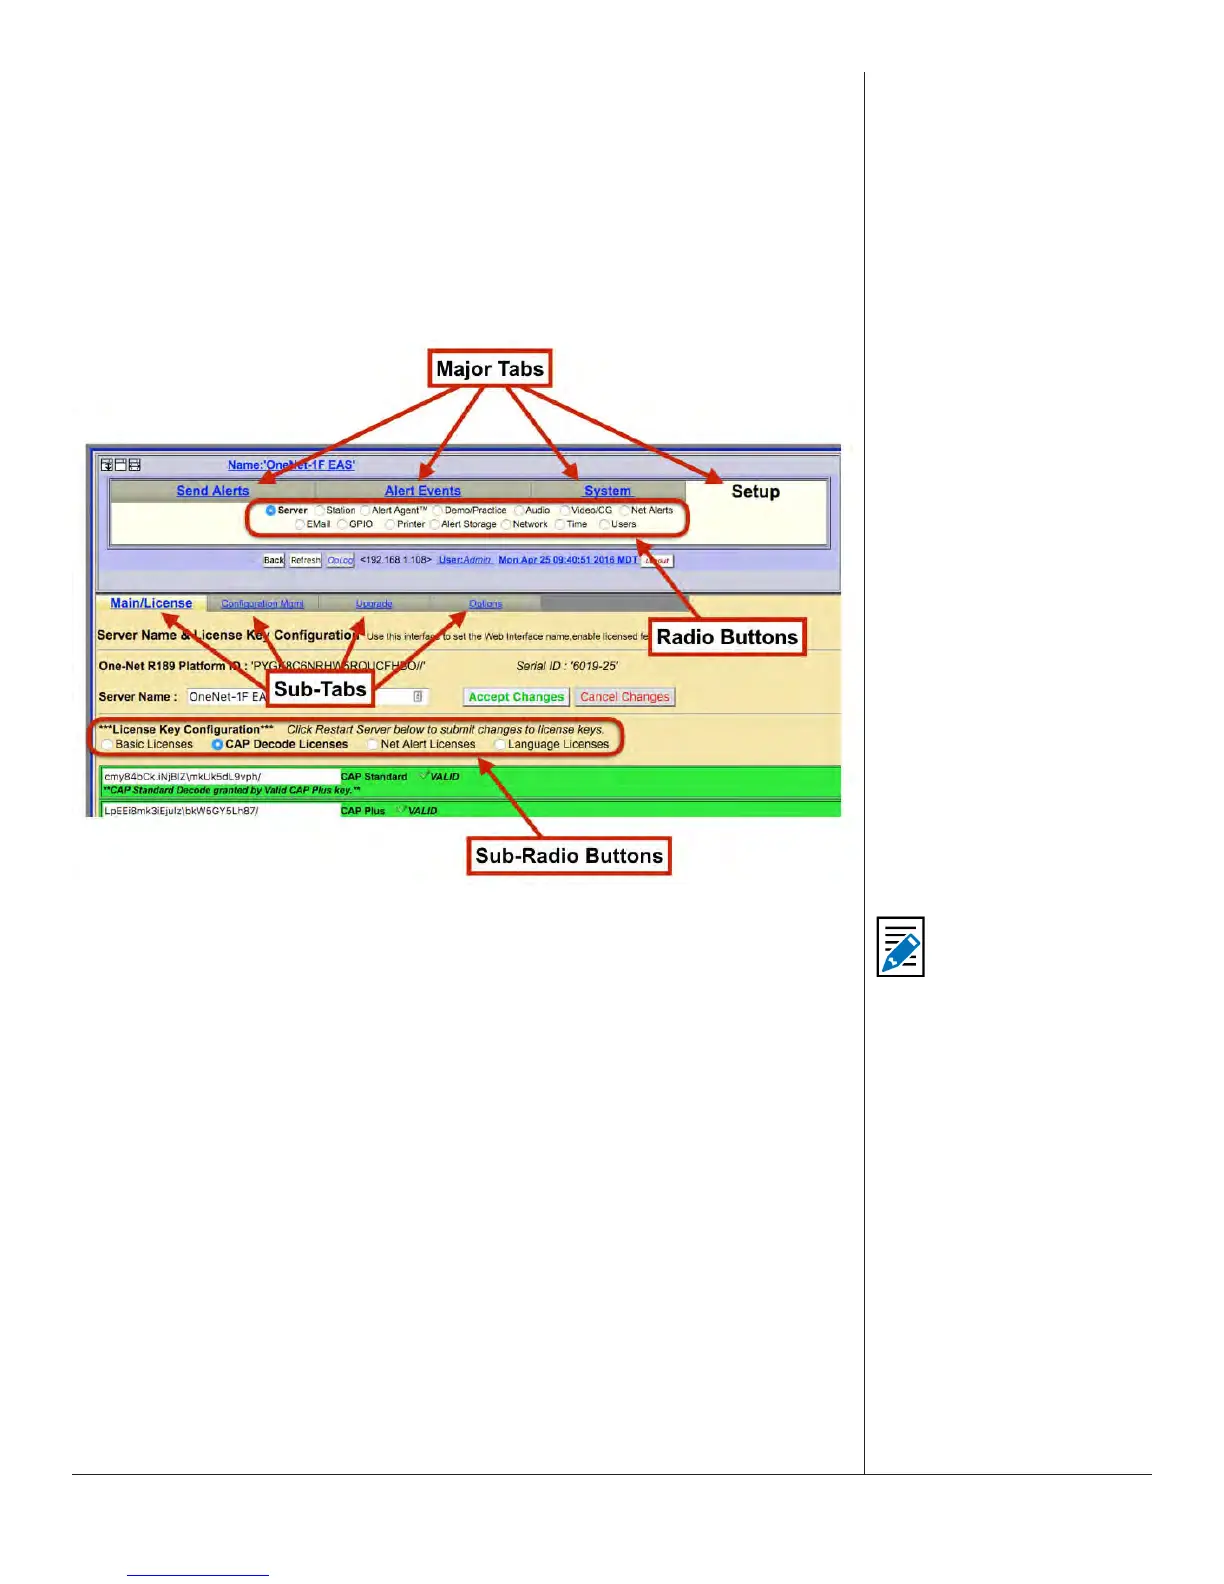
The web interface uses a hierarchical organizaonal structure to navigate dozens of
screens. The rst level is a set of tabs, followed by radio buons. Under the Setup and
System tabs, you will also nd sub-tabs and sub-radio buons.
Web Interface Navigaon
Throughout this manual, you will nd references to menu structures, such as Major
Tab > Radio Buon > Sub Tab > Sub Radio Buon (for example, Setup > Server >
Main/License > CAP Decode Licenses).
To navigate:
1. Select one of the major tab menus at the top of the header.
2. Select a radio buon.
3. If a level of sub-tabbed pages is shown, choose the desired page.
HOW TO MAKE CHANGES AND UPDATES
Changes can be made on each web interface screen, typically with check boxes, radio
buons, text elds, and acon buons.
Check boxes are labeled with the name of the feature that is enabled or disabled by
that parcular box. When the feature is enabled, a brief feature descripon usually
follows. Click to disable the feature if it is not wanted. When the feature is disabled,
click to enable it.
Note
When moving between
top-level tabbed
menus, such as Setup
to System and Back to
Setup, the last selected
Radio Buon > Sub Tab
is remembered for each
top-level tab.