14
3.3.5 Electrical Installation
To function safely and maintain the integrity of your electrical system, the unit must be connected
to a general electricity supply in accordance with the following regulations:
① Upstream, the general electricity supply must be protected by a 30mA differential switch.
② The heat pump must be connected to a suitable D-curve circuit breaker in accordance with
current standards and regulations in the country where the system is installed.
③ The electricity supply cable must be adapted to match the unit’s rated power and the length
of wiring required by the installation. The cable must be suitable for outdoor use.
④ For a three-phase system, it is essential to connect the phases in the correct sequence.If the
phases are inverted, the heat pump’s compressor will not work.
In places open to the public, it is mandatory to install an emergency stop button close to the
heat pump.
Model
Electricity Supply Specification
MR550
208-230V~/60Hz
AWG 12
MR650
MR750
AWG 10
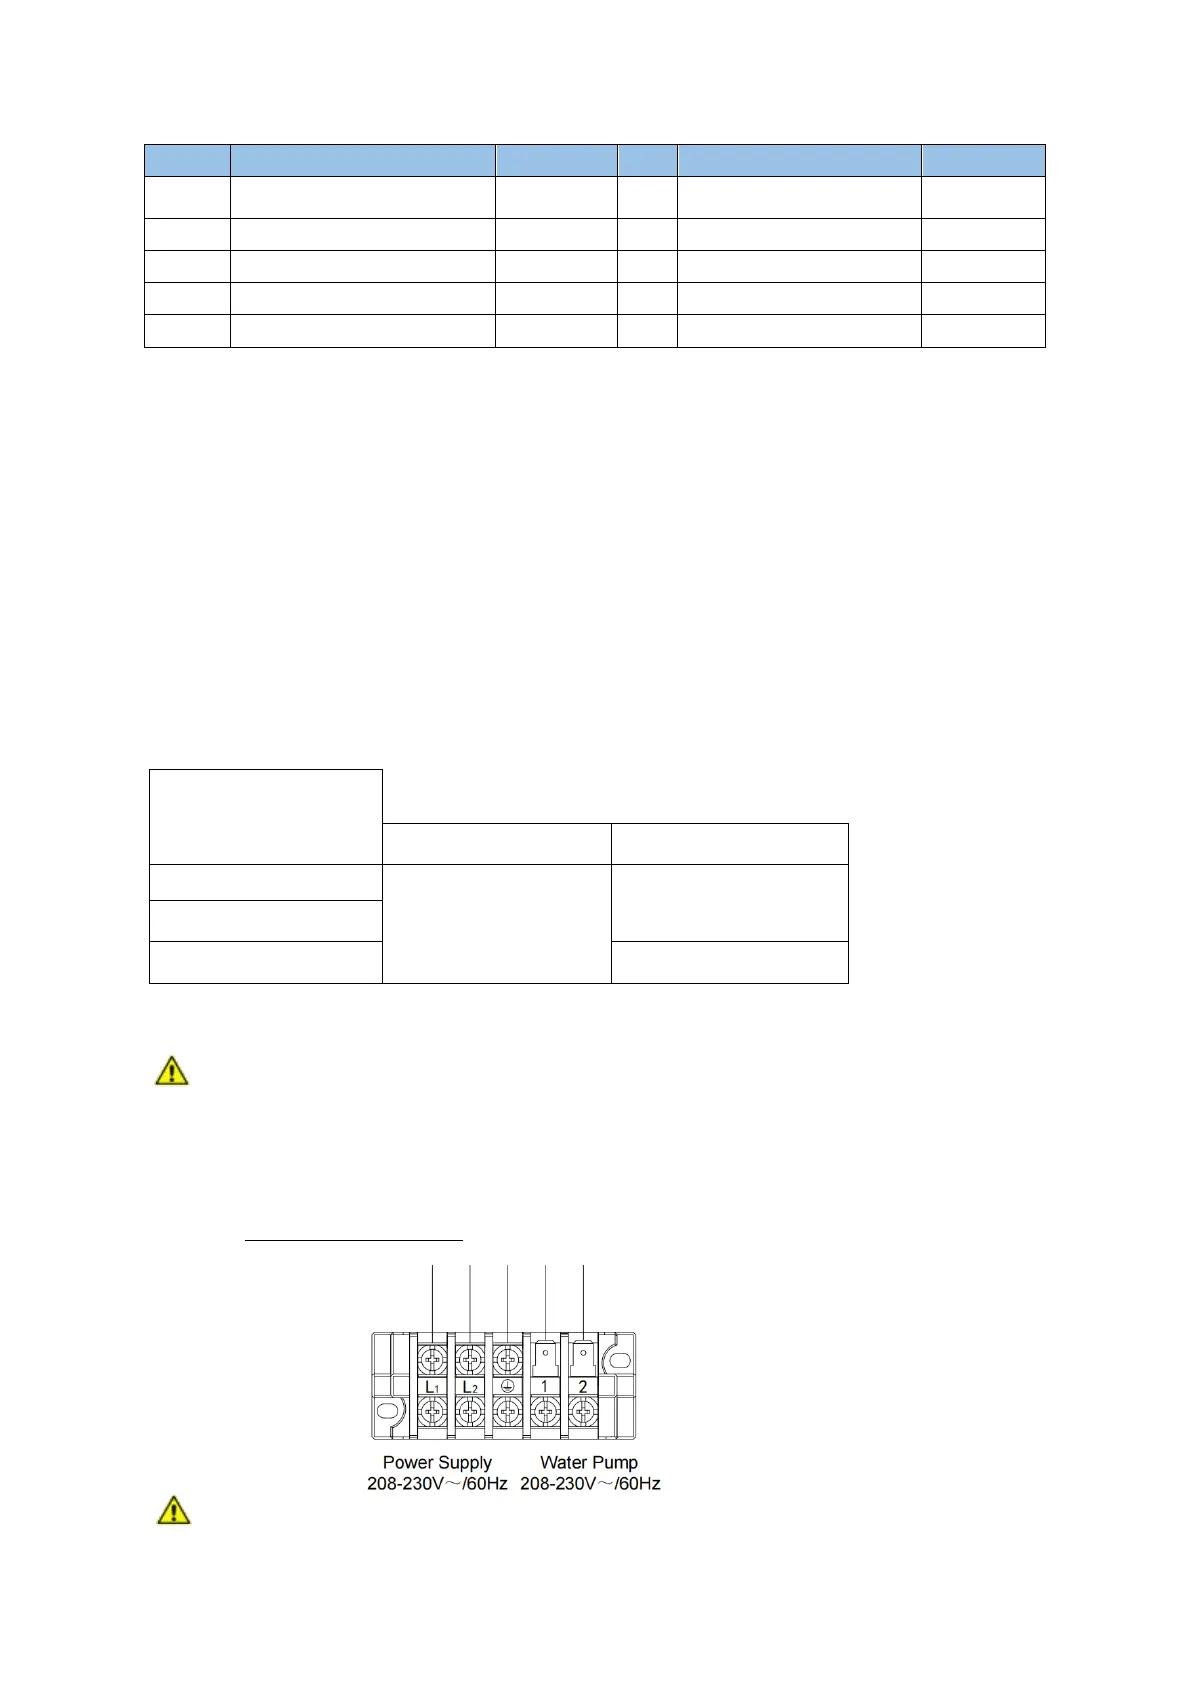
3.3.6 Electrical Connection
WARNING:Power supply of heat pump must be disconnected before any operation.
Please comply with the following instructions to connect heat pump.
Step 1: Detach electrical side panel with a screwdriver to access electrical terminal block.
Step 2: Insert cable into heat pump unit port.
Step 3: Connect power supply cable to terminal block according to the diagram below. In North
America, we do not recommend wiring the pool pump through the heat pump.
3.4. After Installation
WARNING:Please check all the wiring carefully before turning on the heat pump.
2 Y-Type Filter 1 8 Sand Tank Filter 1
4 Circulating Water Pump 1 10 Disinfector 1
5 Hair Collector 1 11 Metering Pump 3
6 Stop Valve 7