EasyManua.ls Logo

Motomaster Classic Series - User Manual

Motomaster Classic Series
16 pages
Print Icon
To Next Page IconTo Next Page
Loading...
headline bars
tabs
continuation tabs
notes
warnings
headline bars
tabs
continuation tabs
notes
warnings
model no. 011-1977-4
IMPORTANT:
Please read this manual carefully before running this battery charger
and save it for reference.
INSTRUCTION
MANUAL
CLASSIC SERIES
Battery Charger
®
/MD
0099002023-00

Questions and Answers

  • K
    Kevin GarciaAug 20, 2025
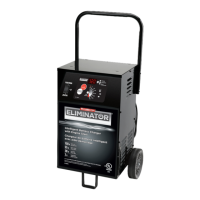
    How to fix Motomaster Classic that will not turn on?
    • B
      Brendan JonesAug 20, 2025
      If your Motomaster Battery Charger will not turn on when properly connected, consider these potential causes: * **AC outlet is dead:** Check for open fuse or circuit breaker supplying AC outlet. * **Poor electrical connection:** Check power cord and extension cord for loose fitting plug. * **Battery is defective:** Have battery checked.
  • R
    reynoldsbrendaAug 22, 2025
    Why does my Motomaster Battery Charger not detect the battery?
    • W
      wjohnsonAug 22, 2025
      If your Motomaster Battery Charger isn't detecting a connected battery, first ensure you connect the battery to the charger before plugging the charger into AC power. Also, check for clean battery posts and rock the clamps back and forth to ensure a solid connection. If the battery voltage is below 1.5 V, which you can check with a voltmeter, the charger won't activate; in this case, consider replacing the battery or boosting it with booster cables from another vehicle to raise the voltage above 1.5 V.
  • J
    Janet BowersAug 28, 2025
    What to do if Charging LED never lit on Motomaster Battery Charger?
    • S
      Steven ReynoldsAug 28, 2025
      If the Charging LED never lights up on your Motomaster Battery Charger, even when the battery is properly connected, it might be because the battery voltage is low. Press the Start/Stop button to start charging.
  • A
    austinandersonAug 31, 2025
    What to do if Motomaster Classic Battery Charger voltage is less than 10V after charging?
    • C
      Cody Williams Jr.Aug 31, 2025
      If the battery voltage remains below 10 V after charging with your Motomaster Battery Charger, it could be due to a defective battery, in which case you should replace it. Alternatively, a load might be connected to the battery, so ensure you are not using the battery while it is charging.
  • J
    Jennifer SinghSep 2, 2025
    How to fix reverse polarity on Motomaster Classic?
    • S
      Shannon HardingSep 2, 2025
      If you encounter a reverse polarity error with your Motomaster Battery Charger, it means the battery clamps are incorrectly connected. Simply reverse the clamp connections.
  • J
    Jason WrightSep 5, 2025
    Why Motomaster Classic Battery Charger doesn't go into Maintenance mode?
    • M
      Mrs. Judy Roberts DDSSep 5, 2025
      If your Motomaster Battery Charger doesn't switch to Maintenance mode after 24 hours, the charge current might be too low; try charging the battery again at a higher rate. Also, make sure there's no load on the battery during charging. Finally, the battery itself might be defective and unable to hold a charge, which would require a replacement.
  • A
    Adam ByrdSep 8, 2025
    What to do if the Motomaster Battery Charger rate exceeds selected rate?
    • J
      Jordan GonzalezSep 8, 2025
      If the actual charge rate exceeds the selected rate on your Motomaster Battery Charger, a load might be connected to the battery. Disconnect any loads and try charging again. If the issue persists, there may be a charger error. In that case, disconnect both the battery and the AC power, then try charging again.
  • V
    vmckeeSep 12, 2025
    Why Motomaster Classic Battery Charger temperature is too high?
    • A
      Alicia MontoyaSep 12, 2025
      If your Motomaster Battery Charger is overheating, ensure it has adequate ventilation and that the ambient temperature isn't too high. The charger will resume charging once it cools down.
  • S
    Stephanie EvansSep 13, 2025
    Why is the Motomaster Classic Battery Charger voltage too high?
    • A
      averysydneySep 13, 2025
      If the battery voltage is too high when using your Motomaster Battery Charger, verify that you are charging a 12 V battery and not a 24 V battery.
  • F
    fisherjorgeNov 16, 2025
    What to do if Motomaster Classic Battery Charger short or no start cycle when cranking engine?
    • D
      Donna HowardNov 16, 2025
      If you experience a short or no start cycle when cranking the engine using the Motomaster Battery Charger, there are several potential causes and solutions: * **Drawing more than the Engine Start Rate:** The crank time varies with the amount of current drawn. If cranking draws more than the Engine Start Rate, crank time may be less than 7 seconds. * **Failure to wait 3 minutes (180 seconds) between cranks:** Allow the battery and charger to cool down by waiting 3 minutes of rest time before the next crank. * **Clamps are not making a good connection:** Check for poor connection at battery and frame. * **AC cord and/or extension cord is loose:** Check power cord and extension cord for loose fitting plug. * **No power at receptacle:** Check for open fuse or circuit breaker supplyi...

Summary

Warranty

Safety

Safety Information

General safety guidelines for using the battery charger and handling batteries.

Personal Safety Instructions

Precautions for personal protection when working with lead-acid batteries.

AC Electrical Connections

Information on connecting the charger to a power outlet and using extension cords.

Using an Extension Cord

Guidelines for using extension cords with the battery charger.

Preparing to Charge

Instructions on charger location and battery preparation before charging.

Assembly

Steps for assembling the battery charger, including handle extension.

Connecting Your Battery

Battery in Vehicle (Negative Grounded)

Instructions for connecting the charger to a negatively grounded battery in a vehicle.

Battery in Vehicle (Positive Grounded)

Instructions for connecting the charger to a positively grounded battery in a vehicle.

Battery Removed from Vehicle

Steps for connecting the charger to a battery that has been removed from the vehicle.

Know Your Charger

Start;Stop Button

Description of the button used to start and stop the charging process.

Rate Selection Button

Explanation of the button used to select charging rates (6A, 40A, 200A).

LED Indicators

Meaning of the different LED lights on the charger indicating status.

Operation

Charging Your Battery

Step-by-step guide on how to charge a battery using the charger.

Battery Charging Times

Table showing estimated charging times for different battery sizes and rates.

Aborted Charge

What happens when charging aborts and how to reset the charger.

Desulfation Mode

Explanation of the special mode for desulfating sulfated batteries.

Completion of Charge

How to identify when charging is complete and the charger enters maintain mode.

Maintain Mode (Float Mode Monitoring)

How the charger maintains a full charge and monitors battery status.

Maintaining a Battery

Information on safely charging and maintaining batteries over extended periods.

Power-Up Auto Start

How the charger automatically starts charging after power-up if no button is pressed.

Using the Engine Start Feature

Instructions and safety precautions for jump-starting a vehicle.

Engine Starting Notes

Details on the different states and timing during the engine start sequence.

Maintenance

Maintenance Procedures

Steps for cleaning clamps, charger case, and proper storage to maintain the charger.

Troubleshooting

Charger Not Turning On

Solutions for when the charger does not power on when connected.

Charging LED Not Lit

Troubleshooting steps when the battery is connected but the charging LED is off.

Engine Start Cycle Issues

Diagnosing problems with the engine start function and cranking.

Red LED Blinking

Causes and solutions when the red LED indicator blinks.

Technical Specifications

Motomaster Classic Series Specifications

General IconGeneral
Voltage12V
Input Voltage120V AC
Output Voltage12V DC
TypeAutomatic
Output Current2A
Battery Compatibility12V Lead-Acid Batteries (AGM, Gel)
Charging ModesTrickle charge
Safety FeaturesReverse Polarity Protection, Overcharge Protection, Short Circuit Protection

Related product manuals