7 Operation
40 10014218/00 EN
A manual reset is performed directly on the device.
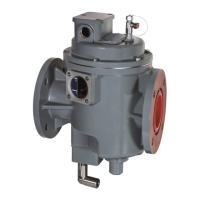
1. Loosen the 4screws (hex-wrench 4mm) on the cover of the test button
and remove the cover.
2. NOTICE! Damage to the reset screw. Do not use any tools on the reset
screw. Screw the reset screw in completely by hand.
ð The float will be forced upward and thus cause the main valve to
open.
3. Vent the Buchholz relay (if installed) in accordance with the operating in-
structions provided.
4. To vent the shutter valve, remove the protective cap from the drain valve
(wrench size17).
5. Turn the lever of the drain valve counterclockwise to vent the device.
6. As soon as insulating fluid begins to escape, turn the lever of the drain
valve clockwise to close the drain valve.
7. Position the protective cap on the drain valve, screw on hand-tight and
then tighten with maximum one half turn (wrench size17).
8. Pull the test button down 3 to 5times to completely fill the valve with oil.
ð The float moves up due to the oil surrounding it. This upward motion
also pulls the test button upwards automatically.
9. If you see air bubbles are rising in the inspection window, repeat steps3
through 7 until no more air bubbles rise.
10. NOTICE! Damage to the reset screw. Do not use any tools on the reset
screw. As soon as the device is filled with oil, screw the reset screw out
completely by hand to reestablish normal operating conditions.
7.2.2 Resetting via the BPR (ball valve) bypass (optional)
Resetting via the BPR bypass is performed from the ground.
 Loading...