mrcool.com 60
60
MAINTENANCE
4
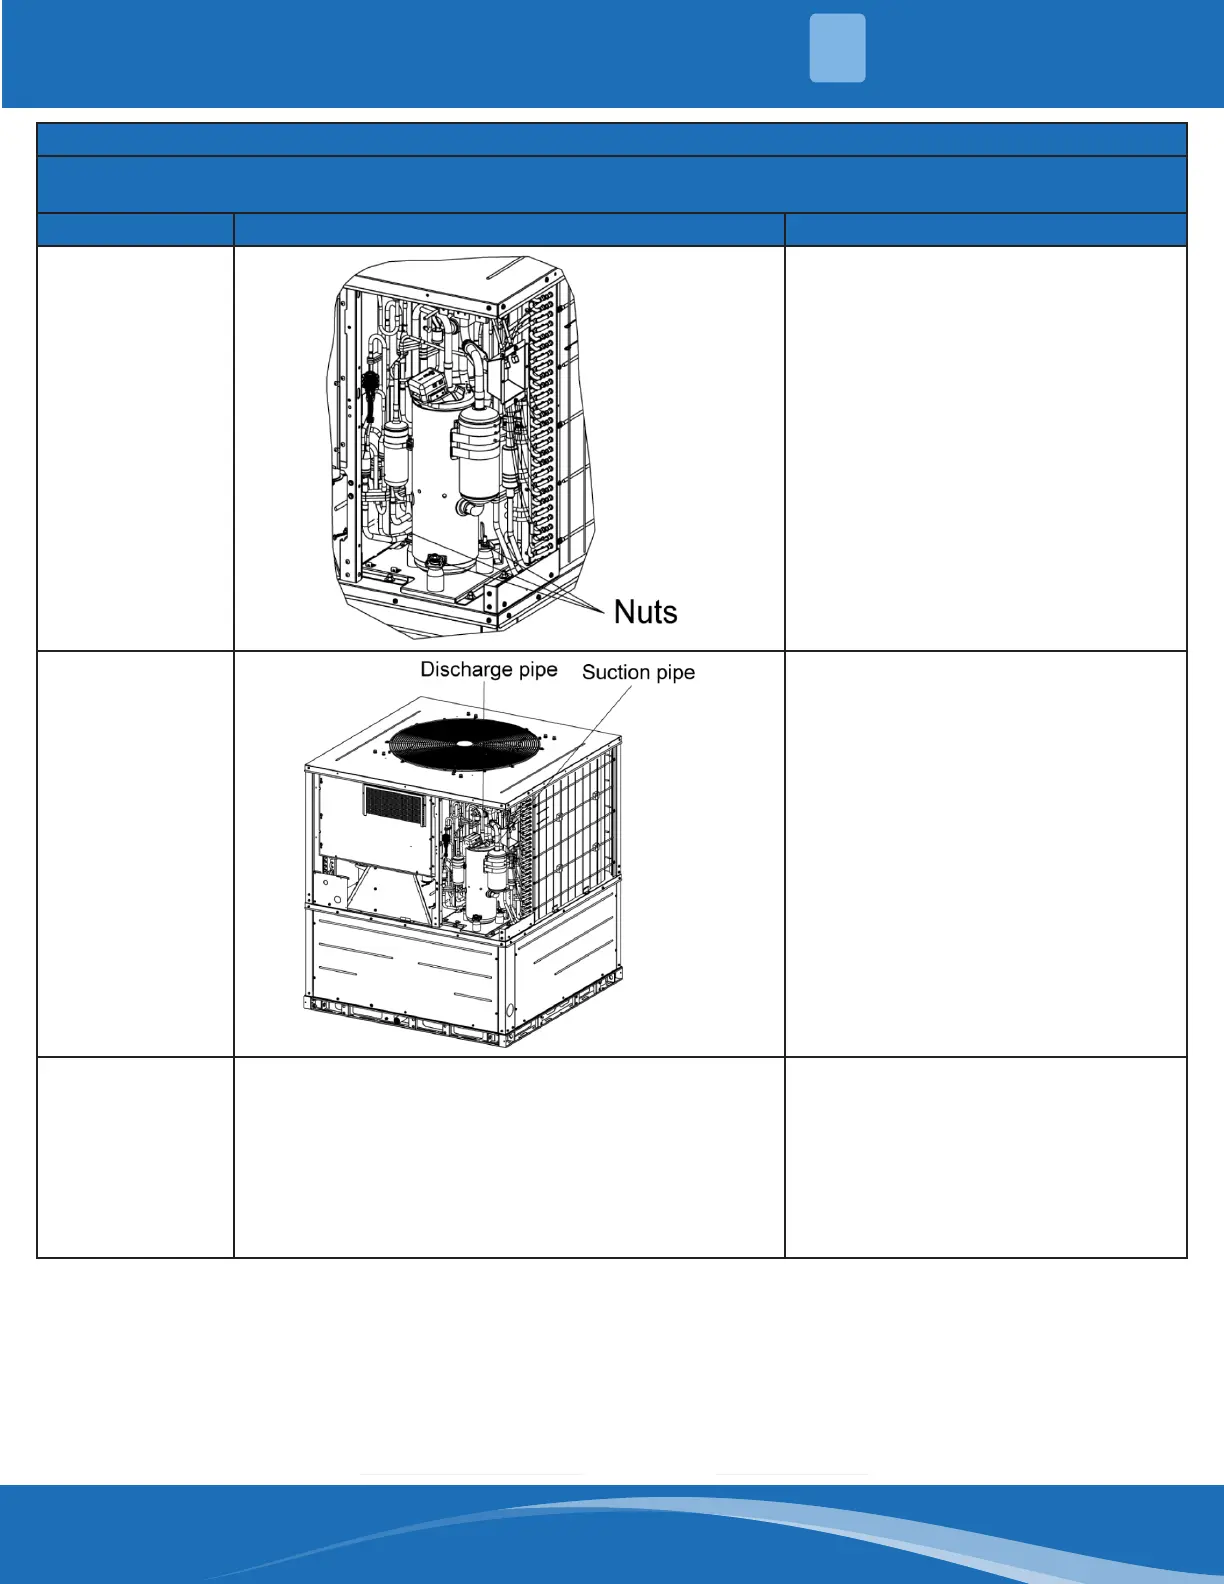
Assembly & Disassembly of Compressor
Note: Ensure there isn't any refrigerant in piping system and the power supply is cut o before
removing the compressor.
Step Illustration Handling Instruction
7. Install a new
compressor on
the chassis.
• Put the new compressor on the
chassis in the same direction as
during the removal. Then, tighten
the xing nut on the compressor
base with a wrench.
Note: Keep compressor level and
vertical on the base. Never incline or
invert it.
8. Connect
the suction
and discharge
pipes of the
compressor with
system pipes.
• Heat the connected pipes
indicated by arrows then weld
them together with the unit pipes.
Note: Pay attention to surroundings
to avoid burns.
9. Reconnect
power cord of
compressor.
• Reconnect the power cord on
compressor according to the same
procedure of disconnecting the
power cord. The line connection must
match the schematic diagram.
Note: The connection box of the
compressor must be recovered to resist
water. No cable should have contact with
the pipe or moving parts.
 Loading...