Removing the First Stage Regulator Cap
1
. Using an adjustable or 1” open-end wrench, loosen
the first stage regulator cap by turning counter-clock-
w
ise.
2. Unthread the cap fully from the first stage regulator.
3. Care should be taken to prevent damage to the
exposed first stage regulator threads.
4. Remove and discard the o-ring from the first stage
r
egulator housing. Be careful not to damage the seal-
ing surfaces on the regulator body.
Installing the New First Stage Regulator Cap
1. To protect the o-ring, wrap paper or tape around the
regulator body external threads.
2. Apply Christo-Lube Lubricant to the new o-ring (P/N
630493) and install it on the regulator body. Remove
the paper or tape.
3. Thread the new first stage regulator cap on the first
stage regulator. Using a torque wrench, torque to
180+/-10 in. lbs.
Installing the Relief Valve
1. To protect the o-ring, wrap paper or tape around the
relief valve threads.
2. Apply Christo-Lube Lubricant to the new o-ring (P/N
635037). Install the o-ring on the relief valve. Remove
the paper or tape from the relief valve.
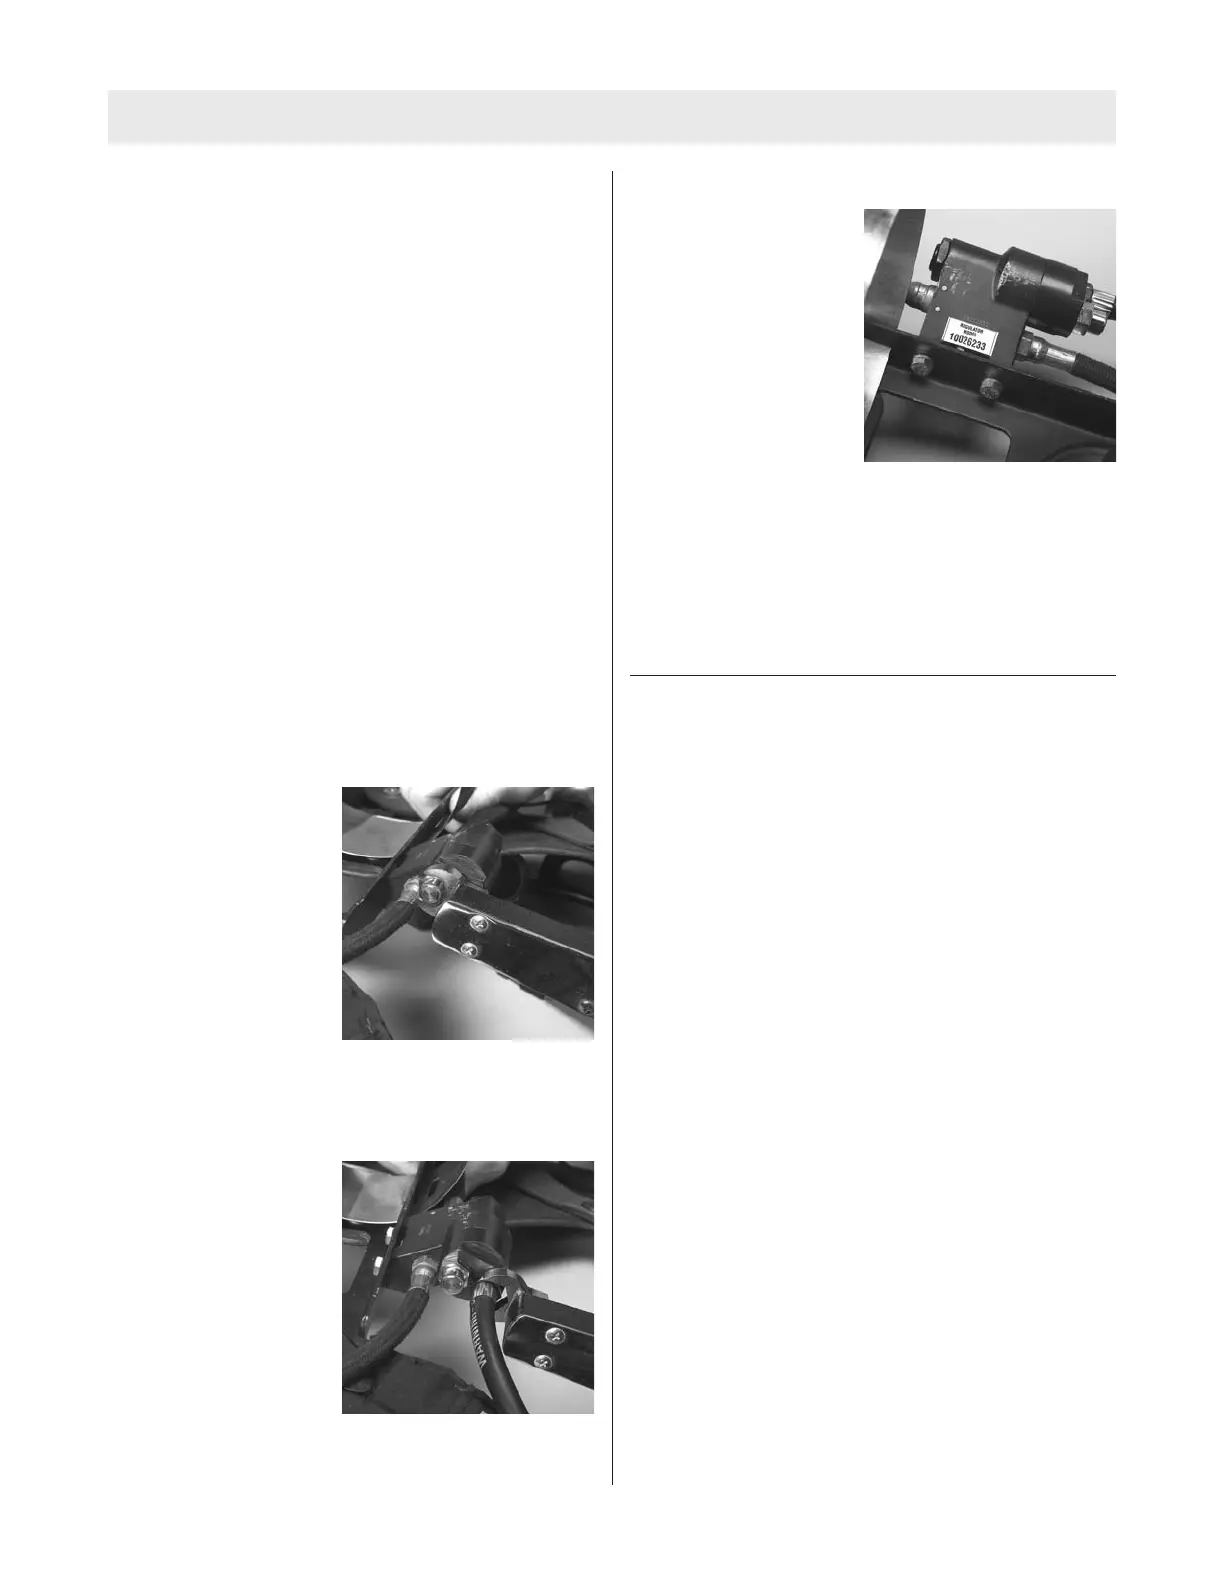
3. Thread the relief valve
into the first stage reg-
ulator cap clockwise by
hand. Torque to 90+/-
10 in. lbs. with a 5/8”
socket.
Installing the New First Stage Intermediate Hose
1. Insert the new first stage intermediate hose through
the entire left shoulder strap, starting at the end with
the friction buckle.
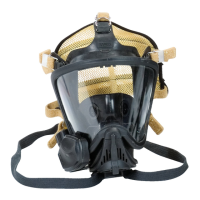
2. Thread the first stage
intermediate hose into
the first stage regulator
cap clockwise and
hand-tighten.
3. Using a torque wrench, torque to 125+/- 5 in. lbs.
Installation of First Stage Regulator Model Number
L
abel
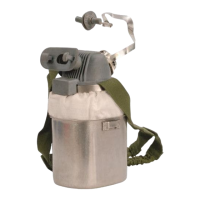
After upgrading the first
s
tage regulator the appro-
priate model numbers
must be applied to the first
stage regulator housing.
Included in the upgrade kit
a
re self-adhesive labels
that must be used after
completing the upgrade.
Identify the first stage reg-
ulator model number label
from set of three first stage
regulator labels. The table below will help identify the
proper model number label.
The first stage regulator assembly model number should
be placed on the side of the first stage regulator over the
existing laser engraved model number. Clean the housing
prior to installing the new label. Discard the remaining
unused labels.
HIGH PRESSURE GAUGE HOSE UPGRADE
For Air Masks WITHOUT Shoulder Mounted Quick-Fill
System
Air masks that do not have a shoulder mounted quick-fill
may reuse the same hose on the FireHawk M7 Air Mask.
A new model number ID tag must be installed on the high
pressure hose.
1. Install model number tag on high pressure hose where
the hose joins the first stage regulator.
2. Wrap metal ID Tag (P/N 10083880) around high pres-
sure hose.
3. Fold metal tab over to secure ID tag to high pressure
hose.
For Air Masks WITH Shoulder Mounted Quick-Fill
System
Air masks with shoulder mounted quickfill must replace
the high pressure hose with a new shorter hose. This new
hose will come with a new model number ID tag installed.
TAL 808 (L) Rev. 1 - 10090073
12
UPGRADE INSTRUCTIONS


 To Next Page