Installing a New Hose on the PR14 First Stage
R
egulator
R
emoving the PR-14 First Stage Regulator from the
Carrier
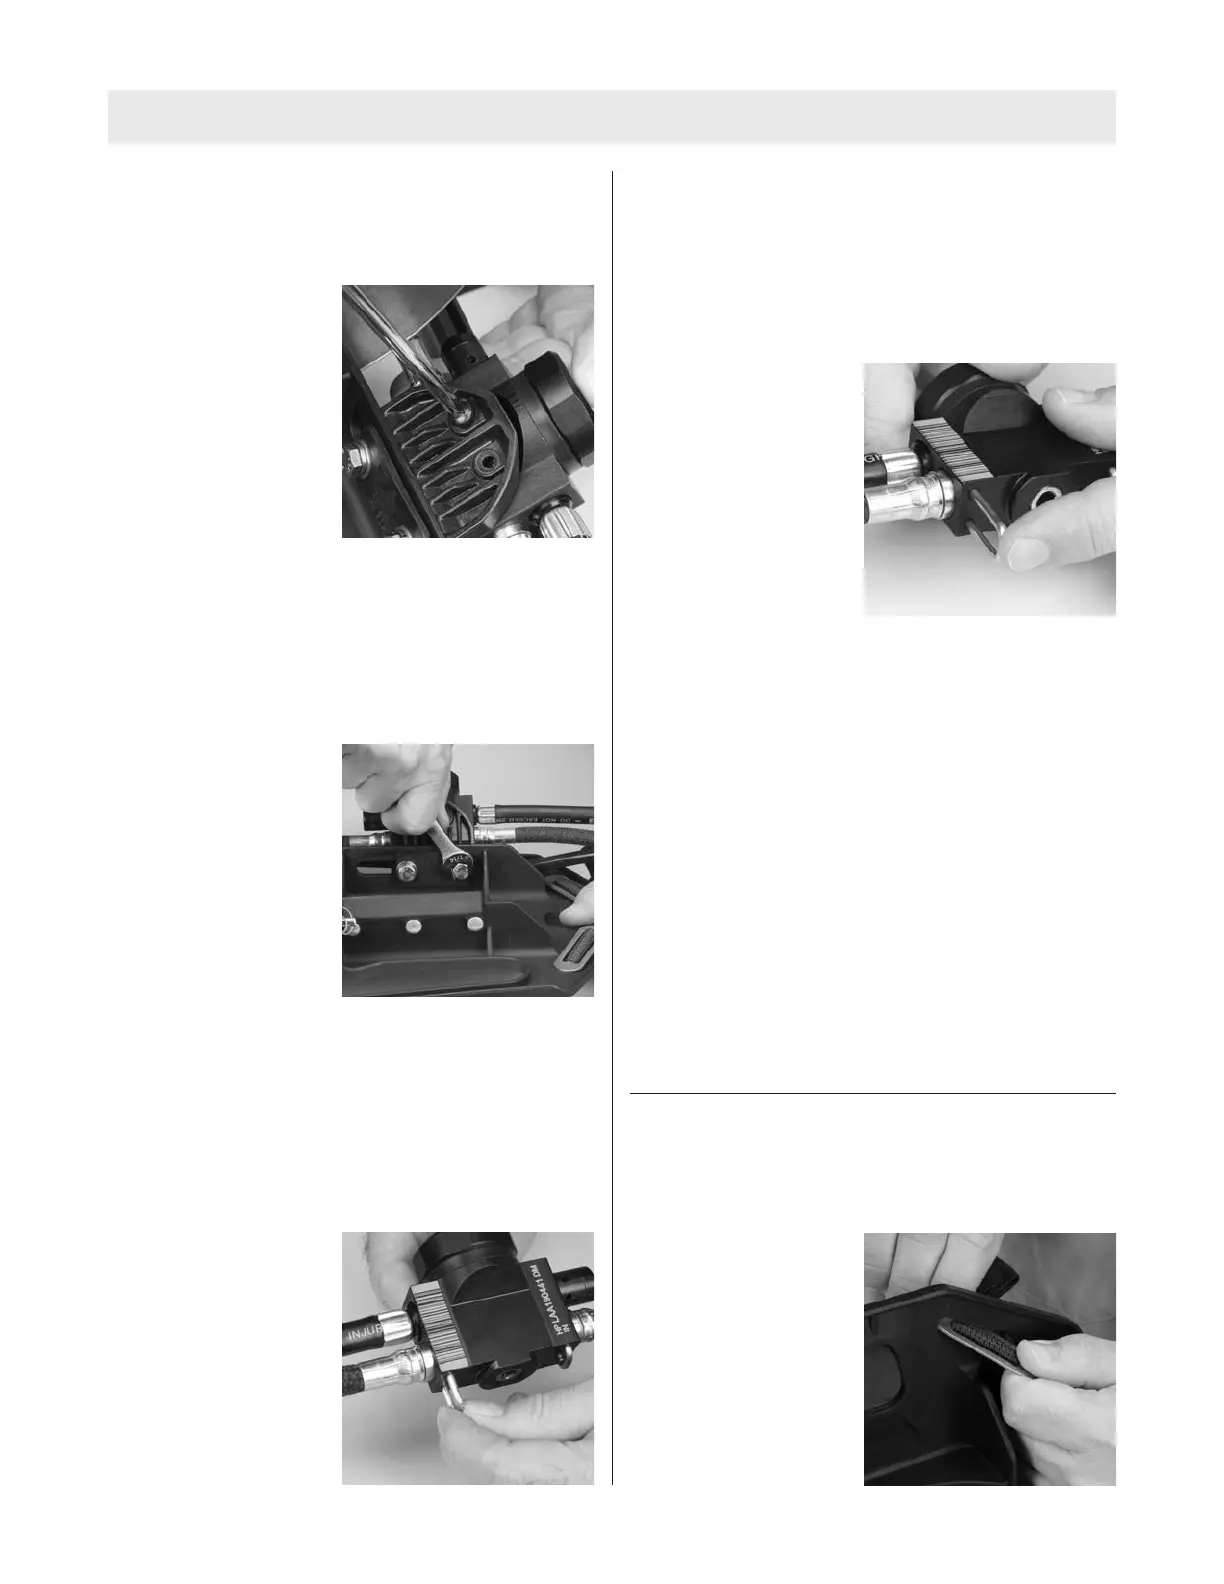
1. Use a screwdriver to
remove the screws.
2. Remove the regulator from the mounting bracket.
3. Remove residual thread-locking material from the
screws.
4. Remove residual thread-locking material from the
regulator body threads.
Removing the Mounting Bracket
1. Use a 7/16” wrench to
remove the mounting
bracket bolts.
2. Remove the regulator from the mounting bracket.
3. Remove the mounting bracket.
4. Remove the plastic slider.
5. Remove residual thread-locking material from the bolts.
6. Remove residual thread-locking material from the
mounting bracket threads.
Removing the High Pressure Gauge Hose
1. Remove the U-clip.
2. Pull the hose firmly to remove it from the regulator body.
3
. Discard the high pressure hose.
I
nstalling the new High Pressure Gauge Hose
1. Install the high pressure gauge hose into the high
pressure gauge port.
Note: The high pressure gauge port is not labeled.
2. Install U-clips to secure
the high-pressure and
intermediate pressure
fittings.
Note: The M7 Control Module and M7 Power module
must be installed before the first stage regulator can be
mounted to the Carrier.
Installing a a New Hose on the Old Style First Stage
Regulator
Removing the high pressure gauge hose from the first
stage regulator
1. Use a 9/16” wrench to unscrew the hose from the
regulator body.
2. Be careful not to damage the o-ring seat area on the
regulator body.
3. Discard the high pressure hose.
Installing the new high pressure gauge hose on the
first stage regulator
1. Insert new high pressure hose (P/N 10083879) into
first stage regulator body.
2. Tighten hose connection to a torque of 100-140 in.lbs.
INSTALLING SOFT GOODS ON THE CARRIER AND
HARNESS ASSEMBLY
Installing the Shoulder Straps
1. Install the shoulder
strap by angling the tri-
bar through the slot.
TAL 808 (L) Rev. 1 - 10090073
13
UPGRADE INSTRUCTIONS


 To Next Page