10. Attach the cable, shielding exposed, to the grounding point.
11. Replace the display module. Push firmly on the board stack where indicated.
12. Replace the S5000 cover by turning clockwise. Be sure to align threads to avoid cross-threading.
Figure 27 Connecting Power and Grounding Cable
NOTICE
Ensure that the electronics assembly is fully engaged in the mounting holes. If not fully seated, the touch interface
performance can be negatively affected.
Care must be taken to ensure the S5000 inside glass surface glass is free of smudges/dirt and grease. Dirt and grease can
interfere with the touch interface of the display.
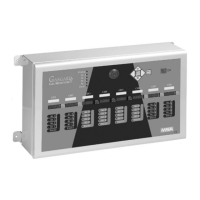
S5000 Installation Outline Drawings
Table 7 Installation Outline Drawings
Model Document
No.
S5000 324102
3.6.6 Relay Electrical and Power Connections
Relay Board Stack Overview
The S5000 can be purchased with three relays. Two of the relays can be configured for either de-energized (default) or
energized and latching or non-latching. The third relay is a dedicated fault relay.
All electrical connections to internal relays can be made directly on the PC board. The board is labeled for Normally Open(NO)
and Normally Closed(NC) de-energized state.
31
US 3 Installation