19
Installation
US
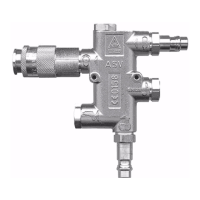
SM5000 Sampling Module - DC Pump Model
e) Route a cable (not supplied) through the electrical entry of the Pump Sampling Module.
f) Connect the conductors to the wiring terminal strip noting the identity of the wires (see Fig. 4 and
Tab. 4).
g) Replace the top cover and tighten with the two screws.
h) Replace lid and tighten in place.
WARNING!
Do not allow lid to remain off of the explosion-proof Pump Sampling Module. Flammable or combustible gas
in the atmosphere may ignite a spark; that, in turn, may cause an explosion and result in injury or death.
(4) Wire the other end of the wiring cable to your read-out instrument and power supply, ensuring the cable
from the Pump Sampling Module is wired to the proper connections on the instrument. Consult the
instrument instruction manual for more wiring details.
Tab. 4 Wiring identification
2.7 Initial Start-Up
Before starting up the Pump Sampling Module:
(1) Check wiring connections (see Fig. 5 and Tab. 4).
(2) Ensure that power supplied to the controlling instrument is the proper voltage with sufficient current
capacity to operate the instrument. Refer to the gas monitor instruction manual for proper power
set-up.
(3) Apply power to the instrument through a remote circuit breaker.
CAUTION!
If relays in the controlling instrument are wired to external devices (e.g. horns, exhaust fans, and fire
suppression systems), these devices may activate while adjustments are performed during the following
procedures. Consult equipment instruction manual for further details. All instruments must be returned to
normal operation when Pump Sampling Module and gas monitor adjustments are completed.
(4) Ensure the exhaust is not restricted.
(5) The front panel low flow indication, red LED, should NOT be ON.
NOTE: If front panel low flow indication is ON, see chapter 4.3 "Troubleshooting Guidelines".
Position Description
1 Normally closed contact of the flow loss relay
2 Normally open contact of the flow loss relay
3 Common position of the flow loss relay
4 Ground or negative of the power supply
5 Positive or supply position of the power supply